Categories
Cryptocurrencies

MyStar wallet Review: How Safe Is This Multi-Blockchain Crypto Wallet?

MyStar Wallet is a mobile phone-based crypto vault designed and developed by Stargram Global, a Korean IT company specializing in Blockchain and entertainment products. On the MyStarWallet website, the crypto vault app is described as a “Multipurpose asset management (and) one-stop platform” for all your cryptocurrency needs. The site further refers to the wallet as a digital asset management tool focused on helping you store, send/receive, and secure your cryptocurrencies.

Though MyStarWallet is still relatively new to the crypto world, it stacks a host of operational and security features that set it apart from the competition. For instance, it is built on the Ethereum Network, which means that it provides users with access to the decentralized network and such amenities as the Dapp browser and the app builder tools.

In this MyStarWallet review, we will be vetting these features by looking at its commitment to safety, outlining the setup by step guide on using the wallet app, and telling you its pros and cons.

MyStar Wallet Key features:

Mobile app: MyStarWallet is a mobile-based app vault. It can be downloaded from either the Google Play Store or Apple App Store.

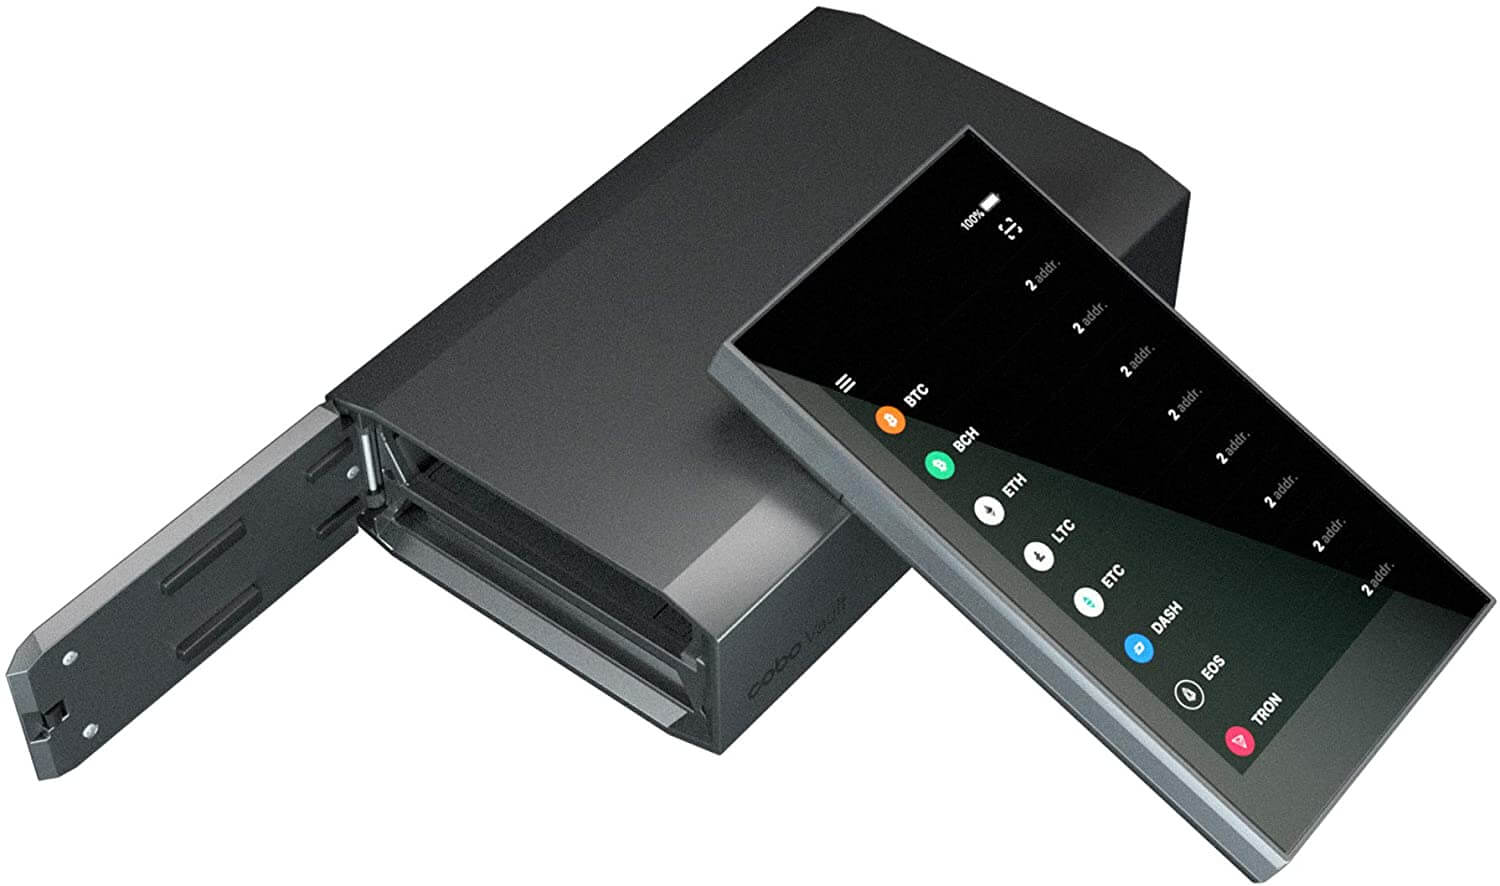
Multi-asset: My Start Wallet is also a multi-asset app vault. It hosts a significant number of cryptocurrencies and tokens, and that there is no limit to the number of private keys that you can store within the wallet.

Inbuilt exchange: MyStarwallet features an inbuilt crypto exchange where users can buy, sell, or exchange cryptocurrencies and tokens. The exchange is relatively secure, and transaction processing reliably fast.

Blockchain explorer: MyStarwallet also features the blockchain explorer that lets you keep tabs on the Ethereum network. It helps you monitor network events, news, important announcements like upcoming ICOs, and political and economic events or changes that may impact the crypto world.

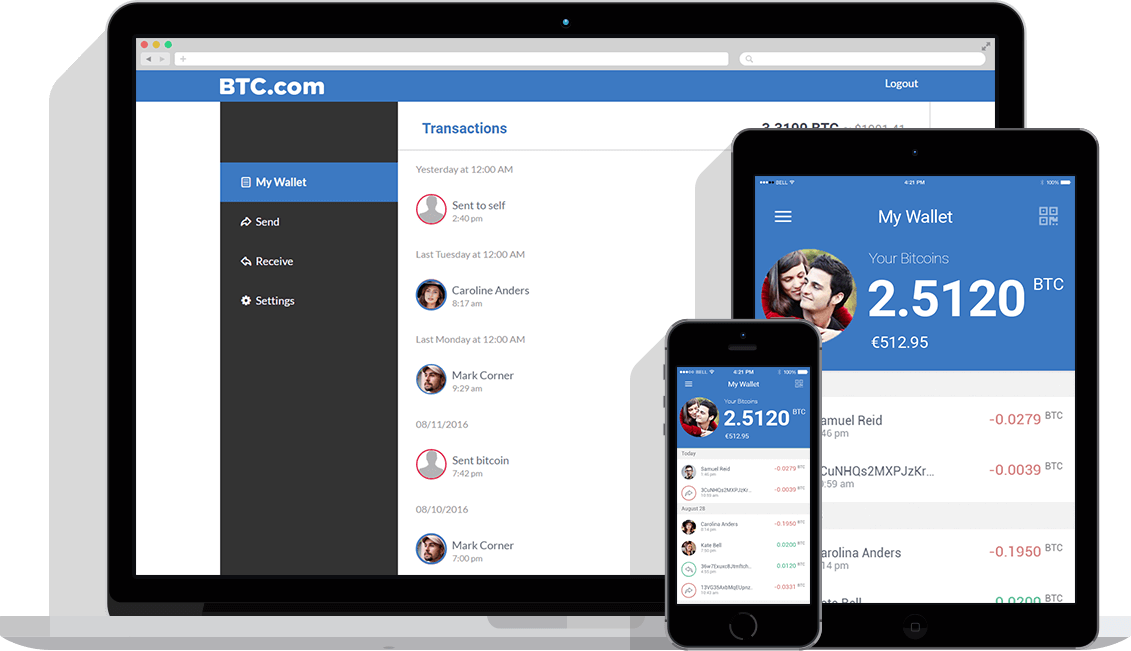
Portfolio Tracker: Within the MyStarwallet app’s dashboard is the balance and transaction history tabs that help monitor your crypto activity. For instance, the history tab outlines your crypto inflows and outflows, and these go a long way in helping you create a crypto budget.

Address book: MyStarwallet also features an address book that integrates your phone’s contact list that simplifies how you send and receive Crypto. This effectively means that you can simply send Crypto to a contact address on your phone regardless of whether they have Mystarwallet installed or not.

Send Crypto via messenger: MyStar wallet also features a proprietary messaging platform, the Startalk Messenger platform that you can use to “Instantly send money while you talk.” This features messaging and video chatting and the remittance functionality that allows you to transfer cryptocurrencies and tokens via StarTalk.

Dapp browser: MyStarWallet integrates a Dapp browser, a decentralized browser that allows you to surf the web anonymously.

Create Tokens: In addition to the Dapp browser, MyStarWallet users now have access to the app builder tools that make it possible for them to create and successfully launch both decentralized token and ERC-20 tokens.

Mystarwallet security features

Password: Like most other mobile phone-based crypto wallet apps, MyStarWallet is password secured. The password deters unauthorized access to your private keys and serves as the crypto app encryption tool.

Recovery seed: When creating a user account on your MyStarWallet app, you will be presented with a 12-word backup seed. You will need this seed to recover lost private keys or restore the MyStarWallet on another device.

Two-factor authentication: Outbound transfers from the MyStarWallet app must be subjected to two-factor authentication. You have the option of adding your phone number when creating a user account for MyStarWallet that you can use to authorize outbound transfers or use the Authenticator apps.

How to set and activate the MyStar wallet

Step 1: Start by downloading the MystartWallet crypto app for your Android or iOS smartphone.

Step 2: Install and upon launching the app, click on the ‘Create a new wallet” icon

Step 3: Create a password for the wallet

Step 4: You will now receive the 12-word backup/recovery seed for the crypto wallet. Write it down on a piece of paper and keep it safe offline.

Step 5: Your wallet is now active and ready for use

How to add/receive Crypto into your MyStar wallet 

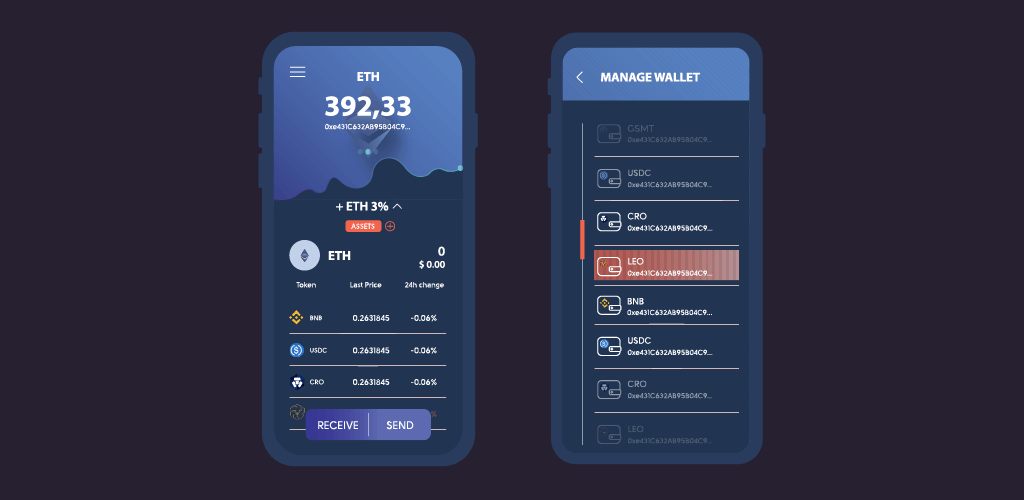
Step 1: Log in to your MyStarWallet app, and on the user dashboard, click on the ‘Receive’ tab.

Step 2: On the deposit window that pops up, copy your wallet address or the QR Code and forward it to the party sending you cryptos

Step 3: Wait for the deposit to reflect in your wallet.

How to send Crypto from your MyStar wallet

Step 1: Start by logging into the MyStarWallet app and clicking the “Send” icon on the user dashboard.

Step 2: If you have more than one types of cryptos stored in here, select the crypto coin you wish to send

Step 3: On the transfer window, key in the recipient’s wallet address and the number of coins/tokens you want to transfer

Step 4: Confirm the accuracy of the transaction details and authorize the transfer.

MyStar wallet ease of use

MyStarWallet is highly intuitive and very beginner-friendly. The processes of creating a user account are simple and quite straightforward. The user interface is very clean, with just a few carefully placed tabs that ensure you don’t need any expert help to teach you how to interact with the app. The processes of sending and receiving cryptos/tokens in and out of the wallet are also quite easy and straightforward.

MyStar wallet supported currencies and countries

MyStarWalet is eth-based and will only support Ethereum and such eth-network based tokens as the ERC-20 tokens.

MyStar wallet cost and fees

Downloading MyStar wallet, installing it on your phone, and storing cryptos and tokens therein is free. However, you will have to part with variable transaction processing fees (GAS) every time you wish to send cryptocurrencies and tokens from one wallet to another.

MyStar wallet customer support

You can always consult the MyStarWallet Blog or Wallet Guide sections of the wallet’s website to learn how to interact with the wallet app. This website also features an extensive range of video tutorials that outline everything related to MyStar, including the different troubleshooting techniques.

You may also want to reach out to the MyStarWallet customer support team by raising a support ticket, emailing them, or direct messaging them on social media platforms such as Facebook, Instagram, and Twitter.

What are the pros and cons of using MyStarWallet?

Pros:

  • It supports a wide range of eth-based cryptos and tokens
  • It is highly intuitive ad beginner-friendly
  • MyStarwallet is feature-rich and even integrates an inbuilt exchange
  • It makes it possible for users to send cryptos to a phone number or via Startalk messenger
  • It features a Dapp browser and Dapp builder that lets you create and launch ERC-20 tokens

Cons:

  • It only hosts basic security features
  • It will only support Eth-cryptos and tokens
  • It is not a regulated wallet

Comparing MyStar wallet with other multipurpose crypto wallets

MyStarWallet vs. eToro wallet 

Mystar and eToro are both multipurpose and multi-feature wallets that host a wide range of operational tools. And some of the common features hosted on both MyStar and eToro wallets include an inbuilt exchange and portfolio tracker. Both wallets are also beginner-friendly and feature highly intuitive user interfaces.

However, while eToro is a multi-blockchain wallet hosting cryptocurrencies built using different blockchains, MyStarWallet will only host eth-based altcoins. Further, eToro has a friendlier and highly responsive customer support team compared MyStarWallet. MyStarWallet nevertheless carries the day with the number of supported altcoins that include all ERC-20 tokens against eToro that will only support less than 20 popular cryptos. Moreover, they have made it possible for you to send Crypto to phone numbers and through messenger.

Verdict: Is MyStar wallet safe?

Well, the mobile crypto app has embraced several effective security and privacy measures around the vault aimed at keeping your private keys private and highly secure. These include securing the app with a password and enabling two-factor authentication, as well as providing you with a backup and recovery seed. However, we must mention that the online nature of the wallet plus the fact that it stores your keys in your phone, not cold storage, exposes it to such threats as hacking and malicious viruses.

Categories
Cryptocurrencies

USDX Wallet review 2020: How Safe is The USDX Wallet?

USDX wallet is a multi-coin storage vault and the official wallet for the USDX stable coin and the Lighthouse (LHT) Coin. It was developed by the Lighthouse Blockchain Technology GmbH company and introduced to the crypto world in 2017. According to the wallet developers, USDX is specially designed and dedicated to providing users with a platform that they could use to secure and process crypto payments at “lightning-fast” speeds while maintaining zero fees. They add that the innovativeness level that went into designing and coming up with the USDX wallet is aimed at transpassing the current restrictions (banks, borders, and fees) set by both traditional and digital payments platforms.

But how does the USDX wallet hope to solve this? How does it work? We answer these questions and tell you everything else you need to know about the USDX wallet in this user review. We will especially look at its key features, the security features in place, and outline the step-by-step guide on how to interact with the wallet.

USDX Wallet key features:

Mobile wallet: USDX wallet is purely a mobile app available for the Android and iOS operating systems.

Fee-free transactions: One of the USDX wallet’s biggest selling points is the fee-free transaction processing approach. The wallet doesn’t impose the transaction fee when you send USDX Stablecoins or LHT tokens from your USDX wallet to other wallets or exchanges.

Lightning-fast transaction processing: The ultrafast transaction processing and confirmation for both transfers to other wallets and cash withdrawals are another selling point for the wallet. According to the USDX wallet website, their servers can process 100,000+ transactions per second. This is more than the combined transaction processing speeds for Visa and MasterCard.

In-built exchange: USDX wallet integrates Alterdice Exchange that provides you with a platform for selling, buying, and exchanging cryptos and tokens without leaving USDX. The transaction processing speeds are fast and maintain highly competitive fees.

Portfolio tracker: On the USDX wallet’s user interface are the transaction history and balance buttons that you can use to view your recent crypto inflows and outflows as well as the value of your digital assets in real-time.

Charting tools: The third party wallet integrated into the USDX wallet – Alterdice Exchange – features market analysis and charting tools. These come in handy in tracking the value of different crypto coins and determining the best buy and sell points.

Address book: USDX wallet’s versatility makes it possible for users to send altcoins to phone numbers, QR codes, and wallet addresses. And by integrating your phone’s contact list in the featured address book simplifies the process of sending funds to a phone number while avoiding such threats as pastejacking.

USDX Wallet security features:

Password + Biometrics: The USDX wallet is secured with a PIN code that you create during app installation and user account creation. You are also free to boost this app security feature further by adding such biometrics as the Face or Fingerprint I.D on compatible devices.

Two-factor authentication: All outbound transfers to other wallets or exchanges must be subjected to two-factor authentication. You will need a phone number, email address, the Google Authenticator app to receive the transaction authorization codes.

Hierarchically deterministic: USDX wallet uses the hierarchically deterministic functionality to auto-generates a new wallet address every time you initiate a crypto transaction, effectively masking your real wallet address.

Enterprise-grade encryption: Your USDX wallet embraces enterprise-grade technologies in encrypting your user data. All of the wallet communications with the Lighthouse Company servers and all other third systems, especially the third party exchange and wallets, are also highly encrypted.

How to activate/setup the USDX Wallet

Step 1: Download the USDX wallet compatible with your device on either Google Play Store or Apple App Store

Step 2: Install and launch the wallet. Since you are new to USDX, choose to create a new wallet.

Step 3: Choose a unique name for your USDX wallet

Step 4: Create a strong and unique multicharacter password (with a minimum of 10 characters) for the wallet.

Step 5: Create and confirm a 4-digit PIN code for securing the app

Step 6:  Enter and verify your phone number using the confirmation code received

Step 7: Your account is now active and ready to use

Step 8: Log in to your new wallet and use the settings tab to personalize it by activating two-factor authentication and backing up your private keys

How to add/ receive Crypto into USDX Wallet:

Step 1: Log in to your USDX wallet and hit “Receive” on the user dashboard

Step 2: The wallet will display the wallet address and its QR code. Copy either and forward it to the person sending you crypto

Step 3: Alternatively, hit the “Buy” button to buy from Alterdice exchange

Step 4: Follow the prompts to make your purchase.

How to send crypto from USDX Wallet:

Step 1: Log in to your USDX wallet and hit the “Send” icon on the user dashboard.

Step 2: If you have multiple coins hosted therein, select the cryptocurrency you want to send

Step 3: On the transfer window that pops up, enter the receiving wallet address or choose to scan their QR code

Step 4: Enter the amounts you wish to send

Step 5: Check the accuracy of these transaction details and confirm the transfer

USDX Wallet ease of use:

USDX wallet incorporates several highly effective functional features that make it highly intuitive and beginner-friendly. It, for instance, integrates an inbuilt exchange that eases the process of buying and exchanging cryptos. But more importantly, it maintains a clean and easily navigable user interface.

It will also take you less than two minutes to activate the wallet and create a user account. Similarly, the processes of sending and receiving cryptocurrencies in and out of the wallet are easy and straightforward.

USDX Wallet supported currencies:

USDX Wallet currently supports two cryptocurrencies; the USDX stable coin and the LHT coin. However, you can exchange either of these with virtually any other crypto or token, as well as a few fiat currencies on the integrated Alterdice exchange.

USDX Wallet cost and fees:

Downloading and depositing funds into the wallet is free. Crypto transfers involving the USDX stable coin are also free.

USDX Wallet customer support:

Lighthouse Blockchain Technology maintains a responsive customer support team for the USDX wallet. You can start by consulting the elaborate FAQ page for troubleshooting tips and guides on how to interact with the different wallet features.

However, personalized queries should be directed to the automated Telegram assistant bots or the wallet developers on the wallet’s official social media pages.

What are the pros and cons of using USDX Wallet?

Pros:

  • Sending USDX coins from the wallet is free.
  • Translation processing on USDX Wallet is lightning fast.
  • It embraces highly effective security measures like 2FA.
  • Creating an account and activating the user account is easy and straightforward.

Cons:

  • It supports a too limited number of coins.
  • USDX doesn’t support anonymous user registration.
  • Only USDX coins are exempt from transaction processing fees.

Comparing USDX Wallet with other crypto wallets

USDX Wallet vs. eToro wallet

USDX and eToro wallets are both highly advanced cryptocurrency wallets. Some of the common features between the two include the integration of a crypto exchange and some highly advanced security features like two-factor authentication and enterprise-grade encryption. More importantly, they both maintain highly responsive customer support teams.

But they also differ significantly on how they operate and their mission. For instance, while eToro’s crypto wallet is ideally meant to help the online broker’s investment vehicles, USDX seeks to be the world’s leading payment processor.

Verdict: Is USDX Wallet safe and easy to use?

Well, activating the USDX wallet and creating a user account takes no more than a few minutes. The wallet then embraces a clean, easily navigable, and beginner-friendly user interface. But irrespective of embracing some highly effective safety and privacy measures like making two-factor authentication default and enterprise-grade encryption, USDX wallets are yet to overcome some security challenges. It is a hot wallet, which exposes it to the inherent threats facing online mobile apps and web wallets.


Categories
Cryptocurrencies

Trust Wallet review: Safety, Ease of Use, Features, Pros, and Cons

Trust Wallet is a crypto mobile app developed and introduced to the crypto market in November 2017 by Viktor Radchenko. It is an open-sourced crypto project that seeks to provide users with a balance between trust, security, and usability. To this end, this crypto wallet app has embraced a wide range of highly advanced features that seek to boost user privacy and ease of use. Some of these include a Web3 Dapp browser, a decentralized exchange, block explorer, and biometric security features.

In July 2018, the Trust wallet was acquired by Binance, who made it the official wallet for the Binance Chain and Binance DEX. They also replaced the Kyber Network that previously powered its exchange with Binance decentralized exchange, enhanced the wallet’s security features, and revamped how different users interact with the wallet by cleaning up the user interface.

In this Trust Wallet review, we want to vet the wallet’s security and operational procedures while helping you determine if it is really safe and easy to use.

Trust Wallet key features:

Multi-blockchain wallet: Unlike most crypto wallet apps that will only support one coin or coins built on a specific blockchain, the Trust Wallet is a multi-coin crypto vault that supports a wide range of digital currencies drawn from multiple blockchains.

Buy with card: Trust wallet works in tandem with such payment processing companies as Changelly and Shapeshift that facilitate the purchase of crypto using a debit or credit card.

In-built exchange: Today, Binance DEX handles all the in-app crypto exchanges for the Trust Wallet. It is relatively fast in processing transactions and presents users with a wide range of crypto coins and tokens.

Integrates Wallet connect: Wallet connect is a crypto interaction tool that helps Trust Wallet interact with virtually any Dapp. It is relatively safe as wallet-to-Dapp communications are secured with end-to-end encryption.

Earn via staking: Trust wallet allows you to stake different altcoins and earn up to 7.21% APR. Use the staking calculator on the Trust wallet website to check the staking tokens and the maximum interest.

Portfolio tracker: You also get to track your crypto portfolio and digital asset balances using the transaction history and balance tabs on the Trust Wallet user interface.

Integrates block Atlas: Trust wallet features a blockchain explorer API that anyone can use to explore different blockchain and gain information about tokens, ICOs, Staking, and even track crypto prices.

Trust Wallet security features:

Password + biometrics: You will need to secure your Trust wallet with a strong multi-character password. You are also free to reinforce this with such biometric security features as Fingerprint and Face I.D on compatible devices.

Recovery seed: Trust wallet will also provide you with a recovery/backup seed phrase when you create a user account. Use it to backup your private keys and digital assets.

Non-custodial: Neither Trust wallet nor Binance will collect any information personally identifiable to your wallet. More importantly, the wallet developers do not store your private keys on your behalf. These are stored within your device.

Anonymous user registration: You can register and trade anonymously when using a Trust Wallet. The crypto vault-app doesn’t request any personal information during registration.

Open-source: Trust wallet is a fully open-sourced crypto project that allows both wallet users and crypto security experts to vet and audit the wallets source code for bugs and other vulnerabilities. This code is available on both the wallet website and the GitHub repository.

Regular security audits: In addition to the wallet’s open-sourced nature and the numerous integrated security features, it is also subjected to regular security audits led by some of the most popular crypto security firms.

Watch-only mode: You can log in to the Trust Wallet’s watch-only mode when using an unsecured internet connection. This allows you to view incoming crypto flows and monitor wallet without exposing such sensitive wallet information as your private keys and passwords.

How to activate/ setup the Trust Wallet

Step 1: Start by downloading the Trust wallet app compatible with your device on the company website.

Step 2: Launch the Trust Wallet and click on the “Create a New Wallet” tab on the installation page.

Step 3: Read and agree to Trust Wallet’s terms of use

Step 4: Create a strong multi-character password for the wallet

Step 5: You will now receive the wallet’s backup and recovery seed. Write it down and keep it safe offline.

Step 6: Verify the recovery phrase and click continue.

Step 7: Your Trust wallet is now active and ready for use

Step 8: Log in and personalize the wallet by choosing a username, reinforcing the password with biometrics, and create multiple wallets.

How to add/receive Crypto into Trust Wallet:

Step 1: Log in to your Trust wallet and click on the “Buy Crypto” tab on the user dashboard.

Step 2: Select the platform from whence you would like to buy cryptocurrencies from the drop-down list. You can choose Changelly or Shapeshift if you wish to buy it with a card.

Step 3: Follow the prompts to make the purchase.

Alternatively:

Step 1: Log in to the Trust wallet and click on the “Receive” tab.

Step 2: Copy your wallet address or the QR code displayed and forward it to the party sending you cryptos.

Step 3: Wait for the funds to reflect in your wallet.

How to send crypto from Trust Wallet wallet:

Step 1: Log in to your Trust wallet and click on the “Send” tab on the user interface.

Step 2: If you have multiple crypto assets stored therein, select the altcoin you want to send

Step 3: On the transfer window, enter the recipient’s address or scan their QR Code and the amount you wish to send

Step 4: Review the transaction details and confirm the accuracy of these transaction details before hitting send.

Trust Wallet ease of use:

Trust Wallet has a highly intuitive and beginner-friendly user interface. It also provides you with easy access to most blockchain services, including the Dapp browser, an exchange that presents you with hundreds of cryptocurrencies and tokens. More importantly, you can easily integrate the Ethereum network that allows you to access and benefit from ICOs and token airdrops.

Setting up the wallet, creating a user account, and interacting with all the features and service offers integrated within the wallet is easy. Plus, the wallet is also multi-lingual (available in 10+ international languages).

Trust Wallet supported currencies:

According to the Trust wallet website, this crypto vault supports 160k+ assets drawn from 40 blockchains.

Trust Wallet cost and fees:

Trust Wallet is free to download and install. You will, however, have to part with the transaction-processing fee charged by the blockchain network.

What are the pros and cons of using the Trust Wallet?

Pros:

  • The wallet stores the widest range of cryptocurrencies
  • It embraces highly advanced security features, like ensuring the wallet is hierarchically deterministic.
  • Allows you to earn from the crypto-assets through staking
  • It is feature-rich yet easy to use
  • Encourages user anonymity

Cons:

  • It is a hot wallet
  • Some integrated services, like Changelly and Shapeshift, demand user verification.

Comparing Trust Wallet with other Multiblockchain wallets

Trust Wallet vs. eToro wallet

Trust and eToro are both highly popular and feature-rich crypto wallets. They both feature built-in exchanges and facilitate the purchase of cryptocurrencies using a debit or credit card. Both are also multi-coin and multi-blockchain.

There, however, are several fundamental differences between the two crypto-exchange-backed wallets. For instance, while Trust Wallet encrypts user private keys and stores them in the phone, eToro stores the digital assets on the user’s behalf. Similarly, eToro requires that all users satisfy the globally set KYC and AML requirements by verifying their identity when creating a user account, while Trust Wallet asks for no personal user information.

Verdict: Is Trust Wallet safe?

Well, the Binance DEX backed crypto wallet has put in place adequate security and protection measures around your private keys. These include embracing the hierarchically deterministic protocol when it comes to generating wallet addresses, open-sourcing the code for viewership and auditing by the crypto security experts, and integrating advanced deterrence measures for unauthorized access to the wallet. However, we must mention that the wallet is online-based, making it susceptible to online threats and malicious malware.

Categories
Cryptocurrencies

Counter Wallet Review 2020: Is It Safe? Is It Easy To Use? Here Is What We Found Out

CounterWallet is the official crypto wallet for Counterparty – a peer-to-peer financial services provider launched in January 2014. It is highly innovative and seeks to revolutionize how we store and interact with crypto wallets and private keys by providing an alternative to standard backup or recovery options. It is built on the bitcoin blockchain and is one of the few crypto wallets, and protocols by extension, that provides users with the tools required to create Bitcoin network tokens.

In this Counterparty wallet review, we will be expounding on these features. We will also vet the safety measures put in place by Counter wallet and tell you everything else you need to know about the Bitcoin focused crypto-storage vault.

Counter Wallet key features:

Light node: Unlike most crypto wallets that require you to download apps or desktop clients to store private keys, Counterwallet is a light wallet. It is web-based and accessible via any browser. You are, however, free to create personalized servers for hosting your Counterwallet.

Built-in exchange: Counterwallet integrates a crypto exchange within its platform that allows for the purchase, sale, and exchange of bitcoins and tokens. Unlike most other wallets with proprietary exchanges, however, Counterwallet integrates ShapeShift – a third-party fiat-to-crypto exchange.

Buy crypto with fiat: Counterwallet users can leverage Shapeshift to buy cryptocurrencies and tokens using fiat currencies via card or bank transfers. And though it isn’t as liquid as most proprietary crypto exchanges like Binance, it is highly convenient.

Custom build tokens: Counterwallet is one of the few Bitcoin-focused crypto vaults that provide you with the necessary app builder tools to build tokens for the bitcoin network.

Counter Wallet security features:

Passphrase: The Counterwallet passphrase is the single most important security feature for your wallet. It does not store your private keys in any device. Rather it calculates them every time you log in to your wallet. Anyone who has the password can, therefore, access and interact with the private keys.

Open sourced: Counterparty has open-sourced the technology used to create the Counterwallet. Crypto security experts can view and audit this code for vulnerabilities, while wallet users can use it to create personalized servers for holding their private keys.

Hierarchically deterministic: Counterparty is hierarchically deterministic. It automatically generates a new wallet address for every crypto transaction. This masks your real wallet address and makes it hard for crypto trackers to monitor your crypto activity.

Multi-signature: You can create a multi-signature Counterwallet that requires signatures from several Bitcoin private keys to spend the wallet’s funds. This increased safety feature comes in handy when setting a multiuser and institutional wallets.

Client-side encryption: The wallet data and all communications with Counterparty foundation servers or other third party systems are highly encrypted. Client-side encryption implies that information is encrypted before it leaves your wallet.

Anonymous user registration: Counterwallet encourages anonymous user registration and bitcoin trading. It does not ask for your personal information when creating a user account.

Integrates Bitcoin Armory: Not satisfied with Counterwallet’s no backup policy or worry about forgetting the passphrase and losing your Bitcoins forever? Take advantage of their collaboration with Bitcoin Armory – a cold storage Bitcoin wallet – that stores your private keys in ultra-safe, air-gapped, and distributed cold storages.

How to activate/setup the Counter Wallet

Step 1: Open the Couterwallet.io website and choose between Official Counterparty or CoinDaddy Counterwallet servers.

Step 2: Since you are creating a new wallet, click on the “Create a new wallet” icon

Step 3: The wallet will now provide you with a PASSPHRASE required to access your wallet and calculate your digital asset balances

Step 4: The wallet will then provide you with a choice of creating a Quick Access Code. You don’t need to create one.

Step 5: The wallet is active and ready to use. Login using the Counterwallet’s keypad to fund the account and start interacting with some of its features

How to add a wallet address on Counterwallet

Your Counterwallet will have one Bitcoin wallet address automatically generated during account creation. Here is how to create a new wallet address for XCP altcoin and supported tokens:

Step 1: Log in to the wallet and click on the “My Balances” tab.

Step 2: Click on the “Create New Address” icon on the top left corner of the user dashboard.

Step 3: Select the type of wallet address you want to create from the drop-down menu.

Step 4: On the popup menu, enter the name of the new address on the “Description” section and click on “Create New Address” to finish

How to add/receive Crypto into Counter Wallet:

Step 1: Log in to your Counterwallet and click on the “My Balances” tab.

Step 2: From the list of wallet addresses, select the wallet to which you would like to deposit funds

Step 3: A popup window will provide you with an address and QR code for the wallet.

Step 4: Send either to the party/individual sending you bitcoins.

How to send crypto from Counter Wallet:

Step 1: Log in to your Counterwallet and click on the “My Balances” tab.

Step 2: From the list of wallet addresses hosted on the wallet, select the crypto/token you want to send

Step 3: Click on the “Address Actions” tab on the far right of the wallet address section.

Step 4: From the drop-down menu, select send and both the wallet address and the number of cryptos to transfer

Step 5: Check the accuracy of the transaction details before hitting send

How to Backup and Restore Counterwallet

Step 1: Log in to your Counterwallet and click on the “My Balances” tab.

Step 2: Click on the “Address Actions” tab on the far right of the ‘My Address’ bar

Step 3: Select the “Show Private Key” option to reveal your wallet’s private key. Copy it and keep it safe offline

Step 4: To restore your digital assets, open a new account and click on the “Import Funds” tab on the user dashboard and select “From Old Wallet” on the drop-down menu

Step 5: Paste the private key.

Counter Wallet ease of use:

Cunterwallet is quite easy to use as it features one of the most intuitive user interfaces. Creating a user account on the Counterwallet and the processes of sending, receiving, and backing your account is straightforward.

Counter Wallet supported currencies:

Counterwallet supports Bitcoin cryptocurrency, Counterparty’s native token XCP, and 500+ tokens. You are also free to create customized Bitcoin network tokens and add them to the wallet.

Counter Wallet cost and fees:

Counterwallet is free to use. However, you will be charged the transaction processing fees that go to the Bitcoin network miners every time you send crypto from the crypto wallet to another wallet or exchange.

Counter Wallet customer support:

There are three primary ways of contacting Counterwallet’s customer support team. You can use the Live chat feature on the wallet and counterpart website, interact with both wallet developers and experienced users on the Counterparty Forums, or direct message them on such social media platforms as Facebook, Twitter, and LinkedIn.

What are the pros and cons of using Counter Wallet?

Pros:

  • It is highly intuitive and beginner-friendly
  • It is feature-rich and makes it possible for users to custom-build Bitcoin-based tokens.
  • Counterwallet is security-focused and integrates a wide range of advanced security features.
  • It integrates the Bitcoin Armor cold storage.

Cons:

  • It will only support Bitcoin-based cryptos and tokens.

Comparing Counter Wallet with other Bitcoin-only wallets

Counter Wallet vs. Mycelium wallet

Both Mycelium and Counterwallet are highly intuitive and beginner-friendly crypto wallets. They are Bitcoin focused, implying that they will only support cryptocurrencies and tokens built on the Bitcoin blockchain.

But while Mycelium will only support Bitcoin crypto, Counterwallet supports Bitcoin, XCP, and hundreds of tokens built on the Bitcoin network. Counterwallet also supports a wide range of features, including the custom token builder tools and the Bitcoin Armor cold storage integration.

Verdict: Is Counter Wallet safe?

Well, the open-sourced wallet embraces highly innovative privacy and security features. For instance, it doesn’t keep a copy of your private keys on either your device or the counterparty servers. Rather, it calculates the balances of your assets when entering the wallet passphrase. The process of generating crypto addresses is hierarchically deterministic and the Bitcoin armory cold storage.

Categories
Cryptocurrencies

Secalot wallet Review: Is It The Safest Hardware Wallet Yet?

Secalot is an all-in-one, security-focused crypto hardware wallet developed and launched into the Crypto market in 2017. It takes the form of a USB dongle that packs a wide range of operational, security, and privacy features. Unlike most USB-like hardware wallets characterized by an OLED on-device screen, Secalot uses a remote screen. It nevertheless has two buttons for authentication of crypto transactions.

Most of Secalot hardware wallet features are spread between the USB dongle and its software/mobile app companions. We will detail them all in this Secalot hardware wallet review, outline the step-by-step guide on how to activate the crypto vault, vet its ease of use, and list its pros and cons.

Secalot wallet key features

Remote screen: Given that the Sacelot hardware device doesn’t have an on-screen device, it relies heavily on a remote screen hosted on the Sacelot mobile app. This lets you view and manage your digital assets, though the private keys never leave the hardware device.

OpenPGP smart card: Secalot’s unique design equips you with the capability to perform cryptographic actions using the OpenPGP smart card. These include file encryption and signing, logging into computers under Linux, signing and encrypting email,  as well as encrypting hard disks using TrueCrypt.

On-device buttons: The USB, like Secalot hardware wallet dongle, features two on-device buttons that are used to not only navigate the wallet but also authorize outbound crypto transfers.

Compatible with MyEtherWallet: Though the Secalot wallet is a multi-currency wallet, it is biased towards the Ethereum blockchain network, as evidenced by the fact that it is compatible with MyEtherWallet.

Portfolio tracker: The Secalot wallet app also features balance and transaction history tabs that let you monitor your digital assets portfolio in real-time.

Secalot wallet security features

PIN-protected: Secalot hardware wallet is secured and encrypted with a PIN code.

Recovery seed: When activating the wallet and creating a user account, you will be presented with a 24-word recovery seed to restore lost wallets and recover private keys.

U2F + OTP: The hardware wallet hosts the Universal Second Factor (U2F) feature that can be used to generate the one-time-passcode (OTP) for signing into sensitive websites like Google, GitHub, Facebook, NextCloud, and numerous other websites. This features compliments (and can be used alongside) Google’s Authenticator app.

Hierarchically deterministic: Secalot is a hierarchically deterministic hardware wallet that auto-generates a new wallet address for each transaction. This privacy feature helps throw crypto trackers off.

Open source: The Secalot hardware wallet, software, and app are all open-sourced. You can download to view, audit, or suggest improvement on this source code from the official Secalot wallet website or their GitHub page.

Non-Custodial + Cold storage: Secalot is a non-custodial wallet that stores your private keys and other personal data in the cold offline storage – the USB like dongle device. You have absolute control over these private keys.

Encrypted communication: All Secalot hardware wallet communications with third-party systems and Secalot wallet app/software are highly encrypted. They communicate via the ultra-safe SSL/TLS channel that eliminates the possibility of a man-in-the-middle hack.

How to set and activate the Secalot wallet (Bitcoin or Ethereum wallet)

How to activate a Secalot Bitcoin wallet

Step 1: Start by downloading the modified version of the Electrum wallet on Secalot’s official website.

Step 2: Install and launch the Electrum Wallet.

Step 3: On the initializing page, click on “Create New Wallet” and create a unique user name for your crypto wallet.

Step 4: Chose the type of wallet you want to create (between a standard wallet and a Multi-signature wallet)

Step 5: Connect the Secalot hardware device and copy the 24-word recovery seed generated.

Step 6: Create a PIN Code for your hardware wallet device

Step 7: The wallet is now active and ready to use

How to activate a Secalot Ethereum wallet

Step 1: After purchasing the Secalot hardware device, open their official website and download the modified MyEtherWallet

Step 2: Follow the installation prompts as dictated by the “Secalot Control Panel GUI.”

Step 3: Connect the hardware wallet device.

Step 4: Copy the 24-word recovery seed generated.

Step 5: Create a PIN code for the hardware wallet

Step 6: The Secalot Ethereum wallet is now active and ready to use

How to add/receive crypto into your Secalot wallet

Step 1: Log in to the modified Secalot account you want to use, Electrum for Bitcoin or MyEtherWallet for Ethereum and ERC-20 tokens

Step 2:  On the user dashboard, click on the receive button

Step 3:  Copy the wallet address or the QR code displayed by the deposit window and forward it to the party sending you coins.

Step 4: Wait for the coin to reflect on your account.

How to send crypto from your Secalot wallet

Step 1: Log in to the modified Secalot account you want to use, Electrum for Bitcoin or MyEtherWallet for Ethereum and ERC-20 tokens

Step 2: Click the “Send” icon on the user dashboard.

Step 3: Enter the wallet address for the recipient and the number of coins you want to send

Step 4: Confirm the transaction and hit send.

Step 5: Connect the Secalot hardware dongle into the computer and log in by keying in the PIN code.

Step 6: Authorize the transaction

Secalot wallet ease of use

Though Secalot hardware wallet stacks a ton of features and advanced security protocols, it isn’t user-friendly, especially to crypto beginners. We consider its onboarding process quite complicated, especially since it requires you to download, setup, and maintain two different online wallets to store two cryptocurrencies and a handful of Eth-tokens.

Further, the multilingual hardware wallet fails to integrate such basic features as a crypto exchange or swap platform.

Secalot wallet supported currencies.

Secalot hardware will only support Bitcoins, Ethereum, and ERC-20 token. Note that the two popular cryptos are also hosted on different Secalot wallets.

Secalot wallet cost and fees

You can order a Secalot hardware wallet from its official website. It currently retails at €50.

When sending Bitcoins or Ethereum and the ERC-20 tokens to another wallet or exchange, you will have to part with a variable transaction fee collected by blockchain miners and administrators.

Secalot wallet customer support

There are two primary ways of accessing the Secalot hardware wallet’s customer support team. You can choose to send them an email or direct message them on Facebook and Twitter.

What are the pros and cons of using the Secalot wallet?

Pros:

  • Secalot is highly secure as it embraces advanced security features.
  • Advanced features.
  • It is competitively priced.
  • The hardware wallet is highly transparent in that its source code is fully open-sourced.
  • Secalot is highly versatile and available as a hardware dongle and software wallet app.

Cons:

  • Secalot hardware wallet relies on third-party wallets like electrum and MyrEtherWallet.
  • It supports a limited number of coins.
  • The hardware wallet packaging doesn’t include a user manual/installation guide.

Comparing Secalot wallet with other hardware wallets

Secalot wallet vs. Trezor hardware wallet

Secalot and Trezor hardware wallets share more than a commitment to the safety and privacy, and integrity of their client funds. They both are also characterized by ultra-light hardware dongles and highly intuitive user interfaces. Moreover, they have embraced several high advanced operational and security protocols like the recovery seed, two-factor authentication, and maintaining offline cold storage for client private keys.

But while the Trezor Wallet has a relatively easy and straightforward setup process, Secalot Wallet’s activation process is rather complex. Furthermore, Trexor Wallet supports a broader range of cryptocurrencies and tokens (1000+), while Secalot will only support two digital currencies.

Verdict: Is Secalot Wallet safe?

Yes, Secalot is a considerably safe hardware wallet. Not just because your private keys and all other data stored never leaves their offline storage but also because of the numerous and highly advanced security and privacy measures the wallet developers have put in place. For instance, they ensured that the wallet is hierarchically deterministic and provided the option of setting up a multi-signature wallet. It serves as a U2F authenticator, and both its firmware and software are fully open-sourced.

Categories
Cryptocurrencies

Bitcoin Gold Core Wallet Review: What Sets This Wallet Apart?

The Bitcoin Gold Core Wallet is a wallet that stores Bitcoin Gold coins. Bitcoin Gold –like Bitcoin Cash- is a fork of the original Bitcoin currency. It aims to fix one of Bitcoin’s flaws; the increasing centralization of Bitcoin’s mining industry. The original creators of Bitcoin wanted anyone to be able to mine with their personal computer and earn some extra cash from their spare computing cycles.

As Bitcoin’s value grew, however, miners adopted extremely efficient (and expensive) custom-built application-specific integrated circuit (ASCI) mining rigs. This made Bitcoin mining a highly specialized industry since consumer PCs could not (and still can’t) compete with these custom rigs. Bitcoin Gold solves this while, at the same time, builds on Bitcoin’s tried and tested systems.

Bitcoin Gold Core Wallet Key Features

Bitcoin Gold adopts most of Bitcoins’ underlying infrastructure. However, it utilizes the Equihash proof of work algorithm, which cannot be sped up by custom hardware. This eliminates the disproportionate advantage that such rigs confer to their owners. It also utilizes a per-block difficulty adjustment algorithm, replay protection, and the Bitcoin Gold core wallet, which is built on the Bitcoin core.

ASCI Resistant

On average, every ten minutes, a computer on the Bitcoin blockchain network adds a block to the end of the blockchain and gets a crypto reward for that. Miners compete for the privilege of getting to add a block, primarily because of that reward. They do this by racing to solve a mathematical problem. Because Bitcoin uses an SHA-256 hash-based algorithm, the most computing power entity stands the highest chance of adding a block to the chain.

Bitcoin Gold, however, uses the Equihash memory intensive algorithm. For this reason, it is much harder – if not impossible – to game the system by having powerful rigs at your disposal. This bodes well for Bitcoin Gold Core wallet users since to use the wallet, you need to download the whole Bitcoin ledger onto your computer, which allows you to mine with your spare cycles if you want to.

Full Bitcoin Node

As mentioned above, you cannot use the Bitcoin Gold core wallet as a standalone wallet. You need to download the full node during the initial setup process. Despite weighing in at hundreds of gigabytes, having the full node on your computer offers a number of advantages.

Firstly, you do not require having your transactions validated by a third party; you can verify them yourself.

Additionally, since the node relays and validates your transactions on the Bitcoin network, you can choose the priority you want your transactions to be given, and by extension, the fees charged for each transaction. Further, you can validate and verify other people’s transactions, earning some extra coin.

Hot Wallet

The Bitcoin Gold Core Wallet requires an internet connection. This means your funds are easily transferrable. The name ‘wallet’ is, to some degree, misleading since the Gold Core wallet doesn’t store funds in the same way a physical wallet does. In contrast, it allows you to change the records stored on the blockchain ledger- a copy of which you’ll need to have on your computer, as explained above.

Security and Privacy Features

Purely by being based on blockchain technology, the Gold Core wallet is a very secure crypto storage option for Bitcoin Gold currency holders. Its creators didn’t stop there, however. They’ve built upon the Bitcoin network, leveraging its strengths and security features. Additionally, the Bitcoin Gold Core wallet is based on the Bitcoin Core wallet, making it one of the safest wallets available.

Compatible with Tor

As you well know, the Bitcoin blockchain is a publicly available ledger. Anyone can keep a copy of it if they wish and analyze it for their various ends. This makes it very difficult to introduce falsified transactions since all the other computers in the network will cross-check and reject it. The disadvantage of this, however, is that anyone can trace your identity if they are determined.

The Tor network is an encrypted web communication protocol that ensures the privacy and anonymity of its users. It does this by leveraging a series of nodes (read servers) that mask your IP address and any inadvertently revealed personal data. The Bitcoin Gold core wallet leverages the Tor network, routing all your transactions and traffic through its transport layer, effectively hiding your original IP address.

Hierarchically Deterministic

Since Bitcoin Gold is derived from Bitcoin, it inherits the Hierarchical deterministic nature of the Bitcoin core wallet. This means that after you use your receiving address, a new one is generated for you. These addresses are your public keys, as you share them publicly with anyone who you’d like to send you money. As all these keys are governed by a single key pair, called the extended public key (xpub), previous addresses remain completely usable.

To access the funds from each of your public addresses, you need to use its corresponding private key. These private keys are also governed by a single key pair, called the extended private key (xpriv). The xpriv is effectively the one key that rules all the others, while the xpub is the one key that brings together your addresses and binds them to your wallet.

Open Source

Much like the Bitcoin core wallet, the Bitcoin Gold core wallet is open source. Anyone can audit, make suggestions, and contribute to its codebase. This means that security loopholes are caught and fixed faster than on proprietary software since more people are on the lookout for bugs. Additionally, all processes are transparent since changes have to be publicly declared and vetted before they are committed to the wallet’s main branch.

How to Set Up and Activate the Bitcoin Gold Core Wallet

Before setting up and opening a Bitcoin Gold core wallet account, you should consider a few things.

Available Disk Space

As has already been established, you cannot run the Gold core wallet as a standalone wallet application. You need to download the full Bitcoin node, which at the time of this writing, is around 200GB. However, you cannot only have 200 gigabytes of storage available since this node grows in size as the number of transactions increases.

The application files will also occupy some space, so it’s probably best to have a few terabytes of spare storage. Additionally, you should set aside a few USB sticks or hard drives to backup your wallet. It is recommended that you regularly back up your wallet on at least two external drives. Do this before upgrading your wallet and after a series of transactions.

Device Security

Due to the sensitive nature of the data this software will store on your computer, you need to ensure that your computer is completely free from malware. Install anti-virus/ anti-malware software and run a full scan. Fix any problems the software identifies before installing the Gold core wallet.

Additionally, make sure you scan all the USB sticks you use to back up the wallet and take care not to install software from shady sites, as some of this software may have masked its malware well enough to escape the anti-virus radar.

Regularly (and promptly) install software and operating system updates, as they usually include security patches.

Internet Connection

During the initial set-up, you will need to download the full bitcoin node. This will require you to have a very reliable internet connection, one that’s fairly fast and that doesn’t impose strict limits. After the initial download, you will then need to maintain a good internet connection since your node needs to communicate with other nodes on the network as transactions happen.

After appropriately set up your device, you can then follow the steps outlined below to open and activate a Bitcoin Gold core wallet account.

Download the Bitcoin Gold Core Wallet

You can get the Gold core wallet from the official Bitcoin Gold website. The software is available for Windows (64 and 32 bit, Vista and later), Mac OS (v10.1 or higher), Linux (64 and 32 bit), and ARM Linux (64 and 32 bit). Installation instructions might vary depending on your platform, but the process should be fairly straightforward.

Start the Software

Launch the wallet. This will begin the node download. Your internet and PC speed will influence the amount of time this process takes, but you’ll likely need to be a little patient as this huge-volume data transfer takes time. You won’t have to repeat this, however, as it’s a one-time download.

Set Your Password

Once the node has been fully downloaded, go to the wallet settings, hit ‘encrypt wallet,’ and set your password.

Backup Your Wallet and Private key(s)

After logging in to your account, go to the file section and hit ‘backup wallet.’ Select the destination (this could be a USB drive, external hard drive, a mobile phone, or a CD) where you want the backup to be saved. It is recommended that you backup your wallet on more than one drive. To back up your private keys, go to the help section, hit ‘debug window’ then ‘console.’ Copy the key and store it well.

Congratulations, your wallet is now ready to use.

Bitcoin Gold Core Wallet Customer Support

This wallet is open-source, so you can raise issues and even fix them yourself if you’re skilled enough. However, for non-techies, the customer service can be contacted through the Bitcoin Gold website or via their various social media channels.

Verdict

The Bitcoin Gold core wallet is a secure solution for Bitcoin Gold holders. It is especially suited for those who’d like to mine and earn some extra crypto, and for those who have enough space and bandwidth to run a full bitcoin node.

Categories
Cryptocurrencies

XZEN Hardware Wallet Review: Security, Fees, Ease of Use, Pros, And Cons

XZEN website describes its hardware wallet as a “Hybrid cybersecurity system” that “Combines hardware, software, and services” in guaranteeing maximum security, transparency, and the highest levels of user experience. It was designed and developed by an Estonian Virtual currency wallet and exchange services provider, XZEN EST Ltd, and launched in 2018. It is the native wallet for the XZEN exchange and features a mobile app companion that hosts such interactive services as the crypto exchange and payment service processor.

According to XZEN founder Dmitry Laptev, this highly innovative and versatile Crypto was born of the need to change the security architecture around hardware wallets. It is especially aimed at eliminating the chances of losing your digital assets because of a forgotten PIN or lost backup seed. It is also one of the few hardware wallets that support fiat currencies.

This review will be vetting the hardware wallet to determine if it is as secure and easy to use as advertised. We will outline its key operational and security features, provide you with a step-by-step guide on how to set up and use XZEN wallet, check the number of supported currencies, and compare it with other hardware wallets.

XZEN Wallet key features

On-device screen: XZEN hardware wallet features a 2.4-inch high-resolution LCD screen that is large enough to fit the entire wallet address.

Mobile compatibility: The hardware wallet has a mobile (Android/iOS) and desktop (Windows/macOS/Linux) app companions that host most of XZEN’s interactive features such as the crypto exchange and portfolio tracking tools.

Inbuilt exchange: XZEN hardware wallet users also interact with the XZEN decentralized exchange hosted on the mobile and desktop apps. The wallet is hybrid and supports both crypto-to-crypto as well as fiat-to-crypto exchanges. Also, it allows you to buy Crypto virtually via any credit/debit card.

Instant transfers: Cryptocurrency transfers on the XZEN platform are instantaneous. Moreover, transfers within the wallet’s ecosystem (from one XZEN wallet to another) do not attract additional charges or commissions.

Contactless payments: Embedded in the XZEN hardware wallet device is an NFC chip that powers contactless payments. It allows you to pay for goods and services in millions of stores worldwide without necessarily connecting your device to the store’s hardware. The chip is also attributed to one of the wallet’s coolest features – wireless charging.

Wireless connections: Just like you don’t need to physically connect an XZEN hardware device to a store’s systems to pay for goods, you also don’t need to connect it to your computer or mobile phone to transfer coins. It is fitted with the Bluetooth 4.2 technology used to communicate with its app companion via a highly secure and AES encrypted channel.

Steel case: The XZEN wallet components are protected by an airtight steel casing that is both dust and waterproof.

Security features

PIN Code + Touch ID: XZEN hardware wallet embraces a multilayered security feature that constitutes both a PIN Code and Touch ID.

Encrypted CPU: The hardware wallet will also feature a highly encrypted CPYU/secure element on which your private keys are stored.

Cold storage: XZEN hardware wallet maintains that the private keys for digital assets are always kept in a 100% offline device and never leave the wallet.

Two-factor authentication: All transfers out of your XZEN wallet must be subjected to two-factor authentication. While you can initiate the outbound transaction via the mobile or desktop app, it must be authorized by the hardware device.

Licensed: XZEN EST Limited is a licensed virtual currency wallet and exchange services provider, authorized and regulated by Estonia’s Financial Intelligence Unit (FIU).

How to set and activate the XZEN wallet

Step 1: Start by ordering the XZEN hardware device from the XZEN wallet’s official website.

Step 2: Open the XZEN wallet official website. Click on the “APP” page. Download the wallet app that is compatible with your phone or computer.

Step 3: Install and launch the app.

Step 4: Choose a username and create a unique multi-character password for the wallet app.

Step 5: Turn on the XZEN hardware wallet and pair it to the phone app via Bluetooth or the USB cable.

Step 6: Once paired, the hardware wallet will request you to create a PIN code and set up the fingerprint ID.

Step 7: It will then provide you with a 12-word recovery seed

Step 8: The wallet will now generate a wallet address that you can use to add/receive funds

How to add/receive Crypto into your XZEN wallet

Step 1: Log into your XZEN crypto wallet app and click on the “Receive” button.

Step 2: Copy the wallet address or QR code provided and send them to the individual sending you coins.

Step 3: Wait for the funds to reflect on your wallet.

How to send Crypto from your XZEN wallet

Step 1: Log in to your XZEN crypto wallet app and hit the “Send” icon.

Step 2: Select the cryptocurrency or token you wish to transfer, especially if you have multiple wallet addresses

Step 3: Enter the recipient address and amounts you want to send

Step 4: Turn on and login to XZEN hardware wallet.

Step 5: Connect the phone or computer to the hardware device via the cable or Bluetooth

Step 6: Confirm that the transaction details are correct and authorize the transaction.

XZEN wallet ease of use

XZEN has one of the most intuitive interfaces – for both the hardware device and the mobile/desktop apps. They are both clean and easy to navigate with little to no help. Several text and video guides throughout the XZEN wallet website can help you master your way around the device and apps. These come in handy in teaching you how to send or receive cryptos via XZEN and in figuring out your way around the crypto exchange.

These, plus the relatively easy and straightforward onboarding process, make XZEN wallet one of the most intuitive hardware wallets.

XZEN wallet supported currencies

XZEN is a multicurrency hardware wallet that is yet to embrace multiple cryptos and tokens. Currently, you can only host Bitcoins, Ethereum, and ERC-20 tokens on the wallet, but the XZEN website hints about an upcoming upgrade that incorporates more popular cryptos.

XZEN wallet cost and fees

XZEN hardware wallet costs $120.

Crypto exchanges within the decentralized exchange and crypto transfers to other XZEN wallets are free. Nevertheless, you will pay a variable network fee every time you send cryptos and tokens to external wallets and exchanges.

What are the pros and cons of using the XZEN Wallet?

Pros:

  • Crypto transfers from one XZEN wallet to another are free.
  • It integrates a hybrid exchange that allows you to pay for Crypto using a card.
  • Embraces a wide range of security and privacy features.
  • Supports anonymous user registration and trading.
  • Your private keys are held in offline cold storage and never leave the wallet.

Cons:

  • Supports a limited number of cryptocurrencies
  • Requires you to verify identity if you want to pay for Crypto via card

Comparing XZEN wallet with other hardware wallets

XZEN wallet vs. Ledger Nano S wallet

XZEN and Ledger Nano S are both multicurrency hardware wallets. Some of the key security measures they have both implemented include the generation of wallet addresses offline, cold storage for private keys, and two-factor authentication. They also have an on-device screen that one can use to check crypto balances while offline and verify transaction details for outbound transfers.

The two, however, have several operational differences. For instance, while XZEN will only support two major cryptocurrencies, Ledger Nano supports 1000+ cryptos and tokens. The on-device screen for the Ledger wallet is smaller than the large and high-resolution color screen on the XZEN hardware wallet. Moreover, XZEN can be more versatile as it is complemented by feature-rich mobile and desktop companion apps.

Verdict: Is XZEN wallet safe?

Yes. With fingerprint protection, offline cold storage, two-factor authentication, password-protected apps, and recovery seed in place, XZEN hardware wallet has put in place adequate security measures around your private keys. And in appreciation of XZEN wallet’s security-focused approach, storing and managing digital assets, the company was honored with the Excellence in Finance Award in 2019 during the global FiNext Conference in Singapore. Our only reservations with the hardware wallet are its relatively expensive price ($120) and its support for a limited number of coins.

Categories
Cryptocurrencies

Walahala Hardware Wallet Review: Is Walahala A Safe Hardware Wallet or Scam?

On the Walahala website, the hardware wallet is described as a next-generation crypto vault. A hardware crypto vault specially designed to give you more control over your digital assets by allowing you to carry all your cryptocurrencies and tokens in one sleek and smart wallet. This hardware wallet takes the shape, size, and weight of a regular credit/debit card but connects directly to your phone or computer via the USB port. It was developed by Walahala – a blockchain technology company – and introduced to the crypto world in late 2019.

It features highly advanced operational and security features that its developers believe will be instrumental in making it one of the easiest to use and safest hardware wallets.

But how safe is the Walahala hardware wallet? Is it easy to use and as beginner-friendly as its developers want us to believe? How does it work, and how many coins and tokens and it support? We answer all these questions and tell you everything else you need to know in this Walahala hardware wallet review.

Walahala wallet key features

Compatible with software app: Unlike most other hardware wallets with on-device screens, Walahala hardware wallet uses a remote screen of the Walahala desktop or mobile app. Both apps are available for all the popular desktop and mobile apps and can be downloaded from the official walahala website.

Inbuilt exchange: Walahala wallet app features a live and ultra-fast decentralized crypto exchange. According to the Walahala website, this exchange can process over 1.5 million transactions per second. The exchange doubles up as a peer-to-peer network that facilitates faster and inexpensive crypto exchanges.

Portfolio tracker: The Walahala wallet app user dashboard has an “Overview” tab that lets you view and monitor your digital asset balances in real-time.

Exchange explorer: Walahala wallet claims to be the first hardware wallet to include the blockchain exchange explorer. This lets you monitor the crypto activity and trends for the different exchanges. Further, it uses Artificial Intelligent (AI)-powered order-matching algorithms to ensure that your buy or sell order is fulfilled at the most attractive market price.

Unlimited storage: There is no limit to the number of wallet addresses or private keys you can hold on your Walahala hardware wallet.

Plasma Core Technology: Walahala wallet has also embraced a blockchain technology similar to Bitcoin’s Lightning network – the Plasma Core Technology – to facilitate instantaneous transaction confirmation. According to the company’s website, the Plasma Core Engine is hosted in the “Quantum Space” and hence its ultrafast performance.

Security features

Password encryption: Your Walahala hardware wallet is secured with a password that doubles up as the wallet encryption tool. However, unlike other hardware wallets that only support alphanumeric passwords, Walahala allows its users to reinforce the password using the special characters when creating a passphrase.

2FA + questionnaire: Outbound transfers from the Walahala hardware wallet have to be subjected to two-factor authentication. You have the option of using the Google Authenticator app, a personalized questionnaire, or verifying your mobile number to receive OTP messages.

Recovery seed: Unlike most hardware and software wallets that provide you with the standard 12/24 recovery seed phrases, Walahala provides you with a 33-word recovery seed for added security.

No wire/wireless connection: The Walahala hardware wallet is immune to such threats as man-in-the-middle hacks as it connects directly to your phone or computer via the USB port and not via wired or wireless connections like Wi-Fi or Bluetooth.

Non-custodial: Walahala is a non-custodial wallet that stores your private keys and all other personal data 100% offline in the credit card like a hardware device. Your keys never leave the wallet.

Offline wallet address generation: The wallet is hierarchically deterministic. Moreover, all the sensitive wallet information like wallet addresses and mnemonic phrases are generated offline by the hardware wallet device and not its software/crypto app companion.

Key erasure protocol: The key erasure protocol for the Walahala Wallet is triggered after ten consecutive but unsuccessful login attempts. It erases all the data held in the hardware wallet and blocks the card.

How to set and activate the Walahala wallet

Step 1: After buying your Walahala hardware wallet, download the Walahala mobile or desktop app companion

Step 2: Chose a username and create a strong password for the wallet app.

Step 3: Connect the hardware device to your computer or phone

Step 4: Create a name for your hardware device

Step 5: Copy the 33-word recovery seed displayed on the wallet app

Step 6: Create a multi-character password for the hardware wallet

Step 7: The device is now active and ready to use

How to add/receive crypto into your Walahala wallet

Step 1: Log in to your Walahala wallet account and tap the “Receive” button on the dashboard.

Step 2: Copy the Walahala Wallet address or QR code and forward it to the party sending you altcoins.

Step 3:  Wait for the coins to reflect in your wallet.

How to send crypto from your Walahala wallet

Step 1: Log in to your Walahala wallet account and click on the “Send” button.

Step 2: If you have multiple wallet addresses, select the coin you want to transfer

Step 3: On the transfer window, enter the recipient’s wallet address and the number of coins you wish to send

Step 4: Connect the Walahala hardware device to the computer and log in.

Step 5: Confirm that the transaction details are correct and hit send.

Step 6: You will receive an OTP code on your preferred two-factor verification device.

Step 7: Verify the code and confirm the transaction.

Walahala wallet ease of use

Walahala hardware wallet is an easy to use and beginner-friendly all-in-one crypto platform. The hardware device is sleek and portable, while its software companions have highly intuitive user interfaces. These are clean, in that they only feature the most important aspects of the wallet and easily navigable.

The onboarding process is also quick and relatively straightforward. And so are the processes of sending and receiving crypto in and out of the wallet.

New users can also rely on the multiple videos and explanatory guides on the Walahala website to learn how to use and interact with the hardware wallet. Plus, they can also download the Demo trader account to learn their way around the Walahala crypto exchange.

Walahala wallet supported currencies.

Walahala is a multi-currency hardware wallet that supports a wide range of cryptocurrencies, including Bitcoin, Ethereum, Litecoin, Ripple, Dash, Walahala Coin, and ERC-20 tokens. The developers have hinted at the possibility of incorporating more digital assets in upcoming wallet updates.

Walahala wallet cost and fees

Walahala hardware wallet retails at $149 (inclusive of free express shipping fees).

Additional costs include the fees charged by the Walahala exchange as well as the blockchain network fees charged by miners and administrators to verify a crypto transaction.

What are the pros and cons of using the Walahala wallet?

Pros:

  • Walahala embraces a number of highly advanced security features.
  • The wallet integrates a variety of highly effective operational features like the inbuilt exchange.
  • Walahala is highly intuitive and beginner-friendly
  • The Plasma Core Technology ensures Walahala has the fastest transaction processing speeds.

Cons:

  • The $149 price tag is quite restrictive.
  • Walahala is relatively new with no solid reputation.
  • The wallet demands KYC verification for 2FA and for using their exchange.

Comparing Walahala wallet with other Multicurrency hardware wallets

Walahala hardware wallet vs. Ledger Nano S

Walahala and Ledger Nano are both highly innovative hardware multi-currency wallets. They have also put in place highly effective security checks that include two-factor authentication and cold storage.

But while Walahala is relatively new and only supports a handful of cryptocurrencies and tokens, Ledger Nano S has a solid reputation of reliability and supports 1000+ cryptos and tokens. Walahala, however, outperforms Ledger Nano S when it comes to the effectiveness of the integrated operational features with their inbuilt exchange and support for the ultra-fast confirmation of crypto transactions.

Verdict: Is Walahala Wallet safe?

Yes, Walahala has embraced all the important security and privacy features. It helps safeguard the privacy of your crypto coins while the offline storage, password encryption, and direct connection to the computer protect your coins from falling into the wrong hands. Moreover, should you lose the wallet or it is compromised, you can always fall back to the 33-word recovery seed.

Our only reservation with this hardware wallet is the uncompetitive price for the hardware wallet, the fact that it is relatively new and with no reputation of reliability, and the negative criticism it has been receiving (and is yet to respond to) on different bitcoin and blockchain forums.

Categories
Cryptocurrencies

Blockchain Lockbox wallet Review: How Safe Is This Blockchain Hardware Wallet?

Blockchain Lockbox is an exclusive hardware wallet that’s specially designed to complement the all-popular Blockchain web wallet. Launched in October 2018, Blockchain Lockbox was designed and created by Blockchain wallet founders in collaboration with Ledger Technology Company. According to Blockchain Wallet CEO, Peter Smith, the hardware wallet is supposed to offer their platform users the option and means to manage their digital assets seamlessly, online and offline.

Blockchain Lockbox is marketed as a security-focused crypto wallet that incorporates the most comprehensive range of highly effective safety and privacy measures. These are then complemented by an equally impactful list of operational features aimed at making the Blockchain Lockbox wallet as easy to use as possible.

In this Blockchain Lockbox review, we detail these features and vet their influence on the hardware wallet’s safety and ease of use. We also look at such other factors as the number of currencies supported by the wallet, its pros, and cons, level of customer support advanced, and compare it with equally popular hardware wallets.

Blockchain Lockbox key features

Compatible with blockchain web wallet: Blockchain Lockbox is ideally supposed to compliment and offer an offline alternative of the already popular Blockchain web wallet.

On-device screen: The USB-like hardware device that takes the shape of Ledger hardware wallets features an on-device OLED screen. The screen comes in handy when activating the wallet, checking crypto balances offline, and authenticating outbound crypto transfers.

Navigation button: In addition to the screen are two on-device buttons supposed to help you navigate the hardware wallet and confirm outbound crypto transfers.

FIDO-Certified: Blockchain Lockbox is a FIDO certified hardware wallet. This means that in addition to keeping the private keys for your cryptocurrencies safe, it can also be used to store the security keys for your Google, Dropbox, GitHub accounts, and more.

Blockchain Lockbox security features

PIN Code: Blockchain Lockbox hardware wallet is secured with a PIN code that you get to create when setting up the crypto vault. This 8-digit PIN not only protects but also encrypts the wallet’s content.

Recovery seed: When activating the hardware wallet, you will also be presented with a 24-word backup seed that you can use to recover your lost wallet or private keys.

Ledger technology: Ledger has a solid reputation for coming up with the most secure crypto hardware wallets. So does Blockchain web wallet, and the fact that Lockbox infuses both Ledger and Blockchain wallet technologies speaks volumes about the hardware wallet’s reliability.

Anti-phishing protocols: Blockchain lockbox is an end-point controlled wallet. It has a unique key embedded within its firmware that will only pair with the legit Blockchain wallet website. This implies that Blockchain Lockbox cannot turn on when connected to a clone website, which goes a long way in defeating phishing.

Non-custodial/Cold storage: Blockchain Lockbox, like the blockchain web wallet, is a non-custodial crypto vault that will not store your private keys on the company servers. Instead, it encrypts all your user data – the private keys and any other personal information stored therein – and holds it in the offline hardware device.

Dual Chip architecture: Unlike most other hardware wallets whose secure element will only feature one encryption chip, Blockchain Lockbox features the ultra-secure ST31H320 and STM32F042 chips. Note that both chips are CCEAL5+ (crypto industry-level) certified.

Key Erasure tool: If you enter your PIN code for the crypto wallet unsuccessfully for three consecutive times, the hardware device will be locked, and any content therein permanently deleted.

How to set and activate the Blockchain Lockbox wallet

Step 1: Start by ordering your Blockchain Lockbox hardware wallet from the Blockchain wallet official website

Step 2: Open the Blockchain Wallet website and login into your user account or create one.

Step 3: Connect the hardware device to your computer using the USB cable provided

Step 4: On your Blockchain wallet’s user dashboard, tap on the ‘Balances’ tab and select the “Set up now” icon

Step 5: Chose the device you wish to set up – Blockchain Lockbox.

Step 6: Follow the prompts by the setup wizard to complete the process.

Step 7: Once done, the hardware device will display the “Choose a PIN” message.

Step 8: Press both on-device buttons simultaneously to set a wallet PIN. Toggle between the right and left buttons when selecting a number and press both buttons simultaneously once satisfied with your 8-digit PIN.

Step 9: Write down and verify the 24-word recovery seed provided by the hardware device

Step 10: Your wallet is now active and ready for use

How to add/receive crypto into your Blockchain Lockbox wallet

Step 1: Log in to your Blockchain wallet user account and click on the “Request” tab.

Step 2: Select the cryptocurrency you would like to receive on the drop-down menu.

Step 3: Chose Blockchain Lockbox on the “Receive To” drop-down menu.

Step 4:  The wallet will automatically generate an address and dynamic QR code that you should now copy and send to the party sending your cryptos

How to transfer coins from blockchain web wallet for Blockchain Blockbox

Step 1: Log into your Blockchain wallet account and click on the “Send” icon.

Step 2: Chose the currency you want to transfer from the drop-down menu and Blockchain Lockbox from the “Receive To” drop-down menu.

Step 3:Chose the sub-wallet on which to deposit the funds to (or simply enter the hardware wallet address) and the number of coins you wish to transfer

Step 4: Select the transaction fee and hit send.

Step 5: The wallet will prompt you to connect the Hardware Wallet

Step 6: Log in to the hardware wallet by keying in the PIN code

Step 7: Press the right on-device button to view the transaction details.

Step 8: After verifying that the transaction is correct, press the on-device button to authorize the transfer

How to send crypto from your Blockchain Lockbox wallet

Step 1: Log in to the Blockchain wallet and click the “Send” tab.

Step 2: Select the currency you what to send in the “Currency” drop-down menu and Blockchain lockbox in the “From” drop-down menu.

Step 3: Enter the recipient’s address and the number of coins you want them to receive

Step 4: Select the transaction fees and click on “Continue.”

Step 5: Connect your lockbox hardware wallet and log in.

Step 6: Check the accuracy of the transaction details on the on-device screen and press the right on-device button to confirm and authorize the transfer

Blockchain Lockbox wallet ease of use

The Blockchain Lockbox wallet has the most effortless onboarding process. The process of receiving and sending cryptocurrencies in and out of the wallet is also relatively straightforward. The on-device screen and buttons and the highly intuitive user interface of the Blockchain wallet web service have also played a key role in easing the interaction with the hardware wallet. And all these make Blockchain Lockbox a beginner-friendly hardware wallet.

The Blockchain Lockbox website is also multi-lingual and available in 20+ international languages.

Blockchain Lockbox wallet supported currencies and countries.

Blockchain lockbox is a multi-currency hardware wallet that currently supports four cryptocurrencies – Bitcoins, Ethereum, Bitcoin Cash, and Stellar Lumens. The wallet developers have nevertheless committed to increasing the number of supported assets in line with user-demands.

The wallet can also be shipped into 140 crypto-friendly countries across the world.

Blockchain Lockbox wallet cost and fees

Blockchain Lockbox currently retails at $59 + free express shipping.

The transaction fee for sending cryptos from the web wallet to Lockbox or other wallets and exchanges is highly dynamic. Priority fees translate to higher transaction fees and faster transaction confirmation, while the basic charge translates to lower costs and slow transaction confirmation speeds.

Blockchain Lockbox wallet customer support

Blockchain wallet has a highly responsive customer support team available via email or social media platforms like Twitter and Instagram.

What are the pros and cons of using the Blockchain Lockbox wallet?

Pros:

  • Blockchain lockbox is easy to use and beginner-friendly.
  • The hardware wallet is competitively priced.
  • The wallet embraces a wide range of highly effective security measures.
  • Easily integrates the blockchain wallet.

Cons:

  • It can only be used on the Blockchain Lockbox wallet.
  • The wallet doesn’t support fiat-to-crypto purchase.

Comparing Blockchain Lockbox wallet with other hardware wallets

Blockchain Lockbox wallet vs. Ledger Nano S wallet

Blockchain Lockbox is technically an offshoot of the Ledger class of hardware wallets given that it was designed and created by Ledger in partnership with Blockchain. They both employ a wide range of security features, including two-factor authentication and recovery seed. Both are also multi-currency hardware wallets that are simple to use and quite beginner-friendly.

But while Blockchain lockbox is only compatible with the Blockchain wallet, Ledger Nano S is versatile and compatible with multiple software and hardware wallets. Additionally, while Blockchain lockbox will only support four cryptocurrencies, Ledger Nano S supports 1000+ cryptos and tokens.

Verdict: Is the Blockchain Lockbox wallet safe?

Blockchain Lockbox is a safe wallet that has put in place multiple advanced security features that include two-factor authentication, dual-chip architecture, and anti-phishing protocols. We also appreciate Blockchain Lockbox’s ease of use, competitive pricing, and beginner friendliness. The only downside to the hardware wallet is its rigidity in that it is compatible with the Blockchain wallet.

Categories
Cryptocurrencies

AIRBITZ (EDGE) Wallet Review: Features, Security, Fees, And Ease Of Use

Airbitz bitcoin wallet app recently underwent a major rebranding that saw its name to Edge wallet. In addition to the open-sourced crypto mobile app, it was also subjected to massive structural changes that aim at making it the most secure and easy to use the wallet.

The most visible changes include its shift from a Bitcoin-only to a multi-blockchain wallet and a more intuitive user interface. The Edge development team has also integrated several operational and security features to the highly versatile mobile wallet.

This Airbitz/Edge crypto wallet app review seeks to highlight all these features and examine their effectiveness in making it the most secure wallet. We will also be addressing its ease of use, supported currencies and compare it with other multi-currency wallets before telling you if it really is the most secure crypto wallet app available.

AIRBITZ key features:

Versatile mobile app: Edge is a highly versatile mobile wallet app. It is not only available for the popular Android and iOS smartphone operating systems but is also available for Windows phones.

Inbuilt exchange: Edge features an inbuilt crypto exchange. Therefore, you don’t have to leave the wallet to buy, sell, or exchange cryptocurrencies, which saves time and eliminates unnecessary transaction fees.

Support for fiat purchases: Edge wallet app doesn’t just let you store, buy, and sell cryptos within the app but also lets you make crypto purchases using fiat currencies through either bank wire transfers to the wallet or via credit card.

Bluetooth transactions: Edge crypto wallet app supports Bluetooth Low Energy (BLE), which means you don’t need to be online to initiate a transaction. BLE allows you to send cryptocurrencies to other individuals via Bluetooth. 

Address book: The wallet seeks to eliminate the risk of sending funds to the wrong wallet by introducing the in-app address book where you can save a crypto recipient’s address, name, and photo for easy access when sending them digital coins.

AIRBITZ security features

Password and Biometrics: Edge embraces a multi-layered wallet protection feature. When creating a user account, you will first be required to set a strong multi-character password for the wallet. You are then required to set a four-digit passcode for regular logins. Additionally, you have the option of adding the fingerprint or face ID login option.

Open source: Edge is also built on an open-sourced technology and allows for scrutiny from both wallet app users and blockchain experts. The code can be downloaded from the official Edge wallet app website or GitHub.

Hierarchically deterministic: The wallet app is also hierarchically deterministic, implying that the public wallet address is auto-generated for every new transaction, which furthers the wallet’s commitment to user privacy.

Automated wallet backup: Unlike other crypto wallets that require you to save and memorize a lengthy recovery seed, your passphrase for the Edge wallet doubles up as your recovery seed.

Client-side encryption: Client-side encryption implies that any data that your wallet shares with the Edge wallet servers or third party systems is encrypted before it leaves your wallet app, effectively safeguarding it against possible man-in-the-middle attacks.

Anonymous registration: Edge crypto wallet app doesn’t ask for personal information like name or address when creating a user account. Neither does it collect or store any personal information when you use the wallet app.

How to set and activate the AIRBITZ wallet

Step 1: Download and install the Edge crypto wallet app compatible with your phone’s operating system.

Step 2: Once installed, launch the app and create a username

Step 3: Create a unique and multi-character password (with a minimum of 10-characters)

Step 4: Set a four-digit passcode that you will be using for regular on-device logins

Step 5: The wallet will request that you write down this information (username, password, and passcode) on a piece of paper and save it offline

Step 6: Read and agree to the crypto wallet app’s terms of use

Step 7: Clicking finish takes you to your account’s user dashboard, an indication that the wallet is active and ready for use.

How to add/receive Crypto into your AIRBITZ wallet

Step 1: Log in to your edge wallet and click the “Request” button

Step 2: Select the wallet address where you would like the coins deposited and enter the number of coins you wish to receive

Step 3: Copy this information and forward it to the party sending you cryptos.

Step 4: Alternatively, hit the share button if you want to share this information with the individual sending cryptos via SMS or email

Step 5: Wait for the funds to reflect in your wallet.

How to send Crypto from your AIRBITZ wallet

Step 1: Log in to your Edge crypto wallet and app and on the user dashboard, tap on the “Send” icon

Step 2: If you have multiple digital assets stored therein, select the wallet from whence you would like to send the coins

Step 3: On the transfer window, enter the recipient’s wallet address and the number of coins you wish to send

Step 4: Confirm that the transaction details are accurate.

Step 5: Slide the authorization button to authorize the transfer

AIRBITZ wallet ease of use

Edge crypto has a relatively straightforward onboarding process. The processes of sending and receiving cryptos are also easy and straightforward. The user dashboard is also easily navigable and specially designed for both the experienced and beginner crypto investors.

The user interface is also highly customizable and allows you to tweak most of the basic features, including its theme. It also integrates a map of all BTC-accepting stores in your neighborhood.

AIRBITZ wallet supported currencies and countries

Edge is a multi-blockchain and multi-currency wallet for all popular cryptos, including Bitcoin, Ethereum. Litecoin, Ripple, Monero, Bitcoin Cash, Dash, Bitcoin Gold, Dogecoin, and all ERC-20 tokens.

AIRBITZ wallet cost and fees

Installing the Edge crypto wallet is free. However, you will pay a  competitive transaction processing fee every time you send cryptocurrencies to another wallet or exchange. This fee is collected by the different blockchain miners and administrators and not the Edge wallet.

What are the pros and cons of using the AIRBITZ wallet?

Pros:

  • Edge is built on an open-sourced technology and also supports two-factor authentication.
  • The wallet app is highly intuitive and beginner-friendly
  • Edge is a multi-currency wallet supporting 40+ cryptocurrencies and tokens.
  • The wallet gives you absolute control of your private keys and password while simplifying the wallet backup process.
  • The wallet features an in-app exchange and integrates a crypto exchange.

Cons:

  • One may still consider the number of supported cryptocurrencies to be limited.
  • It is a mobile app and not available for desktop or online (web) access.
  • It is not a multi-signature wallet.

Comparing AIRBITZ wallet with other Multiblockchain wallets

AIRBITZ wallet vs. BRD wallet

Edge is similar to BRD (also known as Bread wallet). They both started as bitcoin-only wallets before structural upgrades saw them appreciate and store other altcoins. Both are also easy to use, feature an inbuilt exchange, and have a highly intuitive user interface designed to appeal to experienced and beginner crypto traders. The recent update to the Edge wallet has, however, seen it incorporate more operational and security features when compared to BRD. One may also consider the Edge wallet app’s user interface to be user-friendlier.

Verdict: Is the AIRBITZ wallet safe?

Yes, Airbitz – now Edge – crypto wallet app has incorporated a wide range of security features to keep your private keys safe and within your control. These are highly effective and start with keeping all your sensitive information within the wallet and out of anyone’s (including their servers) reach. This data is also subjected to military-grade client-side encryption. The app’s equally effective security features include hierarchically deterministic address generation, biometrics support, and the all-important two-factor authentication. 

Categories
Cryptocurrencies

Natrium Mobile wallet Review: Is It The Safest Neo Blockchain Wallet Yet?

Natrium wallet is a mobile crypto app developed by Appdito and introduced to the Nano community in August 2018. It is an open-sourced mobile app specially designed to further Nano Blockchain’s versatility while guaranteeing the security of the user’s digital assets. Though the community developed it, the wallet app has been subjected to numerous security audits sanctioned by the Nano Foundation that helped push it up the list of most reliable Nano wallets.

On the Natrium wallet website, the crypto app is described as a “Fast, Robust, and Secure Nano Wallet.” But how true is this bold claim? What features make Natrium safe and robust, and how have they influenced its effectiveness? In this Natrium wallet review, we detail its key features and the security measures in place, gauge its ease of use, provide you with a step-by-step guide on how to use the wallet, and tell you if it is the safest Nano Wallet app.

Natrium wallet key features

Mobile wallet: Natrium is a versatile crypto mobile app available for Android and iOS-powered mobile devices. The app can be downloaded from the wallet’s official website, Google play store, or Apple’s app store.

Multi-wallet: Natrium is a multi-account website implying that there is no limit to the number of wallet addresses you can host on the wallet.

Address book: To eliminate the often-costly errors arising from sending cryptos to the wrong address, Natrium has integrated an in-app address book. This allows you to save the wallet address and name of the wallets you interact with regularly.

Real-time wallet notifications: You can also activate the push wallet notification for the wallet, which pops up a notification on your phone or smartwatch’s screen every time you receive Nano coins into your wallet.

SPV protocol for transaction validation: Natrium is a light wallet that doesn’t require you to download a blockchain to your phone and synchronize it with the Nano Mainnet. Rather, it embraces the Simplified Payment Verification (SPV) protocol in confirming and validating new transactions.

Security features

Passcode + Biometrics: When creating a new user account for your Natrium wallet, you will be requested to set a unique and multi-character passphrase. But you also have the option of activating the app’s biometric security feature that allows you to log in to your Natrium wallet using a Fingerprint or Face ID.

Open sourced: Natrium wallet app isn’t just community-led but also built on an open-sourced blockchain technology. Wallet users and blockchain experts are advised to view the code, audit, and come up with recommendations and are also encouraged to fork it and create more improved versions of the Nano Wallet.

Non-custodial: Natrium wallet is privacy-oriented. It not only limits the amount of client data it collects but also ensures that none of your sensitive information is stored on their servers. Rather, all your private data, including passwords and private keys, are encrypted and stored within your device.

Hierarchically deterministic:  Natrium wallet is also hierarchically deterministic, implying that it will auto-generate a new wallet address every time you transact online. This limits the number of individuals who know your real wallet address and seeks to throw crypto trackers off and mask your crypto activity.

Recovery seed: Natrium has also simplified the process of backing up your wallet by presenting you with a 12-phrase recovery seed that you will need to restore lost wallets and recover lost private keys.

Third-party security audit: In furtherance of Natrium’s transparency guarantee, the wallet isn’t just open-sourced but is also subjected to regular security audits by professional blockchain security audit companies like Red4Sec.

How to set and activate the Natrium Mobile wallet

Step 1: Download and install the Natrium wallet app version that is compatible with your device

Step 2: Once installed, launch the app and select “Create a New Wallet” to start the activation process

Step 3: The wallet will now request you to choose the account’s username and create a password

Step 4: You will then be presented with random phrases that make up your wallet’s recovery seed. Write them down and keep them safe offline.

Step 5: Your wallet is now active and ready to use

How to add/receive crypto into your Natrium Mobile wallet

Step 1: Log in to your Natrium Nano wallet and on the user dashboard, click on the “Receive” tab

Step 2: This opens up the deposit window and reveals your public address and QR Code. Copy either of these and forward it to the party, sending you Nano coins

Step 3: Wait for the funds to reflect in your wallet.

How to send crypto from your Natrium Mobile wallet

Step 1: Log in to your Natrium Nano wallet and tap on the “Send” icon on the user dashboard

Step 2: If you have multiple wallets, select the address from whence you would like to send Nano cryptos

Step 3: On the transfer window, enter the recipient’s wallet address and the amount of Nano coins you wish to send

Step 4: Alternatively, select the recipient’s name from the in-app contacts section

Step 5: Check that the transaction details are correct and hit ‘Confirm.’

Natrium Mobile wallet ease of use

Natrium is a highly intuitive crypto wallet with a clean, easily navigable, and modern interface designed to appeal to both the highly experienced and beginner Nano coin traders. It is also easily customizable and allows you to change the icons’ wallet theme, size, and color.

The process of downloading the app and creating a user account is quite straightforward. So are the processes of sending and receiving Nano coins in and out of the wallet.

More importantly, Natrium is a multilingual crypto wallet app that comes available in over 20 international languages.

Natrium Mobile wallet supported currencies

Natrium is a Nano blockchain specific wallet and will, therefore, only host Nano Coins.

Natrium Mobile wallet cost and fees

Downloading the Natrium wallet, creating a user account, and storing coins therein is free.

The fact that the Nano Blockchain doesn’t charge a network fee to confirm or validate Nano transactions also means that you won’t be charged for sending or receiving cryptos into the wallet.

What are the pros and cons of using the Natrium Mobile wallet

Pros:

  • Natrium wallet doesn’t charge network fees for crypto transfers.
  • It is highly intuitive and features a simplistic and beginner-friendly user interface.
  • The use of the SPV protocol makes transaction processing relatively fast.
  • The wallet has embraced highly effective security and privacy measures, including biometrics and anonymous trading.
  • Natrium is highly transparent. It is open-sourced and subject to vetting by independent bitcoin security companies.

Cons:

  • The wallet doesn’t support the important two-factor authentication and multi-signature security measures.
  • Natrium wallet will only support Nano coins.
  • Their customer support team may be sluggish in responding to customer queries.

Comparing Natrium Mobile wallet with other Nano wallets

Natrium Mobile wallet vs. NanoVault web wallet

Natrium mobile and NanoVault are both Nano blockchain wallets that were not only developed by the Nano community members but also vetted and recommended by the Nano Foundation. They are both light and don’t require you to download the Nano blockchain to your wallet. Rather, they have embraced the ultrafast SPV transaction validation protocol.

However, while Natrium is a mobile app, NanoVault is a web wallet. And though they only host the Nano altcoin and record almost similar transaction processing speeds, Natrium can be said to host more operational features, especially the support for an address book and its highly customizable user interface.

Verdict: Is Natrium Mobile wallet safe?

Well, the mobile crypto app has put in place several highly effective security and privacy safeguards around the crypto app. We were especially impressed by their integration of the Biometrics security feature and hierarchically deterministic wallets, as well as their support for anonymous trading. But the fact that it is online-based means that it is not immune to the constant threats (hacking and malicious malware) dogging hot wallets. 

Categories
Cryptocurrencies

Argent wallet Review: Is It The Safest Mobile Wallet App Yet?

Argent is a smart contract wallet developed by Gerald, Julien, and Itamar of Argent Labs and launched in 2018. It is a revolutionary crypto wallet that embraces futuristic security and privacy measures in keeping your private keys safe. For instance, instead of the recovery seed synonymous with virtually every wallet’s security, the wallet introduces “Argent Guardians.” 

Moreover, while your average crypto wallet will only help you store, secure, and manage your altcoins, Argent does all these while allowing you to earn interest and borrow against your digital assets. It is also a Defi-centric wallet that features virtually all the most popular decentralized finance apps.

On the official Argent wallet website, Argent is described as the simplest and most secure crypto vault as well as the “Future of Money.” But how safe and convenient is this crypto wallet app? We answer these questions and tell you everything you need to know about the Argent wallet in this review.

Argent wallet key features

No transaction fees: Argent is the lone Ethereum based crypto wallet app that pays the transaction fee (GAS) on behalf of its clients. In effect, you won’t be charged a transaction fee when using the Argent wallet – regardless of the amounts involved.

PoolTogether dApp: Argent features the PoolTogether Defi app, a “No-loss savings game” that allows individuals to pool together and invest their Dai Coins and let the pool earn interest, with one person getting a chance to win the accumulated interest every week. The platform is powered by smart contracts to eliminate bias.

MakerDao: Argent features yet another Defi app – MakerDao. This is a smart-contract-powered service hosted on the Decentralized network that makes it possible for anyone to lend and earn interest on their digital assets or borrow, invest, and pay back with interest.

Compound Finance: Compound Finance is yet another Defi app that lets you lock your funds with the Compound Finance protocol that, in turn, lends these funds to dApp developers and other crypto investors within the Ethereum network while earning you regular interest.

Inbuilt exchange: You don’t have to leave the Argent wallet to buy, sell, or exchange your digital assets. The wallet features an in-built proprietary exchange and integrates the Kyber Network that has a crypto exchange where you can buy, sell, or exchange crypto for free.

Purchase crypto with fiat: Argent wallet makes it possible for anyone to buy crypto via either credit/debit cards or direct bank transfers.

Human readable addresses: Most crypto wallets (hardware, software, and app) use the traditional hexadecimal (a mix of letters, characters, and numbers) wallet address system. Argent, however, allows you to create a human-readable wallet address (forinstance.argent.xyz) that goes a long way in eliminating the costly errors of getting the wallet address wrong.

Argent security features

Password + Biometrics: Argent wallet is secured with a password that you get to set when creating a user account for your new wallet. You also have the option of activating the biometric security features like fingerprint and Face ID for compatible devices.

Argent guardians: In the place of recovery seeds, the Argent wallet has Argent Guardians. These may be people like close family members using Argent, a phone number or email address that you can use to activate two-factor activation, or other wallets (like Trezor or Ledger). Through smart contracts, you can give these people or devices limited power over your wallet, including powers to help recover your wallet should you forget the password or help you recover lost wallets and private keys.

Transaction limits: Argent wallet lets you set the daily/weekly/monthly crypto transaction limits. This indicates that even if a hacker was to gain access to your wallet, there is a limit to how much they can get away with.

Freeze crypto wallet: Should you lose control of your account or suspect that it has been hacked, you can use Argent Guardians to freeze your wallet.

Non-custodial: Argent wallet doesn’t store your private keys or any of your personal data in their servers. Rather, this information is encrypted and stored on your mobile device.

How to set and activate the Argent wallet

Step 1: Download and install the Argent crypto wallet Google Play Store or Apple App Store

Step 2: Launch the installed app and select “Create a new wallet.”

Step 3: Chose a unique username for your wallet.

Step 4: The wallet will ask for both your mobile number and email address. It will then send you a verification code via SMS and also send you the Activation link via email (both are time-sensitive)

Step 5: You will then receive an email stating whether your wallet has been created or if you have been added to the waitlist.

Step 6: If (or when) the wallet is activated, the app will display a message asking you to finish the wallet creation process

Step 7: Create a passcode to secure your wallet and set up the fingerprint login option (optional)

Step 8: Your Argent wallet is now active and ready to use

How to add/receive crypto into your Argent wallet

Step 1: Log in to your Argent wallet and click on the “Add Funds” tab

Step 2: The wallet deposit will present you with your wallet address and QR code

Step 3: Copy either and forward them to the party sending you altcoins.

Step 4: Alternatively, choose to buy coins from the integrated exchanges

Step 5: Follow the prompts to deposit fiat into the exchange and purchase your preferred crypto.

How to send crypto from your Argent wallet

Step 1: Log in to your Argent wallet and tap on the “Send” icon

Step 2: If you have multiple assets in your wallet, choose the wallet from which to send coins

Step 3: On the transfer window, enter the recipient’s wallet address and the amount of crypto you want to send

Step 4: Alternatively, select the recipient’s wallet address from your contacts tab

Argent wallet ease of use

Argent wallet is highly intuitive and embraces a minimalist design that only features a few buttons on the user interface. It also has smooth and lag-free navigation.

The wallet app is also multilingual and available in four languages. And all these make it appealing to both expert and novice traders.

Argent wallet supported currencies and countries.

Argent is a multicurrency but Ethereum-specific crypto wallet app that currently supports more than 70 cryptocurrencies and tokens. These include Ethereum, Ethereum Classic, all the ERC-20 tokens, and the non-fungible ERC-721 tokens.

Argent wallet cost and fees

Argent is a fee-less cryptocurrency, and you, therefore, will not be charged to download, send/receive crypto into your wallet, or to store these coins in there.

What are the pros and cons of using the Argent wallet:

Pros:

  • Argent wallet is truly free as they pay the GAS transaction fees on your behalf.
  • The wallet employs highly innovative and effective security measures.
  • You don’t have to worry about forgetting your recovery seed when you have Argent Guardians.
  • Argent integrates several Defi apps that let you invest and earn interest from your digital assets.
  • Transaction limits and the ability to freeze the wallet minimize the extent of damage a hacker can cause

Cons:

  • Argent is an Ethereum-only wallet.
  • Though built on the Ethereum network, it doesn’t give you access to most dApps or the block explorer.
  • The fee-free approach may not be sustainable in the long run.

Comparing Argent wallet with other Ethereum-based wallets

Argent wallet vs. MyEtherwallet

Argent and MyEtherwallet are Ethereum-specific wallets that will only support altcoins and cryptos built on the Ethereum blockchain network. However, they embrace different operational and security measures in that while Argent is free, MyEtherwallet charges transaction fees for outbound transactions. Similarly, while MyEtherwallet relies on recovery seed to backup your private keys, the Argent wallet introduces the Guardians. Further, Argent also hosts more cryptos and tokens, embraces more security features, and has an easier-to-use interface.

Verdict: Is the Argent wallet safe?

Well, the Argent wallet has put in place adequate security measures aimed at securing the wallet and limiting the amount of harm that a hacker can cause should they gain access to your account. But a recent security report about Argent Wallet described a highly severe vulnerability that could have allowed hackers to use a bug in Argent’s code and access accounts without Argent Guardians and empty their private keys. And while this vulnerability was discovered and patched early enough by crypto security experts, one can’t help but wonder why it went undiscovered by the Argent team for so long and how many other bugs and vulnerabilities are yet to be discovered.  

Categories
Cryptocurrencies

NEON Wallet Review: Is It The Safest Neo Blockchain Wallet Yet?

NEON Wallet makes it to the list of the most popular wallets designed to store and facilitate your interaction with NEO coins and tokens built on the Neo blockchain. It’s an open-sourced desktop wallet app developed by the City of Zion team and introduced to the world in July 2017. And though it isn’t the official Neo wallet, its code has been reviewed, tested, and approved by the Neo Network developers.

Neon Wallet is marketed as an intuitive, easy to use, and highly secure desktop wallet apps available today. But how true are these claims? What are the factors that make it intuitive and secure? More importantly, how does it compare to other Neo wallets? We answer these questions and tell you everything you need to know about NEON Wallet.

NEON Wallet key features

Cross-platform: Neon wallet is a cross-platform desktop crypto vault that is compatible with all the popular computer operating systems, including Windows, macOS, and Linux. Updated versions of this wallet are available on both the wallet website and GitHub.

Integrates hardware wallets: Neon wallet is compatible with the different types of Ledger hardware wallets. This provides a much-needed boost to not only the number of supported cryptos but also amplifies the security of your private keys.

Multi-coin support: While the Neon wallet is specific to the Neo-blockchain, it supports a host of different coins. These include Neo-blockchain’s native crypto, Neo Coin, GAS, and all the NEP5 tokens.

Lightweight node: Neon wallet is a lightweight, and this means that you don’t have to download the entire NEON blockchain. It, therefore, doesn’t eat into your computer space, speed, or battery life.

Security features

Password encryption: NEON Wallet, like most other desktop-based crypto wallets, is secured with a password, which not only protects the wallet but also acts as an encryption tool for the data therein.

Open source: The Neon wallet is also built on an open-sourced technology. Anyone, including Neon wallet users and Blockchain experts, can view, audit, and propose suggestions on how to best improve the crypto vault. You can view this code from either the NEON Wallet website or the GitHub repository.

Non-custodial: NEON Wallet is a light node desktop client that doesn’t hold your data or store your private keys within their servers. Instead, it gives you absolute control over your private keys by encrypting and saving them in your device.

Backup private keys and history: Neon wallet doesn’t provide its users with a recovery seed. However, they make it possible for you to export and import your decrypted private keys and save them offline in a USB drive or write them down on a piece of paper and store them offline.

How to set and activate the Neon wallet

Step 1: On the Neon wallet website or GitHub, download the updated desktop client that is compatible with your computers operating system

Step 2: Install and launch the wallet.

Step 3: On the startup page, you will be presented with a variety of options; click on the “Create a New Wallet” tab

Step 4: You will now be required to set and verify this password (this protects and encrypts your password)

Step 5: Click on the “Generate Keys” icon to generate an address for your wallet.

Step 6: The wallet will now display the passphrase, public address, private key, and encrypted key. Save this information on your computer or print it and save the copy offline.

Step 7: Hit the‘ Back’ icon to get back to the wallet homepage where you can log in using the saved credentials

Step 8: Your wallet is now active and ready to use

How to add/receive crypto into your Neon wallet

Step1: Login to your Neon wallet

Step 2: Copy the wallet’s public address using the copy clipboard option.

Step 3: Use the copied address to withdraw funds from an exchange or forward it to the party sending you cryptocurrencies

Step 4: Wait for the coins/tokens to reflect on your wallet.

How to send crypto from your Neon wallet

Step 1: Log in to your desktop wallet and click ‘send.’

Step 2: On the ‘Where to send the asset’ section of the transaction details page, enter the recipient’s Neo wallet address and in the amount section, enter the amount of NEO coins you intend to send.

Step 3: Confirm the correctness of these transaction details and hit ‘Send.’

Neon Wallet ease of use

Neon Wallet has a pretty straightforward onboarding process. We also found the wallet to be highly intuitive and beginner-friendly with the send and buy commands strategically placed on the user dashboard. Most of the wallet’s recent upgrades have also been directed towards improving its functionality, as indicated on Neon Wallet’s GitHub page.

For instance, recent updates have ensured that the wallet supports offline signing and authorization of transactions. Additionally, the wallet developers have also introduced multi-lingual functionality to the desktop client and made it available in over ten international languages.

Neon Wallet supported currencies and countries

Neon Wallet is Neo-specific implying that it will only support the Neo coins and any other tokens built on the Neon blockchain.

The supported cryptocurrencies currently include GAS tokens and all NEP5 tokens.

Neon wallet cost and fees

Downloading and installing Neon Wallet or creating a user account is free. You also won’t be charged for storing Neo coins and supported tokens on the wallet.

You will, however, be charged a small transaction fee every time you initiate an outbound transfer. How much you pay in GAS fees is largely dependent on such factors like the number of coins you wish to send and the type of cryptocurrency.

In addition to the transaction fee charged by the Neo blockchain, you might also have to incur additional charges imposed by crypto exchanges.

Note that Neon Wallet will only process whole numbers. Transaction charges will be deducted from the amounts being transferred. For instance, if you wish to send crypto from the Bittrex exchange that charges a $0.1 fee for Neo transactions, you are encouraged only to withdraw a whole number plus the fee. For example, withdraw $28.1 and not $28.5 as the extra $0.4 may be lost.

What are the pros and cons of using the Neon wallet?

Pros:

  • Neon Wallet is highly versatile and compatible with multiple operating systems.
  • The wallet has put in place solid security measures.
  • It is a light wallet that doesn’t require you to download the entire blockchain.
  • The wallet gives you total control of your wallets.
  • The wallet is highly intuitive and has a beginner-friendly user interface.

Cons:

  • It doesn’t support the two-factor functionality.
  • One may consider the number of coins and tokens supported by NEON wallet limited.
  • Neon Wallet stores your private keys in your computer, and this requires that you first invest in quality antivirus that may be costly.
  • One may consider the Neon Wallet’s onboarding process too complicated.

Comparing Neon Wallet with other Neo blockchain wallets

Neon Wallet vs. Neo GUI

Neon Wallet and Neo GUI are both Neo-specific, implying that they will only support Neo coins. Both wallets are also open-sourced, and they have been vetted and approved by the Neon Blockchain development team.

While Neon Wallet is a light node desktop wallet, Neo GUI is a full-stack desktop client. You will need to download the Neo Blockchain to your wallet and synchronize it with the Neo Network main-net if you wish to use Neo GUI. Additionally, the Neon Wallet connects to the Neo Blockchain remotely via nodes, while Neo GUI gives you direct access to the Neo Blockchain user interface.

Verdict: Is Neon wallet safe?

Well, we believe that while Neon wallet has put in place several security measures aimed at protecting your private keys, it has also ignored some key features that would have made the wallet safer. For instance, it doesn’t support two-factor functionality or multi-signature signing. The wallet address generation process is also not hierarchically deterministic. All these, plus the fact that it is an online-based wallet and thus exposed to threats inherent to hot wallets, pierce its security veil. Its ease of use and inexpensive transaction costs nevertheless make it ideal for active smallholder traders. 

Categories
Cryptocurrencies

NEO Wallet Review: Is It The Safest Neo Blockchain Wallet Yet?

Neo wallet is a web-based crypto wallet developed for the Neo Blockchain by the Neo community. According to its developers, the wallet is specially designed and aimed at addressing the three key challenges facing most crypto wallets: ease of use, security, and transaction processing speeds. To achieve this, they ensured that the wallet is ultralight, integrated an easily navigable user interface, and embraced all the critical security and privacy measures.

But have these measures been effective in making Neo Wallet the most secure and easy to use a crypto vault? What other measures have the wallet embraced to boost its security and effectiveness? We answer these and more in this Neo Wallet review.

NEO Wallet key features

Web-wallet: Neo wallet is a web wallet and one of the few online-based Neo-specific crypto vaults. However, the wallet’s versatility is quite limited, as you can only access a NEO Wallet using Google Chrome or Microsoft’s Edge browser.

Community-led project: Neo Wallet is a highly transparent and community-led crypto project. It is developed by blockchain experts from within the Neo blockchain community, but it has been audited and received the necessary approval from the Neo Network administrators.

Transaction tracking: One of Neo Wallet’s key features is its crypto-tracking tool that allows you to monitor your crypto inflows and outflows. The tool helps you keep tabs on your crypto spending and budget.

Contact list: Another handy and unique feature from the Neo wallet is the contact list button on the user dashboard. Here you can save the wallet addresses for the parties (both individuals and exchanges) you regularly engage instead of manually keying in their public addresses every time you wish to send them Neo coins or GAS, simply select their address from your contact list.

Earn through stacking: Neo Wallet also makes it possible for you to earn through staking your NEO Coins. Staking here refers to committing a portion (or the entirety) of your NEO coins to the network in return for a share of the interest by the blockchain in GAS tokens.

Security features

Password encryption: The password is the primary security feature used by the Neo Web wallet in keeping your digital assets secure. And it also serves as an encryption tool for the password.

Wallet backup: Neo wallet simplifies the process of backing up your private keys and the entire wallet by providing you with a backup icon on the user dashboard. And there are two primary ways of backing up your wallet: First, you can save a copy on your computer or phone. Secondly, you can write down the wallet details, especially the private keys and public addresses, and save them offline on paper.

Open source: The Neo web wallet is also built on an open-sourced technology that can be vetted and audited by virtually anyone. This code can be accessed on either the web wallet’s official website, Neo.org and GitHub.

Non-custodial: Though it is web-based and works by relaying your Neo activity to the Neo blockchain processors, Neo is a non-custodial wallet. This implies that it will only store your private keys on your device and not on the wallet or blockchain servers.

Anonymous trading: Neo web wallet promotes anonymous trading by limiting the amount of client personal data they collect or store. You will note that the wallet doesn’t collect any personal information, and any other data collected by the wallet is encrypted and saved in your device.

How to set and activate the NEO wallet

Step 1: Open the Neowallet.cn website to access the wallet registration page

Step 2: Click on the “Start” icon and select “Create a wallet.”

Step 3: Backup the wallet by clicking on “Backup your current wallet,” after which the auto-generates the wallet backup and saves it as a file in your computer

Step 4: Click on the “I have backed up my current wallet” icon to access your public address, QR code and to view your wallet’s private key

Step 5: Your account is now active and ready for use

How to add/receive crypto into your NEO wallet

Step 1: Log in to your Neo wallet and on the user dashboard, click “Receive.”

Step 2: Copy the public wallet address and forward it to the party sending you coins or have them scan the wallet WR code

Step 3: Wait for the funds to reflect on your wallet

How to send crypto from your NEO wallet

Step 1: Log in to your Neo web wallet account and click the “Home” icon the user dashboard to open the Transfer page

Step 2: Select the type of cryptocurrency you wish to send

Step 3: On the receiver tab, you can choose to enter the recipient’s wallet address or simply use the contacts button if you have their address saved in your wallet

Step 4: Enter the number of coins you wish to send on the ‘value’ tab

Step 5: Check that these details are accurate and click ‘Confirm Transfer.’

NEO wallet ease of use

Neo web wallet has one of the easiest to use user interface that is specially designed for both experienced and novice trader NEO traders. The contact list and wallet backup tabs are especially important as they eliminate errors when sending cryptos and simplify the wallet backup processes.

The fact that it is online-based also ensures that the wallet is ultra-light, meaning that it does not consume much of your computer space while maintaining faster transaction processing speeds.

Note, however, that the wallet is only available in two languages: English and Chinese.

NEO wallet supported currencies and countries

Neo web wallet is Neo-specific and will only host NEO coins – native to the blockchain – and Gas tokens.

NEO wallet cost and fees

Creating a user account and storing your Neo or Neo GAS on the Neo web wallet is free.

You will, however, be charged a small transaction fee every time you send Neo coins to another wallet. The transaction charge goes to the Neo Network and not Neo web wallet and is hugely dependent on the type and amount of crypto you want to send.

What are the pros and cons of using the NEO wallet?

Pros:

  • Web Wallet is online based and therefore available on the move, plus it doesn’t eat into your computer space
  • The online wallet allows you to easily backup your account vis the backup wallet icon the dashboard
  • Neo wallet is highly intuitive and easy to use for both novice and experienced traders
  • The transaction processing fees are relatively low
  • The Neo staking feature makes it possible for you to earn for holding a specific amount of Neo coins in your wallet
  • The wallet encourages anonymous trading as it doesn’t collect personally-identifiable client data

Cons:

  • The wallet ignores key security measures like two-factor authentication and HD wallet address generation
  • It is online-based and therefore immune to the inherent threats facing hot wallets
  • It can only support two cryptocurrencies

Comparing NEO wallet with other Neo blockchain wallets

NEO wallet vs. NEON Wallet

Neo wallet and Neon wallet’s primary difference is that Neo is a web-wallet while Neon is a lightweight desktop client. Otherwise, they are both neo-specific wallets built and managed by members of the Neo-blockchain community. They are also light and connect to the Neo mainnet via remote nodes.

Further, they are lightweight and specially designed to offer faster transaction processing speeds than their GUI counterparts. The Neo web wallet, however, carries the day when it comes to the number of integrated features, especially when you consider the contact list, Claim, and Backup wallet tabs on the user dashboard.

Verdict: Is the NEO wallet safe?

Neo web wallet has put in place several measures to guarantee the privacy and anonymity of the crypto wallet. It, for instance, does not collect any client data when you are creating a user account. It also encrypts all the data held in your wallet and stores it in your device. However, it doesn’t support the all-important two-factor authentication, and its online nature exposes it to numerous hot-wallet related threats.

Categories
Cryptocurrencies

GUI Light Wallet Review: Security, Features, And Ease of Use

The GUI light wallet is a highly innovative crypto wallet that stores and helps you manage your IOTA tokens. According to the IOTA foundation, GUI Light is specially designed to provide IOTA altcoin holders with the most user-friendly, simple, and inexpensive way of securing and interacting with their digital assets. The wallet was launched in 2016 and has since been subjected to several upgrades that introduced vital security and operational features.

In this GUI Light wallet review, we will be vetting the effectiveness of its security features. We will also look at the wallet’s user-friendliness and highlight its pros and cons before comparing it with other IOTA-only crypto wallets.

We start by looking at its key operational features.

Key features:

Integrated into IOTA GUI: GUI Light wallet draws its name from the fact that it is incorporated into the IOTA network’s Graphical User Interface. It not only allows you to store your IOTA coins but also provides you with a direct link to the IOTA network.

Double spend warnings: The double-spend warning feature is a recent upgrade to the GUI Light wallet aimed at helping you avoid conflicting transactions. It warns you every time you attempt to initiate an outbound transfer twice, especially if the first transaction hasn’t been confirmed. You can choose the ‘Yes, send it now’ option for legitimate transfers and ‘No, Cancel’ option for a double-spend transaction.

Light node: There are two versions of the GUI IOTA wallet: Full node and Light Node. The GUI Light Wallet is light, non-technical, and specially designed for beginner traders. It makes it possible for you to run and interact with the IOTA network without installing the desktop client that eats into your computer speed and storage space.

Highly versatile: GUI Light wallet is a desktop app wallet. It is also highly versatile and compatible with all the popular operating systems, including Windows, macOS, and Linux.

Track your portfolio: On the GUI Light wallet user dashboard is the History tab as well as the balance display tab that lets you track your IOTA tokens inflow and outflow. These go a long way in helping monitor your spending as well as budgeting and finance management.

Security and privacy features:

Password: Like any other crypto wallet, the GUI Light wallet is secured with a password that you set when creating a user account.

Recovery seed: When setting up your GUI light wallet user profile, you will be provided with a recovery seed. Write it down and keep it safe, as you will need it to reset the wallet password and recover your private keys from a lost wallet.

Open source: The GUI Light wallet is built on an open-sourced technology. This implies that virtually anyone can view and audit the wallet’s source code and possibly identify malicious codes or other security loopholes.

Community-led development: The fact that the GUI Light wallet was created and is currently maintained by the IOTA Foundation it centralizes its operations. However, the foundation is gradually walking away from this centralized control of the wallet by bringing onboard developers from the IOTA community. It hopes to ultimately dissociate itself from the wallet and hand it over to the community developers who will direct future upgrades and further developments.

Non-custodial: This desktop app wallet stores your private keys in your computer and not on the IOTA Foundation servers, giving absolute control over your wallets.

How to set up and activate the GUI Light wallet

Step 1: Open GitHub and search for GUI Light wallet

Step 2: Download the most recent update of this desktop wallet that is compatible with your desktop/laptop’s operating system

Step 3: Click on install and select light node

Step 4: Complete the registration tab by entering your email address and setting your wallet’s password

Step 5: The wallet will provide you with a recovery seed. Copy these phrases onto a piece of paper and store them on a safe place offline

Step 6: Your wallet is now active and ready for use

How to add/receive coins to GUI Light wallet

Step 1: Log in to your GUI Light Wallet

Step 2: On the user dashboard, click on ‘Receive.’

Step 3: This will reveal your wallet address and QR code. Copy either and send them to the individual sending you IOTA Coins

Step 4: Wait for the coins to reflect on your wallet

How to send crypto from GUI Light wallet

Step 1: Log in to your GUI Light wallet

Step 2: On your user dashboard, click on ‘Send.’

Step 3: Enter the recipient’s wallet address and the amount of IOTA coins you wish to send

Step 4: Confirm the correctness of these details and hit send.

GUI Light wallet ease of use

GUI Light wallet has one of the easiest and most straightforward onboarding processes. The wallet is easy to navigate and fast in executing crypto transactions. Further, all the important tabs like Send, Receive, and History are neatly arranged and easily accessible on the user dashboard.

Importantly, a recent community-led upgrade to the GUI Light wallet introduced different translations to the wallet. GUI Light wallet is now multi-lingual, supporting more than 15 international languages.

GUI Light wallet supported currencies and countries

GUI Light wallet will only support IOTA coins. And unlike most other crypto-specific wallets that integrate an inbuilt exchange or third party crypto conversion platform, GUI is quite rigid. You first have to convert your crypto or fiat currencies into IOTA on third party exchanges before adding them to your crypto wallet.

GUI Light wallet cost and fees

GUI Light Wallet is free to download, install, and use.  Therefore, you will not be charged to receive or send IOTA coins from your wallet. Instead of the traditional miner and administration fees charged by most blockchain networks, IOTA Network uses proof of work consensus to fund crypto operations. Here, you are required to commit your computational power and approve two previous transactions before you can have your transaction checked and validated.

What are the pros and cons of using GUI Light wallet:

Pros:

  • GUI Light wallet is one of the handful crypto wallets that don’t charge transactions fees on transfers out
  • GUI Light wallet is incorporated into the IOTA blockchain network’s user interface
  • GUI Light wallet is gradually moving towards community-led management and development of the crypto wallet
  • The wallet is non-custodial, and this gives you control over your private keys

Cons:

  • Beginner traders may find GUI Light wallet too complex
  • The IOTA network has been a target of most phishing and hacking schemes that have almost resulted in the loss of tokens and significant downtimes
  • There is no mobile app for the GUI Wallet app
  • The desktop wallet will only support one altcoin – IOTA Coins
  • Comparing GUI Light wallet to other IOTA crypto wallets

GUI Light wallet vs. Nostalgia light wallet

Both GUI Light Wallet and Nostalgia wallet are IOTA specific and will only support IOTA coins. They can also be considered light wallets, as they don’t require you to download the IOTA network full node to your computer. Their differences stem from the fact that while the GUI wallet is incorporated into the IOTA networks user interface, Nostalgia will only work if connected to a full node network that has its Proof of Work feature activated. Moreover, while light wallet is a desktop wallet, Nostalgia is a Google Chrome browser extension.

Verdict: Is GUI Light wallet safe?

GUI Light wallet is highly convenient, easy to use, and inexpensive crypto vault for IOTA Coins. It has also put in place several effective security measures that not only deter unauthorized access but also boost the privacy of your digital assets. These include a multi-character password, building the wallet on open-sourced technology, private keys, and moving towards a community-led development model that guarantees transparency. There are, however, numerous user concerns about the safety of the private keys stored in the crypto wallet, especially after the constant hacks and lack of such handy security measures as two-factor authentication. 

Categories
Cryptocurrencies

MyMonero wallet Review: How Safe Is This Desktop And Mobile Wallet App?

MyMonero is a lightweight desktop and iOS app wallet developed by Monero Project steward, Riccardo Spagni, and the Monero Core Team. It was launched in 2014 as an alternative to Monero GUI – the full node client for Monero blockchain. And it seeks to address some of the challenges faced by Monero GUI users, including slow transaction processing speeds, extended wallet startup times, and drag on your computer memory, storage, and battery life.

On the MyMonero website, this desktop and mobile app wallet is described as the “Sweet spot between convenience, security, and features.” The website further adds that its development team has “Ironed out the technical details … so you can get back to business” by prioritizing the crypto wallet’s design.

But has MyMonero lived up to its expectations when it comes to balancing the ease of use with security and privacy? We answer this question and more in this MyMonero review.

MyMonero key features

Cross-platform support: MyMonero is a highly versatile crypto wallet that is compatible with multiple operating systems. Unlike the traditional Monero GUI that was only available as a desktop client, MyMonero is available as a web wallet, desktop app (Linux, Windows, and macOS compatible), and iOS mobile app.

Lightweight: MyMonero crypto wallet is also extremely light as it offloads all the heavy work to the MyMonero servers. This implies that you no longer have to download the Monero blockchain that drains its storage and RAM while eating into the battery life of your phone or computer.

Synchronized cross-platform experience: One of MyMonero wallet’s unique features is its cross-platform synchronization experience. This implies that you can easily get access to your wallet account, view transaction history and balances on any device. You only need the seed words to login to your wallet via any device.

Smart contacts management tool: MyMonero has an inbuilt Rolodex that helps you keep track of your private addresses, payment IDs, and OpenAlis addresses. You can also use smart Rolodex to manage your wallet contacts.

Speedy transfers: One of the benefits of MyMonero wallet’s lightweight nature is its speedy startup and fast transaction processing capabilities. You no longer have to wait, hours on end, for the full node client to sync with your wallet to initiate a Monero transaction.

MyMonero Security and privacy features

Password: Like any crypto wallet, MYMonero is secured with a password. The user sets this multi-character password during app installation and when registering a wallet account. It serves to protect your wallet from authorized attacks and also doubles up as an encryption tool.

Non-custodial: While MyMonero wallet servers run virtually all the wallet transactions, it won’t store your private keys. These are stored within the computer or mobile devices, giving you total control over your digital assets.

Strong encryption: All the data held in a MyMonero wallet is highly encrypted, especially the private keys and wallet communications with project servers and other third-party systems.

Native privacy: Monero takes pride in being one of the safest and most private blockchain networks around. MyMonero has taken this a step further and promotes anonymous crypto transactions by ensuring that the wallet doesn’t ask for any of your personally-identifiable details like name, address, or email. It also doesn’t keep logs for your crypto transactions, location, or device IP address. This approach to privacy beats the rudimental privacy systems put in place by some popular crypto wallets.

Open sourced: MyMonero wallet is also built on an open-sourced technology. Its users and blockchain security experts can view, audit, and recommend adjustments to the wallet app from its GitHub wallet repository.

How to set up and activate the MyMonero wallet

Step 1: Open the MyMonero official website and download the web wallet that is compatible with your device’s operating system

Step 2: Install and launch the wallet app to start the registration process

Step 3: Note that the app doesn’t ask for registration details. Rather, it will provide you with a private login key made up of 12 random phrases that double up as the wallet’s recovery seed and request that you set a password.

(Note: Write this private login key down on a physical piece of paper and keep it safe. You will not only need it to access the wallet on different devices, but it will also be needed when recovering lost private keys)

Step 4: Confirm that you have correctly written down the private login key by reentering it on the prompt tab

Step 5: Chose your preferred language and login to your MyMonero wallet

Step 6: Your account is now active and ready for use

How to add/receive coins to MyMonero wallet

Step 1: Log in to your MyMonero wallet, and on the user dashboard, click ‘Receive.’

Step 2: Copy the wallet’s public address or the QR code and forward either to the party sending you the Monero cryptos

Step 3: Wait for the coins to reflect on your wallet

How to send crypto from MyMonero wallet

Step 1: Log in to your MyMonero wallet and click the ‘Send’ tab on the user dashboard

Step 2: On the popup window, enter the recipient’s wallet address and amount of XMR you wish to send

Step 3: Enter the payment ID (This helps differentiate your transaction from others and is especially important when sending cryptos to an exchange)

Step 4: Set the privacy level for your transactions, from minimum to high or Paranoid (Monero pushes private transactions by bundling several transactions together and making it impossible to track either one to your crypto wallet. The ring size, presented as “With # others,” refers to the number of transactions bundled alongside yours).

Step 5: Confirm the correctness of the transaction details and hit send

MyMonero wallet ease of use

Downloading and installing the MyMonero wallet app or registering a user account on the MyMonero web wallet is easy. It also features a highly intuitive and beginner-friendly user interface. The user dashboard is also multi-lingual, easily navigable, and only features the most important aspects of the wallet. The process of sending and receiving cryptos into MyMonero wallet is equally easy and straightforward.

MyMonero wallet supported currencies.

MyMonero wallet will only support Monero (XMR)  altcoins.

MyMonero wallet cost and fees

Downloading and installing the MyMonero wallet is free, and so is storing your XMR altcoins in the wallet. However, you will be charged a transaction fee every time you send XMR coins to another wallet or exchange. Ideally, there are two types of fees acting on an XMR transaction.

First, is the tax charged based on the amount of data it takes to complete the transaction. It is measured in Kilobytes and is charged at 0.002XMRs per KB. Second is the miner’s fee, which is approximately 50% of the transaction cost.

What are the pros and cons of using MyMonero wallet

Pros:

  • MyMonero is a light wallet that doesn’t require you to download the full node blockchain
  • MyMonero is private and highly encrypted to guarantee the privacy of your digital assets
  • The wallet has one of the most interactive and beginner-friendly user interfaces
  • The wallet is also relatively inexpensive
  • It allows for anonymous registration and facilitates private crypto transactions

Cons:

  • MyMonero will only support XRM cryptocurrencies
  • It is an online wallet and still susceptible to the inherent risks facing hot wallets
  • The wallet doesn’t support multi-signature functionality
  • Comparing MyMonero wallet to other Eth-based crypto wallets

MyMonero wallet vs. Monero GUI

MyMonero desktop wallet can be best described as the stripped-down version of the Monero GUI. The two are almost identical in that they have similar roles in storing XRM coins and facilitating Monero transactions. The only difference between the two is that Monero GUI is a full node desktop client, while MyMonero is a light desktop app. These make MyWallet relatively easier to use and faster compared to Monero GUI.

Verdict: Is MyMonero wallet safe?

Well, MyMonero embraces the privacy-oriented nature of the Monero blockchain in the execution of its functions. It will not ask for the client’s personal data, nor collect or keep logs of your crypto activity. Additionally, any information stored within the open-sourced wallet is highly encrypted. These features have made MyMonero one of the most secure and one of the most private crypto wallets. However, we must observe that, though it is non-custodial, MyMonero is still online-based and, therefore, exposed to the inherent risks facing hot wallets. 

Categories
Cryptocurrencies

ImToken Wallet Review: Is This Multi-Currency Wallet App Safe?

ImToken wallet was created by ConsenLabs and launched in May 2016. And in the past few years, ImToken has morphed into one of the most popular cryptocurrency wallets and a favorite for Ethereum and eth-based token holders.

On their website, the ImToken wallet app is described as a ‘Multi-chain wallet’ where you can ‘store assets securely and exchange coins freely.’ The website also adds that the wallet is specially designed to ‘Lower the threshold for users to obtain digital assets and daily use’ without worrying about the ‘security management of the account’s private key.’

ImToken wallet app also markets itself as an easy to use and highly secure vault. In this review, we query these claims by looking at its key features, walking you through the account activation process, and vetting the security measures put in place. We also look at its customer support, the number of supported currencies, and compare it to other popular Ethereum-based crypto wallet apps.

Key features:

Multi-coin support: ImToken started as an Ethereum-only wallet app. However, recent upgrades to the crypto wallet have seen it incorporate some of the highly popular cryptocurrencies and stable coins.

Inbuilt exchange: ImToken recently introduced a token swap feature on their platform that allows quick token swaps. This inbuilt exchange is free and enables imtoken users to swap cryptos for other cryptos or stable coins for free. You only have to pay the transaction fees (GAS) charged by the Ethereum network.

DApp browser support: The wallet also integrates a highly versatile dapp browser. It features a wide range of Dapps, including games and social networking platforms. The browser is privacy-oriented and lets you decide if the hosted apps can read the wallet information. 

Compatible with hardware wallets: ImToken crypto wallet app is highly versatile and compatible with multiple hardware wallets. These include their ImKey Pro hardware wallet and other mainstream wallets like Ledger, Trezor, and CoolWallet.

Earn through staking: ImToken, in partnership with SparkPool and HashQuark, allows you to stake different coins, stablecoins, or imBTC and earn an interest of between 2%-20% p.a. The staking process is easy and straightforward. You can use the onscreen calculator to determine how much you stand to gain through staking and have any interest earned deposited to your wallet daily.

Supports multiple operating systems: ImToken crypto wallet app is available to both Android and iOS smartphone devices.

Security and privacy features:

Password: Like most wallet apps, ImToken is secured with a password set by the user during the installation process.

Recovery phrase: During the installation process, the ImToken wallet will also present you with a 12-word recovery phrase. Write it down and keep it safe offline as you will need it to reset your password, recover lost private keys, and restore your wallet on a different device.

Non-custodial: ImToen wallet app is non-custodial. All your private keys are, therefore, stored within your device, not on the company servers. This effectively gives you absolute control over your private keys.

Open source: The wallet app is built on an open-sourced technology. This means that anyone using the app and verified blockchain security experts can read and audit the wallet’s code, check malicious codes, and vet its transparency.

Hierarchically deterministic: Your privacy within the app is guaranteed by the fact that the app is hierarchically deterministic. It will automatically generate a new wallet address for every transaction, effectively masking your online transactions and evading crypto trackers.

Offline transaction signing: You can also integrate it with hardware wallets to activate offline transaction processing.  And you achieve this by connecting the app and the hardware wallet via Bluetooth and signing the transactions offline. In such a case, you only get online to broadcast the transaction.

Third-party security audits: Apart from being open-sourced, the ImToken crypto wallet is also subjected to regular security audits by popular security companies, including SlowMist, PeckShield, Cure53, and Knownsec.

How to set up and activate the ImToken wallet

Step 1: Download and install the ImToken wallet and select ‘Create Identity’ to start the account creation process

Step 2: Go through and agree to the wallets terms of use

Step 3: Complete the user profile by keying in your wallet username, password, and password hint

Step 4: The wallet will then provide you with 12 random words that form your recovery seed. Write them down and save them offline

Step 5: Your ImToken crypto wallet app is now active and ready for use

How to add/receive coins to ImToken wallet

Step 1: Log in to your ImTokem crypto wallet and click on the three dots on the far right corner of the user dashboard

Step 2: Select receive cryptos and click on the crypto you would like to receive to reveal the wallet address

Step 3: Copy the address and forward it to the party sending you coins

Step 4: Wait for your the coins to reflect on your wallet

How to send crypto from ImToken wallet

Step 1: Log in to your ImTokem crypto wallet and click on the three dots on the far right corner of the user dashboard

Step 2: Select send and click on the cryptocoins you would like to send

Step 3: On the popup tab, enter the recipient’s wallet address and the amount of crypto you would like to send

Step 4: Chose the transaction price

Step 5: Confirm that the transaction details are correct and send

ImToken wallet ease of use

The wallet installation and activation processes are easy and straightforward, and so is sending and receiving cryptos into the wallet. It is also intuitive and easily navigable. These factors make the ImToken wallet easy to use for both beginner and experienced traders. All the integrated platforms, including the dapp browser and inbuilt exchange, are also highly intuitive and easy to use.

ImToken wallet supported currencies and countries

ImToken crypto wallet app currently supports ten cryptocurrencies and eight main stable coins. These include Ethereum. BTC, BCH, COSMOS, LTC, USDT, USDC, DAI, and USDX. This crypto wallet app is available in over 200 countries.

ImToken wallet cost and fees

Downloading and installing the ImToken crypto wallet is free. Further, ConsenLabs won’t charge you when you swap cryptos or tokens using their proprietary Tokenlon exchange.

However, you will be charged Ethereum blockchain network fees every time you send crypto from the wallet app to another wallet or third party exchange. ImToken has nevertheless embraced the reduce-by-fee protocol that lets you set your preferred transaction fees. Ideally, the higher the transaction fees, the faster the transaction, while lower fees always translate to lower transaction processing speeds.

ImToken wallet Customer support

ImToken support starts with the rather elaborate FAQs page on their website. You can also contact the wallets support team via the live chat icon on their website. Alternatively, you can raise a support ticket on their website’s ‘Contact Us’ page or message them via their official social media pages

What are the pros and cons of using the ImToken Wallet?

Pros:

  • ImToken wallet is a highly secure app that employs several security measures
  • The wallet app features several annexed features that include a dapp browser and an inbuilt exchange
  • The wallet is highly intuitive and beginner-friendly
  • Their customer support is readily available and highly responsive
  • The wallet is non-custodial and gives you absolute control over your wallet

Cons:

  • The wallet doesn’t support such security features as two-factor authentication
  • ImToken doesn’t support fiat deposits, and you, therefore, have to use third-party currency convertors 

Comparing ImToken wallet to other Eth-based crypto wallets

ImToken wallet vs. MyEtherWallet

ImToken and MyEtherellet are hugely popular crypto wallet apps built on the Ethereum blockchain technology. Both are free to acquire, easy to use, and give you control over your private keys by storing them in your device. However, unlike MyEtherWalet that will only support Eth-based cryptos and tokens, ImToken has increased the number of supported currencies to 18. It also integrates an inbuilt exchange and DApps browser. More importantly, it lets you control the level of access DApps have on your wallet and the transaction fees (Gas) charged on outbound transactions.

Verdict: Is ImToken wallet safe?

ImToken wallet has put in place numerous effective security measures aimed at keeping your private keys safe. The multi-character password and offline transaction signing provide a privacy guarantee, the open-sourced nature and third-party security audits provide a transparency guarantee while the recovery seed helps you recover lost keys. 

Categories
Cryptocurrencies

NEM Nano Wallet Review: Security, Fees, Features, Pros, And Cons

NEM Wallet is a desktop client and the official desktop wallet app for the NEM network. This makes it the home for the NEM network’s native cryptocurrency – XEM token – and all other cryptos built using the NEM technology. It is a light version of the NEM wallet and specially designed for the network and XEM token users who do not wish to store and run the full node blockchain on their computer.

On their website, NEM desktop client is described as a “cross-platform lite wallet” that you can use to ‘manage your assets and interact with the NEM NIS1 network.’ It was created in 2014, has over the years, been subjected to several community-led upgrades, aimed at making it the most intuitive and highly secure desktop wallet. This includes delegating its maintenance and future developments to an independent team of blockchain experts, elected by the NEM community.

In this review, we want to determine the effectiveness and safety of this desktop wallet. We will detail its key security features, ease of use, and customer support.

Key features:

Integrated exchange: While NEM Network doesn’t have a proprietary exchange, its desktop client integrates a third party exchange – Changelly. This allows you to purchase XEM Tokens using either fiat or other cryptocurrencies.

Compatible with multiple OS: NEM Nano is a highly versatile desktop wallet that is compatible with virtually all the most popular operating systems. These include Linux, macOS, and Windows.

Multi-account support: There is no limit to the number of user accounts or wallets that you can open when using the NEM desktop client. Similarly, there is no limit to the number of XEM Tokens you can host on the NEM Wallet.

Synchronization with NEM mobile wallet: If you are looking for portability and faster transactions, easily synchronize the NEM Nano wallet with the NEM mobile wallet. This ensures that your transactions on the desktop wallet reflect on the mobile app in real-time. It also means that accounts and wallets created on the mobile wallet can be seamlessly exported to the desktop wallet and vice versa.

Integrates NEM harvesting: The NEM Network uses proof of work consensus for validating transactions. Instead of the traditional staking and mining reward schemes adopted by most blockchain networks, NEM embraces Harvesting. The desktop client integrates the harvesting feature, but you need to first commit 10,000 XEM Tokens to qualify as a validator and start earning transaction fees.

Integrates with hardware wallets: In addition to integrating the NEM mobile wallet, the desktop client also integrates with such hardware wallets as TREZOR.

Security and privacy features:

Password and recovery seed: When installing and activating the NEM Nano wallet, you will first be asked to set a password. You will also be provided with a 12-24 word recovery phrase that you can use to reset the wallet password and recover lost private keys.

Highly transparent: The NEM desktop wallet is also built on an open-sourced technology. It is also managed and developed by an independent team of blockchain experts elected by the NEM Network community members. And these features are a guarantee of the wallet’s commitment to transparency.

Hierarchically deterministic: Every time you initiate a new transaction, the NEM Desktop wallet will auto-generate a new wallet address. The new address is used in place of your real public address, making it harder for crypto trackers to monitor your transactions online.

Wallet backup: The NEM Nano wallet makes it possible to back up your private keys offline in another hardware wallet or USB drive. The wallet will even remind you to create a decrypted offline backup for your keys every time you create a new user account.

Military-grade encryption: NEM Nano wallet minimizes the amount of personally identifiable information it collects. Additionally, all the wallet data, including your private keys and passwords, are highly encrypted.

Non-custodial: The desktop wallet is also non-custodial and stores your private keys on your computer, not on the company servers. You, therefore, have absolute control over your wallet.

How to set up and activate the NEM Nano wallet

Step 1: Open the official NEM Network website and download the Nano Wallet that is compatible with your computers operating system.

Step 2: Install and launch the wallet. It will give you the choice of creating a ‘Private Key Wallet’ or a ‘Simple wallet,’ choose Simple Wallet.

Step 3: Create a unique username and password for the crypto wallet.

Step 4: Generate the primary private key by clicking ‘Start’ on the next window and moving.

Step 5: Download the wallet decrypted backup for your wallet or copy the raw wallet data and store it in a clean drive office.

Step 6: Back up your private key by printing it or copying the raw file and store in a secure environment offline.

Step 7: You will now be redirected to the signup page to log in and access your active wallet.

How to add/receive coins to NEM Nano wallet

Step 1: Start by logging into your NEM Nano wallet and take note of your public wallet address on the user dashboard.

Step 2: Click on the ‘Services’ tab, and under ‘Exchange services,’ select ‘Buy XEM on Changelly.’

Step 3: Alternatively, first buy BUT on Fiat-to-crypto exchange and then exchange these Bitcoins for XEM tokens on an exchange that lists the NEM token – like Bittrex.

Step 4: On either exchange, click on send and enter your public address to send the purchased XEM tokens to your wallet.

How to send crypto from NEM Nano wallet

Step 1: Log in to your NEM Nano wallet, and on the user dashboard, click ‘Send.’

Step 2: On the pop-up window, enter the recipient’s wallet address as well as the amount of XEM Tokens you wish to transfer.

Step 3: Enter a message you would like to send (optional) and set the transaction price.

Step 4: Confirm the correctness of these details and hit send.

NEM Nano wallet ease of use

NEM Nano wallet’s onboarding process, though lengthy, is quite straightforward. It also has a highly intuitive interface that makes it beginner-friendly. The processes of sending and receiving XEM tokens to the wallet are also seamless, while the integration of the third party exchange eases the currency conversion process.

NEM Nano wallet supported currencies

NEM Nano is NEM network-specific and will only support the blockchain’s native token – XEM – or other cryptocurrencies built using the NEX technology.

NEM Nano wallet cost and fees

Downloading and installing the NEM Nano desktop client is free. You also won’t be charged for creating user accounts and private addresses or storing your private keys on the desktop wallet. You will only be charged a small transaction fee every time you wish to send XEM tokens to another wallet or exchange.

 This fee is nevertheless highly dynamic and gives you the freedom to set the maximum charge you are willing to pay for a transaction. Typically, a higher fee translates to faster transaction processing.

NEM Nano wallet Customer support

NEM Nano wallet has a readily available and highly responsive customer support team. You can contact them via the live chat feature on the NEM website by raising a support ticket on the website’s ‘Contact Us’ page or by messaging them on their official social media pages.

What are the pros and cons of using NEM Nano wallet

Pros:

  • The wallet user interface is highly intuitive and beginner-friendly
  • There is no limit to the number of user accounts you can create on the wallet or the number of XEM tokens you can store in here.
  • The wallet reminds you to create a backup for your wallet and private keys every time you create a new user account.
  • NEM Nano wallet is highly transparent as it is not only built on an open-sourced technology but has also embraced community-led maintenance
  • You can also synchronize it with the NEM mobile wallet.

Cons:

  • One may consider the wallet’s set-up process to be too complicated.
  • NEM Nano is still a hot wallet and exposed to hacking risks and malicious computer viruses

Verdict: Is the NEM Nano wallet safe?

Well, the NEM Nano wallet has put in place numerous security and anonymity measures meant to guarantee the security of your private keys. For starters, it has open-sourced the wallet’s technology and made it possible to back up both the wallet and the private keys.

Moreover, the wallet is hierarchically deterministic, and all data stored therein is highly encrypted. However, we must observe that while these measures have been effective in guarding against hacks and breaches since the wallet was launched, the Nano wallet is still susceptible to the inherent challenges affecting online wallets.

Categories
Cryptocurrencies

Freewallet Review: Is It A Safe Cryptocurrency Wallet Or A Scam?

According to their website, Freewallet is specially designed to help you access, manage, and store crypto with ease. It comprises of both individual wallets for specific cryptocurrencies and Freewallet Lite – the multi-currency wallet. Single wallets are available as mobile apps, while the multi-currency wallet is available as a mobile app and a web interface. Some of Freewallet’s key features are its dynamic fee system, support for individual crypto wallets, and the fact that it is custodial.

But what makes Freewallet unique? Does its custodial nature make it safer than the next wallet, or is it a scam? We answer these questions in this Freewallet review by detailing some of its key operational and security features. We will also look at its pros and cons and compare its effectiveness with similar crypto wallets.

Key features:

In-built exchange: Freewallet features an inbuilt exchange that supports the trade of 100+ cryptocurrencies. Note, however, that this exchange is only available to the multi-currency wallet users. Plus, it is only accessible via the web wallet.

Single and multi-currency wallets: Freewallet hosts two types of crypto wallets: the Individual crypto wallets that host a specific digital coin like Bitcoin, Litecoin, Ethereum, or Dogecoin and the multi-currency Freewallet Lite that supports 100+ cryptocurrencies.

Free in-app transfers: Freewallet embraces the sidechain crypto technology within the Freewallet network. You, therefore, will not be charged when you transfer crypto to other Freewallet users.

Buy with card: In addition to exchanging crypto for crypto within the Freewallet network, you can also buy crypto with a credit card. And you don’t even have to go through such third party currency conversion sites as Changelly or Simplex.

Highly versatile: Freewallet is also compatible with multiple operating systems. You can access this browser extension via all the popular browsers. Plus, it’s also available in both the Android and iOS app versions.

Intuitive user interface: Both the single currency apps and the multi-currency web interface are highly intuitive. The display is highly intuitive, which makes navigating through the app and initiating transactions relatively easy. It also integrates some of the leading crypto exchanges that allow you to monitor the price performance of different coins and monitor your portfolio on one screen.

Freewallet security features:

Password + Biometric support: Like most other cryptocurrency wallets, Freewallet is secured with a passcode. You get to set this four-digit pin-code when installing and activating the wallet. Its support for biometrics also gives you a choice of securing the wallet with a fingerprint.

Two-factor authentication: 2FA is an additional boost to the security of your wallet. And you can choose to attach either your phone number or email address to the wallet. It is critical in restricting remote access and hacks by ensuring that only email/phone owners can log in and initiate transactions.

Hierarchically deterministic: The Freewallet is hierarchically deterministic and will automatically create a new address for every new transaction. This limits the exposure of your real wallet address, and you, therefore, don’t have to worry about trackers monitoring and tracing your crypto transactions.

Custodial cold storages: Freewallet is a custodial crypto vault that stores private keys on your behalf. And according to their website, these keys are stored in cold storages away from hackers. You, therefore, don’t have to worry about keeping your investments safe.

Active sessions control: Freewallet gives you near-absolute control over your wallet. It lets you monitor all the users’ active sessions by viewing their devices. You can then whitelist or block any unauthorized wallet users.

Multi-signature: You can activate the multi-signature feature of the Freewallet by linking it to up to five email addresses. In such a case, the transaction will not be initiated before confirmation from all linked email addresses.

Transaction limits: Freewallet will also let you set the daily, weekly, and monthly transaction limits. This limit ensures that even if a hacker was to gain access to your wallet, there is only so much they can offload.

Freewallet Setup and activation

Step 1: Open the Freewallet.org website and click on the ‘Wallets’ section. Decide on the type of wallet you wish to download. This can be an individual wallet for a specific crypto coin or the multi-currency Freewallet Lite.

Step 2: Register a user account by linking your wallet with your Facebook profile, Google profile, or phone number.

Step 3: Set a PIN code for the account.

Step 4: Activate the two-factor Authentication feature using either email or the phone number.

Step 5: The account is now active, and you can start adding and sending crypto.

How to add/receive crypto into Freewallet

Step 1: Log in to your Multicurrency Freewallet Lite and click on “Smart Pay In.”

Step 2: Select the currency you wish to use in topping up your wallet. This reveals both the wallet address and the QR code.

Step 3: Send the address or the code to the individual/party, sending you the coins.

Step 4: Wait for the coins to reflect in your wallet.

How to send crypto out of Freewallet

Step 1: Log in to your Freewallet account. Tap on the + icon and click “Send.”

Step 2: Enter the recipient’s wallet address and the number of coins you wish to send.

Step 3: Confirm that the details are correct and hit ‘Send.’

Step 4: Decide on the network fees – from the list of four price ranges.

Freewallet ease of use:

Freewallet app and web interface are highly intuitive and very easy to use. And it starts with a straightforward and easy registration process. Unlike other wallets with complicated account creation processes, Freewallet only requires you to link the wallet with your Facebook or Google profiles or mobile phone number.

From its dashboard, you have easy access to all of Freewallet’s key features, including the send/receive icons. Moreover, you get to monitor your balances and portfolio as well as the real-time price movements for various coins.

The wallet is also multi-lingual and is currently available in over 13 international languages.

Supported cryptocurrencies and countries

According to the Freewallet website, Freewallet Lite multi-currency wallet can support 130+ cryptocurrencies and tokens. However, crypto-specific wallet apps will only host one digital currency.

Currently, Freewallet is available to individuals in over 100 countries across the world, including the U.S, UK, Germany, France, and Russia.

Freewallet cost and fees

You will not be charged to download and activate the Freewallet app or create a user account on their web interface. Sending crypto from one wallet to another within the Freewallet network is also free.

When sending crypto to other users, however, you will be charged blockchain network fees. Freewallet nonetheless embraces the highly dynamic Reduce by Fee protocol that gives you the freedom to determine these transaction charges. There are four pricing levels, and the higher the fees, the faster the transaction processing speed.

Comparing Freewallet with other crypto wallets

Freewallet vs. eToro

Freewallet and eToro have several things in common. Chief among them is the fact that they are both custodial and store private keys on behalf of their clients. These can also be said to have some of the most intuitive user interfaces.

But unlike eToro that only has one type of crypto wallet, Freewallet has both the crypto-specific and multi-currency wallets. And while both their wallets are free, Freewallet uses sidechain technology to make transactions within the network for free. It also embraces a dynamic transaction pricing structure that lets the user set an individualized transaction cost.

What are the pros and cons of Freewallet

Pros:

  •         Transactions within the Freewallet network are free. And you also get to set the transaction fee for external transfers.
  •         You can choose to install multiple crypto-specific wallets for the coins you wish to trade or the multi-currency wallet.
  •         The web interface of a Freewallet has an in-built exchange.
  •         The wallet supports a relatively wide range of cryptocurrencies.
  •         Freewallet has integrated several security measures, including support for biometrics, two-factor authentication, and cold storage.

Cons:

  •         Freewallet stores the private keys on behalf of their clients – providing hackers with a central target.
  •         The wallet is hosted online, and this exposes it to such risks and threats as hacks and malware attacks.
  •         It requires a phone or Facebook profile when registering a user account.
  •         The wallet is not regulated.

Verdict? Is it safe or a scam?

Freewallet adopts a unique approach to the storage and management of cryptocurrencies. These include cold storages, two-factor authentication, active session control, and transaction limits. Some serve to discourage unauthorized access to your wallet while the rest limit the extent of the damage. We, therefore, consider their app and web interface relatively safe. We nevertheless would have been able to give a more qualified verdict if Freewallet adopted even more stringent safety protocols like providing users with recovery seeds and decentralizing the storage of private keys.

Categories
Cryptocurrencies

Abra Wallet Review: Here is Everything You Need To Know About Abra Crypto Wallet

Abra Wallet is a leading virtual service company specializing in blockchain technology and cryptocurrencies. On their website, the Abra crypto wallet is hailed for its simplicity, accessibility, and flexibility. It is a versatile app that is compatible with most operating systems. The crypto wallet is also highly intuitive and simplifies the process of storing and trading cryptos for its users. Launched in 2014 in Silicon Valley and headquartered in The Philippines, Abra supports over 54 world currencies.

But how does it work, how secure is the wallet, how many cryptos can it hold, and what key features make it rise above the competition?

We have tried Abra Crypto Wallet and interacted with its different features. In this review, we tell you how it works, its security features, its usability, and everything else you need to know before downloading and installing the crypto app.

Abra wallet key features:

Simple to use: The Abra crypto wallet app is quite user-friendly and accessible to virtually everyone. It has a simplistic and highly customizable design that makes it easy to use for both beginners and expert traders.

In-built exchange: The Abra crypto wallet app also features an in-built exchange. Here, you can engage in both fiat-to-crypto and crypto-to-crypto conversions. The exchange is quite straightforward and relatively easy to use.

Highly versatile: The Abra crypto wallet app is highly versatile and compatible with both the Android and iOS operating systems. Moreover, it supports a wide range of both crypto and fiat currencies.

Portfolio creation tools: Abra wallet is more than a crypto storage app; it is a crypto investment app. In addition to storing your digital assets securely, the app will also let you invest in leading stocks from different international markets. It especially lets international crypto traders invest in U.S stocks.

Supports fiat-to-crypto purchases: Abra crypto wallet app features an in-built exchange. This tool lets you convert fiat to crypto and engage in crypto-to-crypto exchanges.

Support cash deposits: Unlike most other crypto wallet apps, Abra makes it possible for you to purchase crypto directly via different forms of cash payments. These include credit/debit card purchases and direct bank wire transfers.

Abra wallet users in the Philippines can also pay for their crypto using the Teller Payment System. Note, however, that all your funds in Abra are by default held as Bitcoin (except for Bitcoin Cash and Litecoin), but you can choose to denominate them in the form of any other currency.

Abra wallet security features:

Passcode: Your Abra wallet app has to be secured with a four-digit passcode. You get to set this PIN code when installing and activating the app.

Recovery seed: When installing the crypto wallet app, and after setting the passcode, you will be provided with a recovery seed. Record on a hardy piece of paper and keep it in a highly secure place. You will need it when resetting your app password or when recovering lost private keys.

Two-factor authentication: The Abra crypto wallet app also integrates the two-step verification security feature. This allows you to link your app with your phone number and ensures that you receive an SMS verification code when logging into the wallet and when transferring coins out.

Military-grade encryption: According to Abra wallet developers Bill Barhydt and Pete Kelly, this app collects as little sensitive information of their clients as possible. Additionally, the user data stored within the app – including passwords and private keys – is highly encrypted. All of the app’s interactions with third-party apps and websites, including payment systems, are also highly encrypted.

Non-custodial wallets: Abra wallet developers don’t store your private keys or their copies within the company servers. All the private keys are stored in individual wallets within the wallet of the owner’s devices. This effectively gives you near-absolute control over your private keys.

Hierarchically deterministic: The Abra crypto is also hierarchically deterministic, implying that it automatically generates new wallet addresses for different crypto transactions. This promotes anonymity as it makes it impossible for third parties to track your crypto transactions.

How to set up and activate the Abra Crypto wallet app:

Step 1: Start by downloading the Abra cryptocurrency app from the Google Play Store or Apple Store. You can also download these apps from the Abra’s official website.

Step 2: Initiate the installation process and proceed with creating a user account. Here, you are required to fill in your personal details, including your name, email address, physical address, and your mobile phone number.

Step 3: Activate the two-factor authentication protocol by using the code sent to your mobile number.

Step 4: Proceed to set the four-digit PIN code that secures your Abra crypto wallet.

Step 5: The app will now provide you with recovery phrases. Write them down and keep them safe.

Step 6: The installation is now complete, and the crypto mobile wallet app activated. You can start adding funds, converting/exchanging different currencies, and investing.

How to receive funds/add crypto into your Abra crypto wallet:

Step 1: Start by launching the Abra crypto wallet app and clicking on Portfolio.

Step 2: Click on ‘Add Money’ and choose the cryptocurrency you wish to add/receive into your wallet. This reveals the coin’s wallet address and its corresponding QR Code.

Step 3: Send the address to the parties sending you cash or have them scan the QR code

Step 4: Wait for the cryptocurrency to reflect on your wallet.

How to send crypto out of Abra wallet:

Step 1: Start by launching your Abra Crypto wallet app and clicking on ‘Portfolio.’

Step 2: Click on ‘Send Money’ and choose the cryptocurrency you wish to transfer.

Step 3: Key in the recipient’s wallet address or scan their wallet’s QR code and enter the amount of crypto you wish to send.

Step 4: Confirm that the wallet address and amounts entered are correct and hit send.

Abra Wallet’s ease of use

Abra crypto wallet is very user friendly. The registration process, for instance, is rather quick and straightforward. The fact that the crypto wallet app handles fiat transactions, plus its registration as a Financial Services Provider, means that you will be subjected to the different KYC and AML protocols. It also means that your crypto transactions won’t be wholly anonymous.

Unlike most other crypto apps that require you to pass through third party currency conversion systems like Simplex or Changelly, Abra processes direct fiat deposits. Here, you can make crypto purchases directly using your debit or credit cards, direct bank wire transfers, or the Teller Payment System.

One of the most unique aspects of the Abra Crypto wallet app is that your deposits into the wallet app are held as Bitcoins By default. This implies that if you deposited $10,000 into the wallet, this amount is automatically converted into its Bitcoin equivalent (say 1 BTC). Therefore, if Bitcoin’s value surges by 25%, your balances increase by a similar margin and vice versa. The account can, however, be denominated by any currency and you are free to change the default BTC base currency into any other currency at any time.

Abra wallet supported currencies and countries.

According to the Abra wallet website, the crypto vault is now accessible to residents of over 150 countries – including the U.S.

Abra users in the United States can interact with over 30 of the most popular cryptocurrencies and as much as 50 fiat currencies.

Abra crypto wallet users outside the U.S however, have access to a wider range of currencies as they get to interact with over 200 crypto+fiat currencies.

Abra wallet’s inbuilt exchange is nonetheless highly versatile and there is no limit of either crypto-to-crypto or fiat-to-crypto pairs.

Abra wallet cost and fees:

You will not be charged to download and install the Abra crypto wallet app. And neither will you be charged to activate or for storing your digital assets on your Abra Crypto wallet.

A variable transaction processing fee will, however, apply and debited from your Abra cryptocurrency wallet every time you send cryptocurrencies out of the wallet. These fees are collected by the blockchain miners or network administrators and not Abra wallets and are largely dependent on such factors as the type of cryptocurrency and the transaction amounts involved.

Within the app, you will also incur currency conversion fees in the form of spreads. And this markup price for the different cryptos is set by Abra.

Note that while Abra wallet doesn’t impose withdrawal fees, your payment processor will often charge transaction fees when you deposit into Abra.

Cash Deposit and Withdrawal limits

The app has set limits on the amount of cash you can deposit or withdraw from your Abra crypto wallet app. For instance, U.S residents can only transfer a maximum of $30,000 per wire daily. Additionally, you can only make a bank deposit or withdrawal of a maximum $2,000 daily, up to $4,000 weekly, and $8,000 monthly, while daily credit card deposits/withdrawals have a daily and monthly limit of $200 and $1,000 respectively.

While there is no limit to the number of BTC or LTC conversions you can make, non-BTC/LTC conversions have a daily limit of 5 BTC.

Abra wallet customer support

Abra Wallet’s customer support starts with the wallet’s highly elaborate FAQs page featured on the Abra website. The wallet also features a highly informative blog and the two are key towards addressing some common challenges experienced by Abra Users.

For more personalized queries, consider contacting Abra’s customer support team on their different social media pages like Telegram, Twitter, Reddit, and Facebook. You may also contact them by raising a support ticket on the Abra website.

What are the pros and cons of the Abra crypto wallet app?

Pros:

  • Abra is an all-in-one wallet that doesn’t just let you store your cryptocurrencies but also lets you invest in the stock exchange.
  • The mobile crypto app also features an in-built exchange.
  • Abra wallet supports both fiat and cryptocurrencies.
  • It allows you to change the base currency of your wallet from the highly volatile Bitcoin to Fiat, effectively guarding your assets against possible crypto falls.
  • Installing the app and storing coins therein is free.

Cons:

  • One may consider the currency conversion rates for the wallet’s inbuilt exchange rather high.
  • By holding your cash deposits into the app in the form of Bitcoin, the wallet subjects your cash to volatility risks.
  • The app subjects you to both KYC and AML procedures, which defeats the purpose of Blockchain and cryptos anonymity.

How does Abra Crypto wallet compare to other popular cryptocurrency wallets

When compared to such other crypto wallet apps as eToro, Abra carries the day because of its ease of use and the number of features included. For instance, unlike eToro’s inbuilt exchange that has a limited number of trading/exchange pairs, the Abra Crypto wallet is highly versatile and has an unlimited number of trading pairs. It also supports a wider range of deposit and withdrawal methods that include Teller payment systems. eToro, however, supports a wider range of cryptocurrencies and tokens and can also be considered more secure.

Abra crypto wallet, however, pales in the face of leading Crypto hardware wallets in terms of security and number of supported currencies. Ledger Nano S, for instance, supports more than 1000 cryptocurrencies and tokens and also stores these digital assets offline. The Abra Crypto app can, however, be considered more convenient and easier to access.

Bottom line: Is Abra wallet safe?

Abra has made significant strides towards creating the most sophisticated, versatile, and easy to use trading platform. Their app is not only freely available to all crypto enthusiasts but also integrates some of the most advanced trading and analysis tools.

It also gives its users access to direct crypto market data, including crypto prices and the blockchain industry event calendar. But more importantly, it has put in place several sophisticated security features that make its wallet highly secure while giving you absolute control over your private keys.

Categories
Cryptocurrencies

Enjin Wallet In-Depth Review: Key Features, Security, Pros andCons

Enjin smart wallet comes off as one of the safest and most convenient mobile-app based crypto wallet. It is easy to use on both Android and iOS devices and incorporates a wide range of operational and security features, including a secure keyboard, a built-in exchange, and two layers of cryptography (rule-of-two-encryption). What’s more, it supports a wide range of cryptocurrencies and tokens.

In this Enjin Smart wallet review, we detail everything you need to know about the mobile-based wallet. We highlight its most prominent operational features and look into details of the factors making it one of the most secure wallets. We’ll also tell you of the supported cryptocurrencies and tokens, its pros and cons, and provide you with a step by step guide on how it works.

We start by looking at its key features:

Key Features

Secure Keyboard:

Enjin Smart wallet features a proprietary keyboard that is specially designed to shield your data from sniffers and keyboard keyloggers. It has the key randomization option that provides you with the ultimate level of input protection.

QR Scanner:

In addition to the randomized and highly secure inbuilt keyboard, you can use the QR Scanner to communicate with different exchanges and wallets when sending and receiving digital assets.

Crypto wallet trackers:

The crypto wallet mobile app gives you the ability to monitor your Bitcoin, Ethereum, and Litecoin addresses. This allows you to monitor their transactions in real-time.

Add custom tokens:

Enjin smart wallet doesn’t just support the ERC-20, ERC-721, and ERC-1125 tokens. It also gives you the ability to create and launch your custom tokens.

Create multiple wallet addresses:

There is no limit to the number of wallet addresses you can create on this platform, and neither is there a limit to the number of coins you can store in these wallets. The coin, therefore, gives you the ability to create multiple wallet addresses for different coins and tokens.

Budget for your crypto assets:

Unlike most crypto wallets that only have one vault for all your digital assets, Enjin Smart wallet lets you create multiple vaults. You can, for instance, create a Savings, Business, and Trading vault and split your crypto assets into these different allotments.

Samsung Blockchain Keystore support:

Enjin is specially designed to support the Samsung Blockchain feature for private keys protection.

Custom libraries:

Its libraries are designed with a feature that enables the removal of private keys from the device immediately after use. 

Enjin wallet security features:

i) One-touch fingerprint login: Enjin Smart Wallet can be secured by a unique multi-character password or a fingerprint. The fingerprint protection especially comes in handy in further eliminating possible password leaks and giving the wallet user absolute control over their wallet.

ii) Two-layer encryption: The mobile crypto wallet employs two layers of encryption in protecting the data stored within the wallet and keep your private keys confidential. 256 AES encryption covers the hardware while software encryption techniques are applied to the wallet’s application layer.

iii) Recovery phrase: When installing and activating the Enjin Smart wallet, it will provide you with a 12-word recovery seed. Record these phrases on a piece of paper and keep it safe. You will need it to regain access to your wallet should you forget the password and also recover private keys should you lose access to your mobile phone.

iv) RAM encryption: According to Enjin smart wallet developers, all of the important data is processed by and stored on a secure RAM. They further state that this RAM limits the amount of sensitive data stored in here and that this data is highly encrypted.

How to set up the Enjin crypto wallet app

Setting up your Enjin wallet on your mobile device is easy and straightforward. Here is a detailed insight on how to go about it:

Step 1: Download and install the Enjin Smart Wallet app: Depending on the type of operating system you are using, the first step is to search the Enjin wallet on Play Store or iTunes. Download the application and click on the “install” button. Once the installation is complete, click on the “open” button to launch the app.

Step 2: Create a new wallet: You will be provided with two options. You can either create a new wallet or restore your previously backed up wallet.

Since we are creating a new wallet, choose on the ‘Create New’ and click the “next step” button.

Step 3: Create and confirm password: Create a unique multi-character website for your wallet app.

Step 4: Recovery phrase backup: You will then be provided with a 12-word recovery phrase that will be used to restore your wallet when you lose or forget your password. The best way to backup these phrases is to write them on a piece of paper and keep them in a safe or any other highly secure environment.

Step 5: Create wallet addresses: The wallet is now set and you can proceed to create wallet addresses for the different crypto assets. You can also create different vaults and allocate them pieces of your digital assets for different purposes.

Step 6: Start trading: Your Enjin wallet is set and you can now start receiving, exchanging, and sending cryptocurrencies or customizing your own tokens.

How to send cash using an Enjin smart wallet

Step 1: Start by launching your Enjin crypto wallet

Step 2: Click on the cryptocurrency or token you wish to send. The app will display a wallet address input section as well as the option for scanning the receiver’s wallet QR Code. Chose one.

Step 3: Enter the amount of coins/tokens you wish to send

Step 4: Confirm that the details entered (wallet address and crypto amounts) are correct and hit send

How to receive funds into your Enjin smart wallet

Step 1: Start by launching the Enjin Smart crypto wallet app

Step 2: Tap on the ‘Receive’ icon and proceed to click on the cryptocurrency/token you wish to receive. The app will display the crypto’s wallet address as well as its QR code.

Step 3: Copy the wallet address and forward it to the parties from whom you wish to receive the coins or have them scan your QR Code.

Step 4: Wait for the cryptos to reflect on your wallet

Enjin wallet’s supported currencies

The Enjin smart crypto wallet is highly versatile and currently supports over 700 cryptocurrencies and tokens. These include the all-popular crypto coins like Bitcoin, Bitcoin Cash, Ethereum, Litecoin, Ripple, and the Enjin Coin.

The wallet also holds multiple variations of the Ethereum based tokens including all the ERC-20, ERC-721, ERC-233, and ERC-1155 tokens. Its also one of the few crypto wallets that lets you leverage their inbuilt-exchange and support for Ethereum based tokens to help you customize and launch your own token.

Enjin smart wallet cost and fees

Enjin smart crypto wallet doesn’t charge you when you download, install, or store cryptocurrencies/tokens on their wallet. You will, however, be charged variable transaction fees when you send/receive funds into your wallet. These charges are usually imposed by blockchain networks and are collected by miners and network administrators, not the Enjin wallet developers.

How much you pay per transaction is largely dependent on such factors as your preferred crypto as well as the number of coins transferred.

Enjin Crypto wallet ease of use

Enjin crypto wallet app features a smart user interface that makes it one of the most user-friendly wallet apps. According to Enjin, the smart UI features turns your phone into a hardware-like wallet by giving you full control over your private keys while offering a number of important security features.

Enjin smart wallet app customer support

Enjin wallet has an elaborative and readily available customer support team. Their multi-lingual website (currently available in four international languages) is, for instance, awash with different resource materials aimed at helping address common user concerns. The wallet maintains a regularly updated blog that not only covers hot financial and crypto industry news but also updates about the wallet.

This is, also the Enjin forum where wallet users get to interact with the developers and other users. Here they can have their challenges and queries addressed by either the Enjin wallet developers or expert wallet users.

More sensitive queries can be addressed directly to the Enjin customer support team by raising a support ticket on their ‘Contact Us’ page. You can also send them an email via [email protected] or engage them on their official social media handles on such platforms as Instagram, Facebook, Twitter, Telegram, Reddit, and LinkedIn.

Comparing the Enjin crypto wallet app with other wallets

Compared to other crypto wallet apps like Mycelium, Enjin smart crypto wallet carries the day when it comes to the employed security measures. It, for instance, combines military-grade encryption with biometrics in further boosting the confidentiality of your private keys. It also has more operational features like the inbuilt exchange/marketplace, support for decentralized apps and browsers, and the integration of the ERC-1155 protocol that lets the user create and issue customized tokens.

Enjin smart wallet app security features, however, are pale in the face of the more secure hardware wallets. For instance, while the data contained therein may be highly encrypted, it still is a hot wallet and this exposes it to possible hacking and malicious malware threats. Unlike most hardware wallets that can hold thousands of cryptocurrencies and tokens, Enjin can only hold a maximum of 700 cryptos. The only advantage Enjin crypto has over such hardware wallets Trezor or Ledger Nano is that it is free.

Everything else you need to know about Enjin smart crypto wallet

Enjin is also more than a wallet as it also features an easy to use inbuilt-exchange and a crypto marketplace. The wallet integrates the all-popular Enjin social gaming network and the Enjin marketplace where players can buy or exchange different video games and in-game items for crypto and tokens.

The Enjin wallet also features one of the most interesting and easy to use Decentralized App web browsers. It has a friendly and easy-to-interact-with user-interface. It allows you access to leading crypto exchanges, financial news, online games, and even social media.

In addition to supporting the popular ERC-20 and ERC-721 tokens, Enjin developers introduced the ERC-1155 protocol. This allows you to create highly customized tokens and token collectibles that you can trade on the Enjin exchange, store on the Enjin wallet, and exchange for online games or in-game items within the Enjin Marketplace.  All these are accessible via the Enjin smart wallet app.

Enjin does not store fiat currencies and neither does it support fiat-to-crypto conversions. The smart crypto wallet has, however, partnered with some of the most popular fiat-to-crypto conversion platforms like Changelly, Simplex, Bancor, and Kyber. These make it possible for you to swap cash for cryptocurrencies and tokens that you can then use to trade or exchange via the Enjin smart crypto wallet.

What are the pros and cons of the Enjin crypto wallet

Pros

  • Employs a wide range of security features – including encryption and Biometric access
  • Both the crypto wallet app and Enjin website are multi-lingual
  • High user ratings on both Android and iOS app stores
  • Supports a relatively wide range of cryptocurrencies and tokens
  • The Enjin wallet app features a highly intuitive user interface

Cons

  • Mobile wallets are prone to online attacks as compared to hardware wallets
  • It is not open source and, therefore, not adequately vetted
  • Doesn’t support fiat-to-crypto conversions

Final Verdict: Is the Enjin wallet app safe?

Well, Enjin smart wallet app has embraced several security protocols that make it one of the safest crypto apps around. It, for instance, employs the two-layer encryption for the private keys and personal data stored within the app and uses a multi-character password and biometrics to secure the wallet.

Other factors that make Enjin smart wallet app the most effective mobile wallet include the fact that it integrates such features as an inbuilt-exchange and marketplace, decentralized apps, and browsers, supports 700+ cryptocoins and tokens and makes it possible for you to create and launch a custom ERC-1155 token.

Categories
Cryptocurrencies

Citowise Crypto Wallet Review: Features, Safety, Pros and Cons?

If you are looking for a free and secure cryptocurrency wallet/payment solution provider, consider Citowise. This multi-currency crypto wallet premiered as a free digital wallet software and supported various platforms that allow easy use of cryptocurrencies. Citowise is also regarded as very secure, providing a transparent payment method for e-commerce.

Citowise crypto wallet is designed to offer private and business customers an easy way to empower the mainstream adoption of cryptocurrency. It is beginner-friendly and requires no technical knowledge to operate. Simply download your wallet, set up your account, and begin using existing platforms to sell and purchase supported cryptocurrencies.

The wallet was launched back in 2016 with one mission in mind: to create a secure blockchain infrastructure and ensure ordinary users understand the technology. One of the founders fell victim to a crypto hack while the other wasn’t awarded deserved coins after participating in an ICO. The third founder encountered problems sending crypto to a relative—the three set their sight on creating a solution that covered these and more challenges crypto users face daily.

Key Features:

Multiplatform:

Citowise provides free crypto wallets for both Android and iOS platforms, which are the most popular phones in the market. It is also compatible with Linux and Mac platforms and provides full support for Ledger cold storages and TREZOR.

Export/backup:

You can export or backup your digital wallet, which is recommended for security purposes. To do this, open your Citowise wallet through your phone or PC and navigate to the Wallet screen. Click on the wallet and select Export from the menu that comes up. Follow the remaining prompts to finish exporting your wallet.

Import wallet:

You can import your wallet back to Citowise and continue from where you left. Go to your Citowise wallet and navigate to the Wallet screen. Click on the button with a + sign appearing on the bottom right corner and follow the remaining prompts to import your wallet.

Integrated exchange:

Citowise provides a user-friendly interface that allows you to convert one crypto to another within the wallet. You get to pick your preferred integrated exchange, and the platform supports quite a number. Citowise can also transfer all your ERC20 tokens out-of-the-box.

Buy Cryptocurrency:

Within the Citowise simple user interface, there’s a feature for purchasing cryptos at the lowest market prices, directly from the wallet. This complements the integrated exchanges you pick for your crypto transactions. You don’t need any technical knowledge about blockchain networks to buy cryptocurrencies.

ICO:

This section offers a unique experience for users that want to claim coins from ICO campaigns. It comes with its set of features and possibilities.

Security features:

i) Password: Citowise requires each wallet owner to use a strong password that is hard to guess. Without a strong password, people with access to your devices can export the wallet and access the funds using another device. You can use the recommended Citowise password or create one with a variety of characters.

ii) Encrypted channels: Data processed by Citowise use encrypted channels to prevent external breaches. This ensures transactions are secure and accurate. The platform uses the latest cryptography technologies and security algorithms to keep hackers at bay. No history of a breach has been reported since launch. SSL certificates and regular scans also add a layer of security.

iii) Ad-Hoc payments: Citowise dispenses payments on a discretionary basis, ensuring investor and trader confidence. Ad-Hoc payments also guarantee privacy. However, users must ensure safe practices to prevent others from accessing their details and passwords.

iv) Instant notifications: Users will get timely information for any changes that occur in the network, so you can react quickly in case of anything. You can also request a report on your statement for personal audits.

v) Encrypted hardware: The Citowise hardware wallet features the latest encryption technology to keep hackers at bay. All you need to do is set up a strong password for your account.

Citowise user-friendly interface:

Citowise employs advanced technologies to provide a sleek, user-friendly interface with all the features you need within a click’s reach. The simple design appeals to both new users and older folks with little to no background in crypto wallets. Wallet users have total monetary control and can enjoy fast transactions and customer service. The site also includes links to various resources with more insights regarding the wallet. The hardware wallet is also secured using advanced encryption and very easy to use.

Supported currencies and countries

Citowise supports numerous cryptocurrencies and tokens than most crypto wallets. The platform accommodates all the 55,000+ tokens compatible with ERC20 standards. The most popular coins include BTC, ETH, LTC, BCH, VEN, EOS, TRX, and OMG.

Citowise also supports more than 1000 ETC coins and is available as a mobile app. The platform has offered financial solutions for 23 million+ companies in over 200 countries. All countries in the Eurozone are supported, and the number of currencies keeps growing, so it is advisable to check the information on the official site.

Citowise cost and fees

Setting up your Citowise wallet won’t cost a cent as the platform is free. No fee is charged for installing the wallet or using any integrated feature. Citowise is generally considered one of the budget-friendly digital wallets and charge the lowest fees in the market. The platform also scans all exchanges to minimize transaction costs.

While Citowise is free to use, network miners that verify and confirm transactions have their fees based on the network, transaction volume, speed of confirmation, and other factors. For instance, if you want speedy transactions from a system known to provide swift confirmations, you may pay a higher fee. The networks also have other restrictions, including limits on maximum and minimum transactions.

Customer support

Citowise offers various customer support channels to assist users in navigating all challenges they encounter using the wallet. A resourceful FAQ section provides insights concerning common questions, and the contact tab allows you to send an email describing your issue. Response time is fast compared to other wallets, and you can also reach the support team via social networks.

Setting up the Citowise crypto wallet

Step 1: Download and Install the Citowise app

To use Citowise, you need to download and install the wallet on your device. Citowise comes as a mobile app you can install on Android and iOS platforms. Head to the respective stores (Google Play and App Store) to download the wallet. They are also available on the homepage.

Step 2: Set up the wallet

Once you have the app installed on your device, launch it to set up your wallet. Like most crypto wallets, Citowise will require a unique wallet name and password. Enter and follow the prompts to create a wallet. You will be asked to back up the wallet, but this is optional, and you can do it later. However, it takes less than a minute to complete the backup.

Step 3: Enjoy Citowise

Once created, your Citowise wallet is ready for use. You can buy/sell cryptocurrencies, send and receive funds, and enjoy all the functionalities provided in the app. Citowise gives you total monetary control, so there’s a lot you can do with your account.

How to send currencies with Citowise

Step 1: Launch your Citowise app and log in. Click on balance on the bottom of the screen to see how much crypto you have.

Step 2: Click on the crypto balance you have and then Send Payments. Clicking on the Send icon that’s beside the Balance icon will also take you to the same page.

Step 3: Choose the recipient of the funds you are sending. You can do this by clicking on a contact list, using a QR code, or typing the wallet URL. Click Proceed.

Step 4: Enter the amount you wish to transfer in the To Pay section and click Proceed.

Step 5: Check if everything is okay and click the blue Send Payment button to send cryptocurrency. If you entered the wrong amount or address, click the back arrow to correct before submitting it.

How to receive currencies with Citowise

Step 1: Launch your Citowise mobile app and log in. Click on the Request icon on the bottom of the screen.

Step 2: In the request payment window, enter the amount you want to receive. You can change the cryptocurrency by clicking on the small arrow beside the current crypto. Converter and Setup Hint buttons also offer extra functionality on the window. Fill the description section for the request and input the wallet URL (the wallet you are requesting payments from). You can also request using QR code or sharing your URL.

Step 3: Check if all details are correct and click on Request Payment to ask for funds. Once the request is sent, the recipient will get a prompt notification on their app, and funds are added automatically when they pay.

Citowise supported currencies

Citowise supports various cryptocurrencies, but you will only have a few options to choose from during the account setup. The popular currencies supported include:

  • Bitcoin
  • Litecoin
  • Ethereum Classic
  • Ether
  • Bitcoin Cash
  • POA
  • Citowise Token

The wallet also supported various fiat currencies, including the Dollar (Canadian, Australian, and the US), Euro, British Pound, Swiss Franc, Chinese Yuan, Japanese Yen, Indian Rupee, Korean Won, and Russian Ruble.

Buying and selling crypto with Citowise

Citowise allows users to buy and sell cryptocurrencies, taking advantage of the best rates in the market. To buy and sell crypto, simply click on the three-row lines appearing on the top right corner and select Buy/Sell Crypto. This will open a service page where you can choose the preferred option. Some providers buy crypto while others sell, so choose accordingly. Specify the amount you want to buy or sell and trigger the request following the prompts given. Ensure you select the correct currency before buying or selling crypto.

How does Citowise compare with other wallets?

Citowise vs. eToro

Both Citowise and eToro are great crypto wallets you can use to accomplish various transactions. Citowise offers a simple interface and navigation. They also provide impressive ICO campaigns. Concerning features and functionality, Citowise and eToro don’t reflect much difference. However, eToro supports 120 different cryptos, which is way above the seven options available on Citowise. The wallets are both secure and relatively cheap, compared to other top-rated options.

Citowise vs CoolWallet S

CoolWallet S is a premium crypto wallet with advanced security features. Like Citowise, a hardware wallet is available for interested users. This obviously comes at a fee, but you get to enjoy top-notch security. CoolWallet S supports 22 cryptocurrencies, which is still above Citowise. However, this is nothing compared to wallets such as Ledger Nano S, which supports more than 1000 cryptos.

Pros and Cons of Citowise crypto wallet

Pros

  • Free secure crypto wallet available for mobile users
  • No transaction charges or subscriptions
  • Participate in ICO campaigns
  • Send, receive, buy or sell crypto easily
  • Choose from a wide variety of exchanges
  • Supports FIAT currency and in-app conversions
  • User-friendly interface appealing to both beginner and experienced crypto-traders

Cons

  • Supports fewer cryptocurrencies than most wallets
  • Very few service providers in the Buy/Sell Crypto section
  • Only available for mobile platforms

Final words

Citowise is an excellent mobile wallet you can use to facilitate various transactions. It allows you to exchange and convert cryptocurrencies and permits buying and selling of the same. You can also access popular FIAT currencies, pay for goods and services, or request invoice payments.

As a payment method, Citowise is safe and convenient to use, boasting a sleek interface with beginner-friendly navigation. Every important feature is within a click’s reach, and the mobile app is light on your device. If you are looking for a reliable, secure mobile crypto wallet, Citowise is worth a try. However, the platform could do better with support for more cryptocurrencies. Currently, users can only access a few popular options.

Categories
Cryptocurrencies

BTC.Com Wallet Review: What Makes This Crypto Wallet App Unique?

Developed and maintained by Bitmain, BTC.com is a crypto wallet app and web wallet that seeks to provide users with the most secure yet easy to use crypto storage. This online wallet has made it relatively easy to earn, store, and spend your Bitcoin without having to worry about the insecurities that come with storing your crypto in an exchange or the complicated interfaces of the hardware wallets.

Unlike most of its competitors with shadowy reputations, BTC.com has the solid backing of Bitmain. This is a Bitcoin-focused technology company that’s best known for pioneering and popularizing antminer rigs, running two of the largest bitcoin mining pools, and developing other bitcoin-related products. The company introduced the BTC.com wallet to the crypto industry in 2016, and it has gone on to become the favorite wallet for most Bitcoin miners, traders, and investors.

In this BTC.com wallet review, we look at the factors that help the Bitmain-sponsored crypto wallet app stand out. We detail its key operational and security features, its ease of use and level of customer support, highlight its pros and cons, and compare its efficiency with that offered by similar crypto wallets.

Key features:

Highly reputable:

One of BTC.com wallet’s strengths and biggest selling point is that it is maintained by the highly reputable and security-conscious Bitmain company. This, plus the fact that it has never suffered a significant security breach, endears it to most users.

Multiplatform:

There are two primary versions of the BTC.com wallet – the mobile app and internet-based wallet. Both are versatile and work well with the two main mobile operating systems and popular internet browsers.

Straightforward setup:

We also like the BTC.com wallet’s user-friendliness highlighted by its quick and straightforward user account set up process. This aligns with BTC.com’s commitment to being the most secure yet highly secure crypto wallet.

Integration with mining pools:

The BTC.com wallet also gives you access to the mining pools operated by Bitmain. And if you contributed your RAM to either of the pools, your portion of earnings will be automatically deposited to the BTC.com wallet from which you can sell them at an exchange.

Hardware wallet integration:

In addition to the wallet’s close ties with Bitmain Bitcoin mining pools, BTC.com also integrates with some of the leading hardware wallets. This provides it with an added layer of security and makes it possible for you to hold more than just two (BTC + BCH) cryptocurrencies.

Phone contacts synchronization:

This revolutionary BTC.com feature ensures that you don’t always have to key in the complex wallet addresses when sending cryptos. You can give the wallet app permission to access your phone book and send cryptos to your contacts without necessarily having to copy or import their wallet address.

BTC.com wallet security features:

Password:

When installing the BTC.com wallet app and creating your user account, you will be required to set a highly unique password. This becomes the central-most form of protection for your crypto wallet and its contents.

Two-factor authentication:

You can reinforce the effectiveness of the wallet password in deterring illegal access to your private keys by activating two-factor authentication. You can activate this using your mobile phone number whereby you receive calls or SMS verification codes or via the Google authenticator app.

Non-custodial:

BTC.com wallet app is a non-custodial wallet – implying that the wallet developers don’t store your private keys in central servers. Rather, they are stored in your phone when using an app and on your computer if you are using the chrome browser extension. This essentially means that you have absolute control over your digital assets.

Hierarchically deterministic:

The BTC.com wallet will auto-generate a new wallet address every time you initiate a bitcoin/bitcoin cash transaction. This ensures that you rarely get to share your real wallet address with the public, which then minimizes the chances of third parties tracking your bitcoin expenditure or crypto activity.

Open-sourced code:

The BTC.com wallet is built on an open-sourced technology, effectively providing a guarantee of safety and transparency. The fact that it is open-sourced means that it has been subjected to a lot of scrutiny and vetting by experienced industry experts who have found it safe for public use.

Multi-signature:

The BTC.com wallet also supports multi-signature transactions that require the authorization of two or more third parties. This makes it ideal for copay and organizational use as it requires 2-of-3 signatures for a transaction to be validated.

Replay protection:

The replay protection feature that applies to Bitcoin and its forks are ideally meant to cushion you and your funds from the risk of double payments if you ever initiate a Bitcoin payment at a time when a Bitcoin hard fork is being generated. BTC.com wallet developers announced that they are taking measures to prevent this from happening.

How to set up the BTC.com crypto wallet app:

Step 1: Start by downloading the BTC.com mobile wallet app from Google play store or Apple’s app store. The app and the browser extension can also be downloaded from BTC.com official website.

Step 2: Install the crypto app and also key fill in the account registration form that captures your email address.

Step 3: Create a password for your wallet address and agree to the wallet app’s terms of service.

Step 4: Download the wallet’s recovery datasheet. This is availed in PDF Format and captures your wallet’s recovery seed.

Step 5: Access your user account dashboard and click on ‘Create New Wallet’ to generate your primary wallet address.

Step 6: You can start adding Bitcoin and bitcoin cash to your wallet, trading or investing

How to add/receive crypto into your BTC.com wallet

Step 1: Log in to your BTC.com bitcoin wallet

Step 2: On the MyWallet section, click on Bitcoin or Bitcoin cash to reveal the wallet address for the crypt you wish to receive

Step 3: Copy the wallet address or the QR code and send them to the party from who you wish to receive the coins.

Step 4: Wait for the cryptos to reflect in your BTC.com wallet.

How to send crypto into your BTC.com crypto wallet:

Step 1: Log in to your BTC.com Bitcoin wallet, and on My Wallet section, click ‘Send.’

Step 2: Click on the crypto you wish to send – Bitcoin or Bitcoin cash.

Step 3: On the popup window that appears, key in the recipient’s wallet address or scan their QR code. Alternatively, use the app’s contact connect feature to send cryptos to saved contacts on your phone.

Step 4: Confirm that the wallet address and amounts you wish to send are correct and click send.

BTC.com ease of use:

According to the BTC.com website, the Bitcoin wallet app has security and ease of use as its key driving pillars. Both the mobile crypto app and the web wallet feature decongested and highly intuitive interfaces. The app is also infused with a wide range of features that make it easy to use.

It, for instance, has the contacts-synchronization feature that gives the app permission to access your phone contacts, which eliminates the need to memorize the wallet address. Similarly, the downloadable recovery seed option minimizes the common errors most crypto users face when copying the backup phrases. Further, it gives you the option of saving the seed as an electronic copy, printing it, or both.

Unlike most other Bitcoin wallets that can be considered opaque, both the BTC.com mobile app and web wallet allow you to view your crypto transaction history.

BTC.com supported currencies

BTC.com is a Bitcoin-biased wallet and will only support the legacy crypto coin Bitcoin and its Bitcoin Cash hard fork.

The wallet app is nonetheless highly versatile and can easily integrate with some of the most popular hardware wallets like Ledger Nano S. Anyone looking to add a security layer to the app or increase their digital assets portfolio without losing access to the Bitcoin mining pools connected wallet, should consider integrating it with their hardware wallet.

BTC.com cost and fees:

The BTC.com wallet is free. You will not be charged to download or install the crypto app. Neither will you incur any fees for storing your Bitcoins or Bitcoin Cash.

When sending Bitcoins to other wallets or exchanges, however, the bitcoin blockchain network may impose transaction charges. These are highly variable and largely dependent on the Crypto transaction volume.

Additionally, the bitcoin trading platform further adopts a highly dynamic fee structure. This allows you to chose from a three-tier fee system where low-fees translate to low transaction processing, moderate charges equal medium transaction speeds, and high transaction fees result in near-instant transaction processing.

BTC.com customer support:

BTC.com features an extensively elaborated FAQ page as well as a highly informative Blog. They both address some of the common challenges you might face during installation and when using the app.

You are also advised to join the BTC.com online community forum. Here, you get to interact with numerous BTC.com users – both newbie and experienced BTC.com clients – as well as the crypto wallet developers. The forum allows anyone to contribute by way of asking questions and providing solutions to common challenges faced by wallet users. You get to learn the tips and tricks of using the app and get help from developers.

More personalized queries regarding the use of the app can be directed to BTC.com’s customer support team by raising a support ticket, email, or through a call. Alternatively, you can message them on their different social media pages that include Twitter, Reddit, and Facebook.

What are the pros and cons of the BTC.com crypto wallet app?

Pros:

  • The fact that the BTC.com wallet doesn’t store the entire blockchain on your device makes transaction processing relatively fast and doesn’t eat up your phone’s RAM.
  • The wallet features a highly responsive customer support team that is available via social media, community forums, and even on the phone.
  • The Bitcoin wallet has the backing of one of the most reputable crypto industry players.
  • The bitcoin wallet features a wide range of security features, including the fact that it is hierarchically deterministic, open-sourced, and supports two-factor authentication.
  • Installing and using the app is quite straightforward.
  • Your private keys are stored in your device, giving you absolute control of your funds.

Cons:

  • The crypto wallet will only support two cryptocurrencies – Bitcoin and Bitcoin cash.
  • It doesn’t feature an in-built wallet, and neither does it allow for direct bitcoin purchases using fiat currencies.
  • While it has the backing of a reputable company, it still is an unregulated crypto wallet.
  • Its online nature exposes it to the inherent risks associated with online crypto-wallets.

Comparing BTC.com wallet with other crypto wallets

Comparing BTC.com to eToro

BTC.com can be said to have more security features than the eToro crypto wallet, including the fact it is developed on an open-sourced technology. eToro crypto can, on the other hand, be considered more convenient and easy to use. It, for instance, has an inbuilt exchange and supports both crypto-to-crypto and fiat-to-crypto conversions.

Unlike BTC.com that only supports two bitcoin-related cryptos, eToro supports 10+ cryptocurrencies and numerous fiat currencies. And while they both have the backing of highly popular technology companies, eToro is considered more reputable as it is also highly regulated.

Verdict? Is the BTC.com wallet safe?

Well, the BTC.com wallet has adopted some highly innovative security protocols that are aimed at keeping your private keys truly private. Its non-custodial nature, for instance, eliminates a possible central point of attack by storing your private keys in the device hoisting the wallet and not the company’s servers. Other features that endear BTC.com wallet to its users include its ease of use, compatibility with other wallets, and the fact that it is highly customizable.

We nevertheless believe that BTC.com could be even more popular within the crypto industry circles if it were regulated, supported more crypto coins and tokens, and featured an inbuilt crypto trading or exchange platform.

Categories
Cryptocurrencies

Cobo Vault Review: Is It The Safest Hardware Crypto Wallet Ever Designed?

Cobo Vault is arguably one of the most secure hardware wallets currently available. Created by blockchain expert Lixin Liu, Cobo Vault features a host of premium security features that give it an edge over the competition. These include open sourcing its software, disabling wireless connections to the wallet, and enclosing it in a military-grade casing that’s both water and shock-proof. According to Liu, the device that’s dedicated to the Western Markets was designed with the aim of providing the safest, yet easy to use, hardware wallet.

It is one of the most transparent hardware wallets ever introduced to the public. Virtually, all its aspects are open-sourced. In this guide, we explore this in detail. We’ll highlight its key features, explaining its security features, providing you with a step by step on how it works, and going over its pros and cons.

Cobo Vault Key Features:

i) 4-inch touchscreen with a fingerprint sensor: Cobo Vault hardware wallet is relatively bulky and features one of the widest screens ever fitted on a hardware wallet. The wallet’s interactive interface is a 4-inch touchscreen with a fingerprint sensor and capable of fitting a full keyboard. The Cobo vault wallet also features a button and a camera that facilitate the wallet’s communications.

ii) Water and shock resistant: Both the metallic and glass casings of the Cobo Vault hardware wallet are made of aerospace aluminum. The military-grade casing is waterproof, impact-resistant, and fulfills the MLD-STD-810G standards set by the US Military.

iii) Rechargeable and removable battery: Cobo Vault hardware wallet features a rechargeable and removable battery. Additionally, instead of relying on the more expensive Li-Ion batteries, the wallet uses the readily available and inexpensive AAA batteries. Most importantly, these batteries have to be detached and charged on a charging dock as a further safety guide.

iv) Multi-coin and tokens support: The Cobo Vault hardware wallet currently supports up to 10 cryptocurrencies and the ERC-20 tokens. Its providers have, nevertheless, hinted on the possibility of expanding this number of supported cryptos during the upcoming firmware updates.

Cobo Vault security features:

Multi-character password:

Like any other hardware or software wallet, Cobo vault has a password as its first protection measure. You get to set this password during wallet installation and activation. Unlike most other crypto wallets, however, Cobo Vault allows you to set up a 30-character long password. Plus, you also have the option of using a pattern password.

Communication via QR Codes:

Unlike most other hardware wallets that use both wired and wireless connections like Bluetooth or Wi-Fi to connect to their crypto apps, Cobo vault uses QR codes. It does not have a USB port, and neither does it support Bluetooth nor Wi-Fi connections. To send/receive cryptos in/out of the wallet, you have to use its camera on the wallet device to scan the receiver’s QR code.

Open-sourced software:

Like most other hardware and software crypto wallets, Cobo vault has outsourced the technology used in coming up with the wallet. This has exposed it to scrutiny and auditing by crypto and blockchain industry experts who affirm its security.

Cobo vault has gone ahead and open-sourced its wallets secure element – often considered the most opaque part of the hardware – making it the first hardware wallet to expose this sensitive aspect of its wallet’s operations.

Firmware Upgrade through SD Card:

In light of the fact that the Cobo vault hardware wallet doesn’t have a USB port and doesn’t support wireless connections, it can only be updated via an SD card.

12-24 word recovery seed:

When installing the Cobo vault hardware wallet, you will also be furnished with a 24-word recovery seed that you can use to recover your private keys if you ever forget your password or lose the device. The Cobo Vault package will also feature a Cobo tablet – a stainless metallic wallet that you will use to store this recovery seed.

Increasing lockout period:

Cobo Vault further protects your wallet against brute force attacks by incrementally pushing up the lockout time between two subsequent password input attempts.

Self-destruct security feature:

In addition to the increased lockout period for failed password input, the Cobo vault hardware wallet has a self destruct feature. The wallet will delete any form of data stored within the wallet’s secure element should anyone try to open the body of the device.

Hidden vaults:

You get to create a vault/ wallet address for every crypto stored in your Cobo vault. But you also have the option of creating multiple hidden wallet addresses with individual passcodes for these cryptocurrencies and tokens.

No physical attack points:

The Cobo Vault Hardware wallet is completely air-gapped with no physical points of attack, safe for the SD card used during the firmware update. By disabling Wi-Fi, USB cable, and Bluetooth connections, Cobo Vault effectively eliminates the possibility of a man-in-the-middle attack.

Encryption chip:

The device features an encrypted chip that integrates BIP32, 39, and 44 security protocols. The Chip is proprietary and bank-grade, and it works by auto-generating truly random numbers for your private keys.

Setting up Cobo Vault hardware wallet

Step 1: Power on your device

Press and hold the power button for 3 seconds to boot the Cobo Vault wallet and proceed to choose your desired language.

Step 2: Visit Cobo official website

Using your desktop, laptop, or mobile phone, open Cobo Vault’s official website and click on start to display the web authentication QR code. The size of this code can be adjusted inwards or outwards.

Step 3: Scan the QR code using your Cobo Vault device

Use the camera on your Cobo vault device to scan the QR code displayed on the Cobo vault.

Step 4: Input the 8-digit code shown on your device

For the Cobo vault device verification, scan the 8-digit code on the website. If it succeeds, the website will display the “Authenticated” message while the device displays a “Success” note. But if your hardware and the website don’t pair, and the authentication process fails, it is possible that the device might have been tampered with.

Step 5: Set a strong password

Proceed to set a strong, memorable, and highly unique password. An ideal password is ten characters long. But, the Cobo Vault wallet makes it possible for you to create a 30-character password with a mix of symbols, numbers, and letters. Plus, you have the option of choosing to set up a pattern as your password.

Step 6: Create your vault

Proceed to create a new vault for storing your digital assets. To get started, tap on the ‘Create vault’ icon, click ‘Next,’ and then “Understand” to complete the process.

Step 7: Back up or record the recovery phrase

After creating the first vault, the device will display a set of 24-words known as the seed that is used in recovering your private keys should you forget the password for the device. Record these on the indestructible metal tablet shipped alongside the device. The device will ask you to confirm that you correctly recorded the seed.

Step 8: Start loading cryptocurrencies and tokens

Your wallet is now active and ready for use. You can start moving your cryptocurrencies from exchanges and other wallets into the Cobo Vault Wallet.

Step 9: Synchronize with Cobo Vault Mobile App

Accessing your vault from your mobile phone is quite easy. All you are required to do is synchronize your Cobo vault mobile app with your device. Start by downloading the app from Google Play or iOS. Open the app and click on “Bind” from the “Add wallet” option. Agree to their terms and conditions and click “confirm” to begin scanning the QR code.

If the code doesn’t scan currently on the first trial, click on “difficulty scanning” and retry.

Supported Crypto Assets and countries

Unlike most other hardware crypto wallets that support hundreds – sometimes thousands – of cryptocurrencies and tokens, you can only store a maximum of 11 cryptocurrencies and ERC-20 tokens on the Cobo Vault hardware wallet. These include:

  • Ethereum (ETH)
  • Dash
  • Bitcoin (BTC)
  • BitcoinCash (BCH)
  • Ethereum Classic (ETC)
  • EOS
  • XRP
  • Litecoin (LTC)
  • Zcoin (XZC)
  • Tron (TRX)
  • Decred (DCR)
  • ERC- 20 tokens

The Cobo wallet developers argue that there is no limit to the number of cryptos you can store within your Cobo crypto wallet. They are also regularly releasing firmware updates for the wallet that involves increasing the number of supported cryptocurrencies.

Virtually any crypto trader/investor looking for a safe storage unit for their digital assets can purchase the Cobo Vault hardware wallet form their official website and have it shipped to any part of the world.

Cobo Vault hardware wallet ease of use:

The fact that the Cobo Vault wallet will only use the QR code scanner for communications with the company’s website and mobile apps complicate its use – especially the initial activation and verification process. The processes of sending and receiving coins into the wallet are, however, quite straightforward as the wallet eliminates the need to type in the lengthy wallet addresses. You only need to scan the other party’s QR code.

Thanks to its relatively large touch screen and fingerprint sensor, interacting with the wallet when checking crypto balances, creating additional vaults, or setting passwords for hidden vaults is relatively simple.

Cobo Vault hardware wallet customer support:

Cobo vault’s website is multilingual and available in both English and Mandarin. Its developers have also availed both written and video tutorials on their website aimed at helping address some of the most common challenges faced by Cobo Vault users.

You can also contact the Cobo Vault customer support team by raising a ticket on their website, via email, or reaching out through the official Cobo Vault social media pages (Facebook, Weibo, Twitter, or LinkedIn).

Cobo wallet fees and charges:

The unlimited number of premium security features integrated into the Cobo Vault hardware wallet explains the relatively high price of the different Cobo Vault wallet models. Ideally, there are three models of the Cobo Vault Wallet: Cobo Vault Essential costs $99, Cobo Vault Pro costs $149, while Cobo Vault Ultimate costs $479.

You, however, won’t be charged to download and install the Cobo Vault mobile app or for the continued use of the Cobo wallet. The blockchain network operators will nevertheless institute transaction fees that vary based on the amounts transferred and type of coin. These fees go to blockchain miners and not Cobo Vault.

Pros and Cons of Cobo Vault hardware wallet

Pros 

  • The contactless nature of the hardware wallet goes a long way in eliminating the man-in-the-middle hacks.
  • It’s the first truly open-sourced hardware wallet – given that this open-sourced nature extends to its secure element.
  • Its large display allows users to use a full keyboard and eases interactions with the wallet.
  • The increased lockout period and self-destruct features pay a critical role in preventing such physical intrusions as the brute force attack.
  • Cobo Vault wallet employs a combination of several security features, all aimed at keeping your private keys private.

Cons

  • One may consider the wallet too complicated and not user-friendly.
  • The different models of the Cobo Vault wallet are a bit expensive.
  • The wallet supports less than a dozen cryptocurrencies.

How Does Combo Vault wallet Compare to other Wallets in the Market? 

Cobo Vault differs significantly, with some of the most common hardware wallets available today. For instance, in addition to the common security features employed by such hardware wallets as Trezor and Ledger Nano, Cobo Vault introduces the self-destruct mode. It also limits the device’s wireless connectivity and embraces a military-grade casing. That is, fire, water, and impact-proof. The likes of Trezor and Ledger Nano may, however, be considered more user-friendly, support a wide range of crypto assets, and are also less costly.

Final Verdict: Is Cobo Vault the safest hardware wallet?

Thanks to its tamper-proof design, open-sourced secure element, self-destruct feature, and limited connectivity, Cobo Vault makes it on the list of the most secure hardware wallets available today. We consider it ideal for long-time crypto investors specializing in popular cryptos. Its security and cool design notwithstanding, we take offense with its steep cost $479 cost, especially considering that it only supports 11 cryptocoins.