Categories
Cryptocurrencies

BitBox02 Hardware wallet Review: How Safe Is The Bitbox Hardware Wallet?

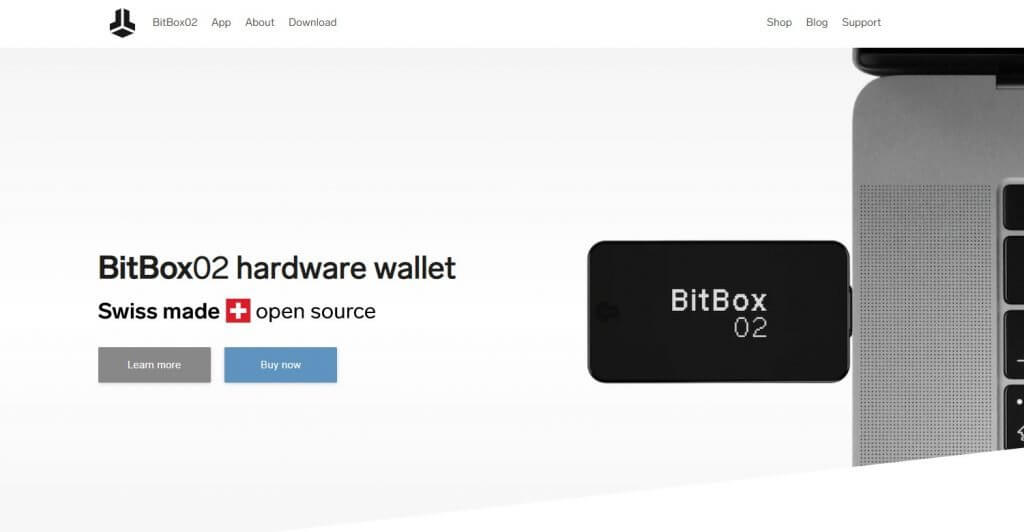
Bitbox02 is a hardware crypto wallet developed by Shift Cryptosecurity AG, a technology company based in Zurich, Switzerland. It has a minimalistic design but packs a wide range of highly effective security features. And this falls in line with its mission of providing users with a secure and independent hardware wallet. According to the Shift Crypto website, the hardware wallet was developed by an international team of programming and crypto security specialists as an improvement of BitBox01.

Some of this wallet’s key features include an OLED display and invisible touch sensors for ease of navigation and a secure element, multi-signature support, and enterprise-grade encryption. In this review, we will be vetting BitBox02’s safety and ease of use by detailing its key security features, its step-by-step activation guide, number of supported currencies, and its pros and cons:

Key features:

Solid architecture: BitBox02 is ultralight, weighing only 12g. It is also made from a highly durable polycarbonate that can resist such elements as heat and water.

OLED display: BitBox02 features a white and 128*64 pixels OLED display. It plays a key role in easing in-wallet navigation and is large enough to fit a wallet address.

Invisible touch sensors: In addition to the OLED display is a range of invisible touch sensors that line up the sides of the wallet device. These also play a key role in navigating the wallet and approving outbound crypto transactions.

Desktop and mobile app compatible: BitBox02 is a cross-platform hardware wallet. It has a compatible desktop app for all the popular desktop operating systems like Windows, macOS, and Linux. Their website also hints at an upcoming mobile crypto wallet.

Multi-wallet: The wallet’s software is available in two downloadable data sheets; the BitBox02 multi and BitBox02 BTC. BitBox02 BTC ensures that the wallet will only support Bitcoin Cryptocurrency, while BitBox02 Multi supports popular cryptos.

Security features:

Password: Both the BitBox02 hardware wallet and compatible BitBox02 apps have a password as their primary deterrence against unauthorized access. You get to set both when activating the wallet and creating a user account.

Open-sourced: BitBox02 hardware wallet is highly transparent in that it is built on a fully open-sourced technology. This implies that both the app and the wallet firmware are open for viewing and auditing by wallet users and crypto security experts.

Secure element: BitBox02 wallet’s secure element is made up of dual chips that are used to store your encrypted private keys. The dual-chip architecture is designed using proprietary technology. They are also reinforced with a monotonic counter technology that limits the number of login attempts and a password stretcher that extends the amount of time required between login attempts while erasing the wallet contents after 15 unsuccessful attempts.

Instant backup: The BitBox02 hardware wallet comes with an SD card that you can use to back up your private keys. Unlike most other hardware wallets that provide you with an easy-to-forget recovery seed, the BitBox02 hardware wallet presents you with an SD card that you can use to back up your recovery seed instantaneously.

Enterprise-grade encryption: Your private keys, passwords, personal data held in your BitBox02 wallet is highly encrypted using the AES-256-CBC technology. Your wallet’s communications with other third party websites and systems are also subjected to end-to-end encryption.

Two-factor authentication: Outbound crypto transfers must also be subjected to two-factor verification processes.

Cold storage: Your private keys and any other personal data held in the wallet is held in offline cold storage. This gives you absolute control over your private keys and their backup.

FIDO-certified: BitBox02 wallet is FIDO certified as a Universal two-factor authenticator.

How to set and activate the BitBox Hardware wallet

Step 1: Start by ordering your BitBox hardware wallet on the Shift Crypto website.

Step 2: Download the BitBox02 desktop wallet app that’s compatible with your computer operating system.

Step 3: Plugin the hardware device (ensure the SD card is inserted)

Step 4: Chose a name for the wallet and create a unique wallet password.

Step 5: You will now have access to the BitBox02 wallet dashboard. Start by agreeing to the security information displayed to proceed.

Step 6:  On the ‘create a new wallet’ tab, enter your preferred wallet name, and create a password

Step 7: Remove the SD Card and keep it safe.

Step 8: The wallet is now active and ready to use

How to add/ receive crypto into your BitBox Hardware wallet

Step 1: Start by logging in to the BitBox02 wallet.

Step 2: If you are operating the multi-crypto wallet, select the coin you would like to receive

Step 3: Copy the wallet address or QR code and forward it to the party sending you crypto.

Step 4: Wait for the funds to reflect in your account.

How to send Crypto from your BitBox Hardware wallet

Step 1: Log in to your BitBox02 wallet

Step 2: If you are operating a multi-cryptocurrency wallet, select the coin you wish to send

Step 3: Enter the recipient’s wallet address and the amount of crypto you wish to send

Step 4: Insert the BitBox0 hardware wallet

Step 5: Confirm the transaction details on the hardware device and authorize the transfer by pressing the invisible touch sensors on the device.

BitBox Hardware wallet ease of use

The BitBox02 hardware wallet package doesn’t give you a manual/user guide, just a link to their website printed on the packaging box’s underside. It, however, is quite easy to use. Setting up the wallet, linking it with the desktop app, and creating a user account is quite straightforward.

Interacting with the app by sending or receiving crypto into the wallet or backing up your digital assets is also quite easy. And all these play a key role in making BitBox02 the most user-friendly hardware wallet.

BitBox Hardware wallet supported currencies and countries.

The number of cryptocurrencies supported by the BitBox02 hardware wallet depends on the firmware installed. You can choose BitBox02 BTC that will only support Bitcoin and Litecoin or BitBox02 multi that supports a wider range of cryptocurrencies.

You can also integrate the app with MyEtherWallet that makes it possible for you to support BTC, LTC, ETH, and 1000+ tokens.

BitBox02 wallet can be shipped to virtually every crypto-friendly country in the world.

BitBox Hardware wallet cost and fees

BitBox02 hardware wallet retails at €99.

You will only have to pay the variable crypto transaction fee when sending cryptocurrencies and tokens to another wallet or exchange.

BitBox Hardware wallet customer support

BitBox02 hardware wallet distributors have a highly responsive customer support team accessible via email or such Shift Crypto official social media pages on Facebook, Twitter, Instagram, Telegram, and follow their blogs on Medium.

What are the pros and cons of using the BitBox Hardware Wallet?

Pros:

  • BitBox02 hardware wallet has a strong emphasis on security.
  • It is easy to backup and recover your wallet using the SD card.
  • It is compatible with both desktop and mobile apps for easy navigation.
  • You can integrate MyEtherWallet that expands the number of supported currencies.
  • It is easy to use.

Cons:

  • Will only support a limited number of coins and tokens.
  • The screen is really small.
  • One may consider their €99 price tag restrictive.

Comparing BitBox Hardware wallet with other hardware wallets

BitBox Hardware wallet vs. Ledger Nano S wallet

Bitbox02 and Ledger Nano are both crypto hardware wallets that take pride in the number and effectiveness of integrated security features. Some of their similarities include integrating two-factor authentication, sleek design, and the fact that they both store your private keys in offline cold storage.

But unlike Ledger Nano S that supports 1000+ cryptocurrencies and tokens, the BitBox02 hardware wallet will only support a handful of crypto assets. Plus, while Ledger Nano S presents you with a set or recovery seed that you can use to backup your private keys. Unlike Ledger Nano S, however, BitBox02 has a simpler setup guide and supports multi-signature functionality.

Verdict: Is the BitBox02 Hardware Wallet safe?

Yes, BitBox02 hardware wallet embraces some of the most effective security measures. These include the fact that the wallet is open-sourced, is FIDO certified to serve as a Universal two-factor authenticator, two-step verification for outbound transfers, and backing up your wallet in an SD card. But these aren’t the only factors endearing BitBox02 to its users. Others include its rather straightforward setup process and its intuitive user interface.

Categories
Cryptocurrencies

Secalot wallet Review: Is It The Safest Hardware Wallet Yet?

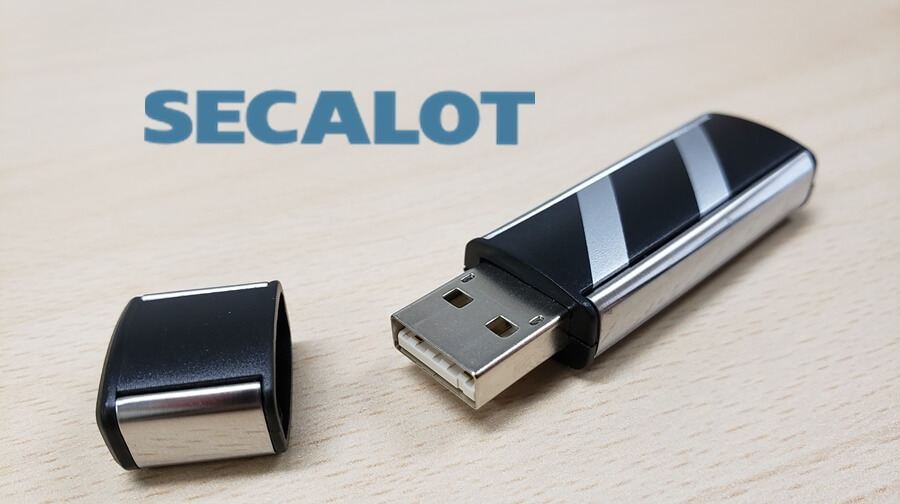
Secalot is an all-in-one, security-focused crypto hardware wallet developed and launched into the Crypto market in 2017. It takes the form of a USB dongle that packs a wide range of operational, security, and privacy features. Unlike most USB-like hardware wallets characterized by an OLED on-device screen, Secalot uses a remote screen. It nevertheless has two buttons for authentication of crypto transactions.

Most of Secalot hardware wallet features are spread between the USB dongle and its software/mobile app companions. We will detail them all in this Secalot hardware wallet review, outline the step-by-step guide on how to activate the crypto vault, vet its ease of use, and list its pros and cons.

Secalot wallet key features

Remote screen: Given that the Sacelot hardware device doesn’t have an on-screen device, it relies heavily on a remote screen hosted on the Sacelot mobile app. This lets you view and manage your digital assets, though the private keys never leave the hardware device.

OpenPGP smart card: Secalot’s unique design equips you with the capability to perform cryptographic actions using the OpenPGP smart card. These include file encryption and signing, logging into computers under Linux, signing and encrypting email,  as well as encrypting hard disks using TrueCrypt.

On-device buttons: The USB, like Secalot hardware wallet dongle, features two on-device buttons that are used to not only navigate the wallet but also authorize outbound crypto transfers.

Compatible with MyEtherWallet: Though the Secalot wallet is a multi-currency wallet, it is biased towards the Ethereum blockchain network, as evidenced by the fact that it is compatible with MyEtherWallet.

Portfolio tracker: The Secalot wallet app also features balance and transaction history tabs that let you monitor your digital assets portfolio in real-time.

Secalot wallet security features

PIN-protected: Secalot hardware wallet is secured and encrypted with a PIN code.

Recovery seed: When activating the wallet and creating a user account, you will be presented with a 24-word recovery seed to restore lost wallets and recover private keys.

U2F + OTP: The hardware wallet hosts the Universal Second Factor (U2F) feature that can be used to generate the one-time-passcode (OTP) for signing into sensitive websites like Google, GitHub, Facebook, NextCloud, and numerous other websites. This features compliments (and can be used alongside) Google’s Authenticator app.

Hierarchically deterministic: Secalot is a hierarchically deterministic hardware wallet that auto-generates a new wallet address for each transaction. This privacy feature helps throw crypto trackers off.

Open source: The Secalot hardware wallet, software, and app are all open-sourced. You can download to view, audit, or suggest improvement on this source code from the official Secalot wallet website or their GitHub page.

Non-Custodial + Cold storage: Secalot is a non-custodial wallet that stores your private keys and other personal data in the cold offline storage – the USB like dongle device. You have absolute control over these private keys.

Encrypted communication: All Secalot hardware wallet communications with third-party systems and Secalot wallet app/software are highly encrypted. They communicate via the ultra-safe SSL/TLS channel that eliminates the possibility of a man-in-the-middle hack.

How to set and activate the Secalot wallet (Bitcoin or Ethereum wallet)

How to activate a Secalot Bitcoin wallet

Step 1: Start by downloading the modified version of the Electrum wallet on Secalot’s official website.

Step 2: Install and launch the Electrum Wallet.

Step 3: On the initializing page, click on “Create New Wallet” and create a unique user name for your crypto wallet.

Step 4: Chose the type of wallet you want to create (between a standard wallet and a Multi-signature wallet)

Step 5: Connect the Secalot hardware device and copy the 24-word recovery seed generated.

Step 6: Create a PIN Code for your hardware wallet device

Step 7: The wallet is now active and ready to use

How to activate a Secalot Ethereum wallet

Step 1: After purchasing the Secalot hardware device, open their official website and download the modified MyEtherWallet

Step 2: Follow the installation prompts as dictated by the “Secalot Control Panel GUI.”

Step 3: Connect the hardware wallet device.

Step 4: Copy the 24-word recovery seed generated.

Step 5: Create a PIN code for the hardware wallet

Step 6: The Secalot Ethereum wallet is now active and ready to use

How to add/receive crypto into your Secalot wallet

Step 1: Log in to the modified Secalot account you want to use, Electrum for Bitcoin or MyEtherWallet for Ethereum and ERC-20 tokens

Step 2:  On the user dashboard, click on the receive button

Step 3:  Copy the wallet address or the QR code displayed by the deposit window and forward it to the party sending you coins.

Step 4: Wait for the coin to reflect on your account.

How to send crypto from your Secalot wallet

Step 1: Log in to the modified Secalot account you want to use, Electrum for Bitcoin or MyEtherWallet for Ethereum and ERC-20 tokens

Step 2: Click the “Send” icon on the user dashboard.

Step 3: Enter the wallet address for the recipient and the number of coins you want to send

Step 4: Confirm the transaction and hit send.

Step 5: Connect the Secalot hardware dongle into the computer and log in by keying in the PIN code.

Step 6: Authorize the transaction

Secalot wallet ease of use

Though Secalot hardware wallet stacks a ton of features and advanced security protocols, it isn’t user-friendly, especially to crypto beginners. We consider its onboarding process quite complicated, especially since it requires you to download, setup, and maintain two different online wallets to store two cryptocurrencies and a handful of Eth-tokens.

Further, the multilingual hardware wallet fails to integrate such basic features as a crypto exchange or swap platform.

Secalot wallet supported currencies.

Secalot hardware will only support Bitcoins, Ethereum, and ERC-20 token. Note that the two popular cryptos are also hosted on different Secalot wallets.

Secalot wallet cost and fees

You can order a Secalot hardware wallet from its official website. It currently retails at €50.

When sending Bitcoins or Ethereum and the ERC-20 tokens to another wallet or exchange, you will have to part with a variable transaction fee collected by blockchain miners and administrators.

Secalot wallet customer support

There are two primary ways of accessing the Secalot hardware wallet’s customer support team. You can choose to send them an email or direct message them on Facebook and Twitter.

What are the pros and cons of using the Secalot wallet?

Pros:

  • Secalot is highly secure as it embraces advanced security features.
  • Advanced features.
  • It is competitively priced.
  • The hardware wallet is highly transparent in that its source code is fully open-sourced.
  • Secalot is highly versatile and available as a hardware dongle and software wallet app.

Cons:

  • Secalot hardware wallet relies on third-party wallets like electrum and MyrEtherWallet.
  • It supports a limited number of coins.
  • The hardware wallet packaging doesn’t include a user manual/installation guide.

Comparing Secalot wallet with other hardware wallets

Secalot wallet vs. Trezor hardware wallet

Secalot and Trezor hardware wallets share more than a commitment to the safety and privacy, and integrity of their client funds. They both are also characterized by ultra-light hardware dongles and highly intuitive user interfaces. Moreover, they have embraced several high advanced operational and security protocols like the recovery seed, two-factor authentication, and maintaining offline cold storage for client private keys.

But while the Trezor Wallet has a relatively easy and straightforward setup process, Secalot Wallet’s activation process is rather complex. Furthermore, Trexor Wallet supports a broader range of cryptocurrencies and tokens (1000+), while Secalot will only support two digital currencies.

Verdict: Is Secalot Wallet safe?

Yes, Secalot is a considerably safe hardware wallet. Not just because your private keys and all other data stored never leaves their offline storage but also because of the numerous and highly advanced security and privacy measures the wallet developers have put in place. For instance, they ensured that the wallet is hierarchically deterministic and provided the option of setting up a multi-signature wallet. It serves as a U2F authenticator, and both its firmware and software are fully open-sourced.

Categories
Cryptocurrencies

SafePal S1 Hardware wallet Review: How Safe Is Safepal T Hardware Wallet?

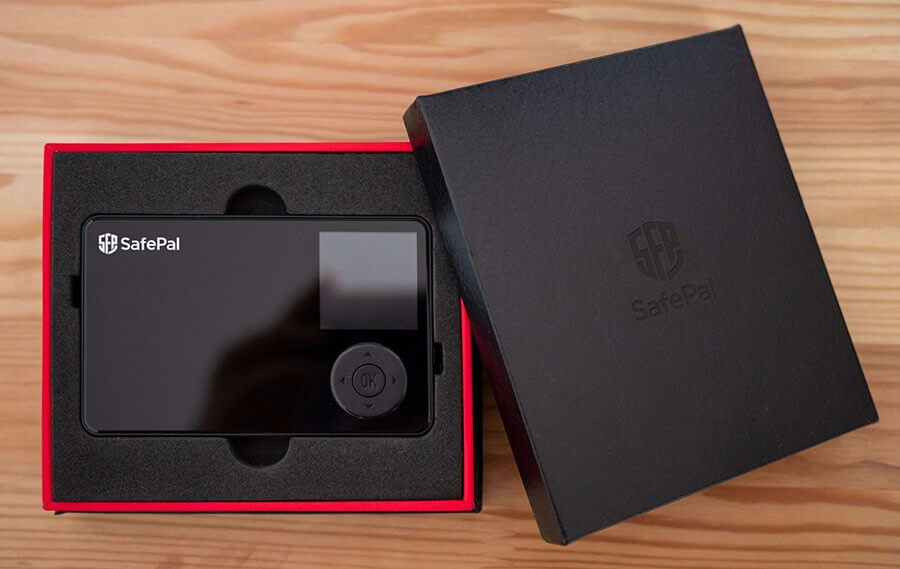
SafePal S1 hardware crypto wallet was introduced to the crypto community in 2019. And though it’s relatively new, SafePal is a highly innovative wallet that seeks to provide crypto users with a “Secure, Simple, and Enjoyable crypto management solution.” The wallet has the backing of prominent crypto industry players like Binance Exchange. It has also integrated a host of operational and security features to help it achieve this goal.

According to the SafePal S1 website, the wallet was developed by a group of software, cybersecurity, and hardware experts, with the blessings of Binance. And one of its approaches to solving the constant challenges faced by other crypto hardware wallets was making it a 100% cold storage wallet.

This review will detail its features, understand how it works, vet its ease of use and fees. We will also provide you with a step-by-step guide on how to use SafePal Hardware Wallet before telling you if SafePal S1 is indeed the safest hardware wallet yet.

Key features

High-resolution screen: SafePal S1 hardware wallet has a sleek design that takes the shape of an MP3 player. It features a relatively wide and high-resolution color screen and a D-pad controller that you use to navigate the wallet. It also features a camera whose key role is scanning QR codes for other wallets and exchanges.

Mobile app compatible: SafePal hardware wallet developers have also come up with the SafePal wallet app that you can use to manage your crypto balance and facilitate crypto exchanges.

Monitor crypto portfolio: The SafePal mobile wallet app features the balance and activity tabs that you can use to monitor your crypto portfolio in real-time. For instance, the activity tab outlines your crypto transaction history (inflows and outflows) and, in turn, helps shape your crypto budget.

Integrated exchange: One of SafePal’s key partners is Binance – the largest crypto exchange in the world. And this partly explains why SafePal Wallet mobile app features BinanceDEX that SafePal users can use to trade and exchange different cryptos and exchanges.

Send crypto via social media: SafePal’s innovativeness is best highlighted by the wallet user’s ability to send crypto via the different social media networks. A SafePal wallet user can, for instance, send altcoins and tokens to an individual (regardless of whether they have a SafePal wallet or not) via social media.

Security features

Pin code: SafePal hardware wallet is secured with a PIN code that you set when creating a user account. It is also fitted with the number randomization tool that helps you avoid key loggers and other spying tools.

Password + pattern for the app: The SafePal mobile wallet app, on the other hand, is secured with a password or a pattern.

Recovery seed: SafePal will also present you with a backup and recovery seed for your wallet and private keys. When creating a user account on the platform, you will be presented with either 12 or 24 random phrases that form your wallet’s recovery seed. Write them down and save them offline.

Secure element: The SafePal hardware wallet is also fitted with a hack-proof EAL5+ secure element. This is a global finance industry-grade crypto chip that stores your private keys.

Two-factor authentication: All crypto transactions initiated via the SafePal mobile app must be signed and authenticated using the hardware device.

Key-deletion tool: SafePal S1 wallet features a key deletion tool that allows you to add and delete cryptos and tokens with ease.

Tamper-proof: The hardware wallet’s package features two tamper-proof seals, and so does its secure element. In the case of a suspected cyber hack or if someone tried to tamper with its secure element, the key deletion and self-destruct features will be triggered.

Offline cold storage: SafePal S1 hardware device is a 100% offline vault that connects to your phone or computer via a USB cable. It doesn’t maintain wireless (Wi-Fi, Bluetooth, or otherwise) connections with internet-connected devices.

How to set and activate the Safepal S1 Hardware wallet

Step 1: Download the SafePal S1 mobile app after purchasing the SafePal S1 hardware device

Step 2: Install and launch the app.

Step 3: Create a password and pattern for the mobile app

Step 4: Connect the SafePal S2 hardware device to the computer and choose your preferred language.

Step 5: Open the SafePal app and click on the ‘Add Wallet’ icon. Alternatively, tab the scan button on the top-right corner of the app.

Step 6: Follow the setup wizard prompts to create a user account.

Step 7: Chose a recovery seed (between 12-word seed and 24-word seed) and write it on the mnemonic cards that accompany the hardware wallet package.

Step 8: Verify that you’ve correctly copied this mnemonic phrase.

Step 9: Create and verify a PIN code for the mobile device

Step 10: Scan your wallet’s QR code using the mobile app to connect the two.

How to add/receive crypto into your SafePal S1 Hardware wallet

Step 1: Log in to your SafePal S1 wallet mobile app on click on the “Receive” icon

Step 2: Copy the wallet address and forward it to the party sending you crypto coins.

Alternatively:

Step 3: Have the party sending you cryptos/tokens scan your wallet’s QR code.

Step 4: Wait for the funds to reflect on the wallet.

How to send crypto from your SafePal S1 Hardware wallet

Step 1: Log in to the SafePal S1 mobile wallet app and click on the “Send” button.

Step 2: From the list of hosted cryptocurrencies and tokens, select the coin you want to send

Step 3: Enter the recipient’s wallet address or scan their QR code and the number of coins/tokens you wish to send

Step 4: Select the fee level.

Step 5: Confirm that the transaction details are correct and hit the send button. The app will then display a dynamic QR code specific to that transaction.

Step 6: Use the SafePal S1 hardware wallet to authorize the transfer. Simply use the hardware wallet’s camera to scan the app’s QR code and enter the PIN to sign and authorize the transaction.

Step 7: Confirm that the transaction has sailed through on the mobile app via the

SafePal S1 Hardware wallet ease of use

Though lengthy, SafePal S1 has a straightforward onboarding process. The wide display screen on the hardware wallet and easily navigable mobile wallet app interface has made interacting with the crypto vault, receiving, and sending cryptos relatively easy.

SafePal S1 hardware wallet is also available in over ten international languages.

SafePal S1 Hardware wallet supported currencies and countries.

According to the SafePal S1 website, the hardware wallet can support 1000+ cryptocurrencies and tokens. Wallet addresses are also generated offline by the hardware device.

SafePal S1 Hardware wallet cost and fees

SafePal S1 hardware wallet costs $59.99, but the company behind the brand is currently running a limited-time discount of $39.99.

The only other charge you will have to part with is the blockchain network’s network fees for transaction verification and confirmation.

What are the pros and cons of using the SafePal S1 Hardware Wallet?

Pros:

  • Very safe as it stores all your private keys offline in a tamper-proof secure element
  • SafePal S1 is cheaper than most other crypto hardware wallets
  • The hardware wallet supports a wide range of both cryptocurrencies and tokens
  • It features the largest and most liquid crypto exchange
  • The hardware is tamper-proof and embraces stringent security measures

Cons:

  • One may consider the wallet’s activation process quite laborious and not beginner-friendly
  • It maintains a rather complicated crypto transfer process

Comparing Safepal S1 Hardware wallet with other hardware wallets

Safepal S1 Hardware wallet vs. Ledger Nano S

SafePal S1 and Ledger Nano S are both highly advanced crypto hardware wallets. Their similarities include the fact that they both host 1000+ crypto coins and tokens. They store the client’s private keys offline and employ multi-layer protection tools around all the wallets, including two-factor authentication and offline wallet address generation. Both are also compatible with mobile apps and feature on-device screens that help ease navigation.

The two are also different in the pricing and mode of operation. For instance, while the Ledger Nano S hardware wallet costs around $60.00, SafePal S1 costs a paltry $39.99. Similarly, while the SafePal hardware device and its mobile app companion will only communicate through the hack-proof QR Codes, Ledger Nano S connects to its app companion via a wireless Bluetooth connection that is susceptible to man-in-the-middle attacks.

Verdict: Is Safepal S1 Hardware wallet safe?

SafePal S1 is a safe hardware wallet. It has embraced several highly effective security and privacy measures to safeguard the integrity of the device and private keys held therein. And it all starts with tamper-proof packaging with two proprietary seals. It has also employed multiple security features, including two-factor authentication, offline generation of wallet addresses, and a 6-digit passcode for the hardware device and password + pattern for the SafePal S1 mobile wallet app. You only have to part with the $39.99 wallet cost.

Categories
Cryptocurrencies

Keevo Hardware Wallet Review: How Does Paperless Recovery Work & Is It Safe?

Keevo is a hardware crypto wallet developed by a San Francisco-based Fintech Company – BitKey Technologies Inc. And according to its developers, Keevo has its focus set on providing users with a hardware wallet that offers the right balance between security and usability. It is highly innovative and offers standard-setting solutions to some of the challenges facing the crypto industry like continuity after death and paperless crypto backup and recovery.

On their website, the Keevo hardware wallet is described as a “Swiss bank vault in your pocket, but without the bank,” as well as a simple, intuitive, and secure crypto wallet.

But how true are these bold claims? How secure is the Keevo hardware wallet? More importantly, how effective are such revolutionary features as paperless recovery and beneficiary service? We answer all these questions and tell you everything else you need to know about the crypto vault in this Keevo hardware wallet review.

Keevo wallet key features

On-device color screen: Keevo hardware wallet device has a large, high-resolution color display as its most prominent feature. This screen is large enough to fit a wallet address; it’s easily navigable and touch-sensitive.

Durable casing: Keevo hardware wallet’s casing is made from precision-cast zinc alloy and glass fiber, and reinforced steel for maximum durability. These also ensure that the wallet is protected from elements of nature like dust, temperature, and water.

Desktop app companion: Keevo hardware wallet is also compatible with the keevo desktop app that lets you view your crypto activity and your digital assets easily.

Multi-wallet vault: Keevo is a multi-wallet crypto vault in that there is no limit to the number of wallet addresses or private keys you can store in the wallet.

Beneficiary service: Keevo offers the revolutionary beneficiary service that allows your heir to inherit your digital assets when you pass. This solves the dead man’s conundrum that has seen an estimated 4 million Bitcoins lost forever since their holders didn’t leave clues about the wallet passwords or recovery seed before death. To achieve this, Keevo allows you to name a beneficiary and have them create a separate login option (PIN + Fingerprint) on your Keevo carbon key. Upon your passing, Keevo will verify your death before handing over the login credentials to your heir.

Keevo wallet security features

Passcode + Fingerprint sensor: Keevo hardware wallet is protected by a multi-layered security system. You start by creating a PIN code and reinforce it with a Fingerprint. This ensures that even if a hacker gained access to your PIN, they can’t transact without your Fingerprint.

Two-factor authentication: Every outbound crypto transfer initiated by Keevo hardware wallet must be subjected to two-factor verification. It takes the PIN and Touch ID to authorize crypto transfers to other wallets or exchanges.

Dual chip architecture: Keevo claims to use double CPUs that embrace the highest data encryption levels and segregation as used by leading banks and finance industry players.

No storing private keys: Regardless of all these safety and privacy measures employed by Keevo, the company claims that it does not store your private keys. Rather, it calculates the digital assets associated with the login credentials every time you log in.

Proprietary multi-signature system: Keevo wallet developers are in the final stages of patenting a multi-factor/multi-signature transaction authentication system that will then be integrated into the Keevo hardware wallet.

Carbon Key: This refers to a proprietary private keys recovery system designed and populated by the Keevo hardware wallet. It is a four-step and paperless authentication system that backs up your wallet and helps you recover private keys, effectively replacing the recovery seed system used by most wallets. The carbon key is a secondary hardware device that stores encrypted copies of your hardware wallet’s PIN code, Fingerprint, and wallet data. You start by sending this data to Keevo, and they will create a personalized Carbon key and ship to you or store it in one of the ultra-secure 1400+ vaults maintained by Iron Mountain data handlers for a small fee.

How to set and activate the Keevo Hardware wallet

Step 1: Order your Keevo hardware wallet

Step 2: Download and install the Keevo desktop wallet app.

Step 3: Complete registration by choosing a username and creating a password

Step 4: Turn on the Keevo hardware wallet device and connect to the computer via the provided USB cable.

Step 5: Once paired, create a PIN for the device and scan your Fingerprint.

Step 6: Keevo will now display your wallet address and QR code

Step 7: The wallet is now active and ready for use

Note: You will need to contact the Keevo wallet development team to activate the beneficiary service and subscribe to their service plans.

How to add/receive Crypto into your Keevo Hardware wallet

Step 1: Log in to your Keevo desktop app and click on the “Receive” icon.

Step 2: From the display window, copy the wallet address or its QR code and forward it to the person sending you altcoins

Step 3: Wait for your funds to reflect on your account.

How to send Crypto from your Keevo Hardware wallet

Step 1: Log in to your Keevo desktop wallet and click on the “Send” icon.

Step 2: Select the altcoin you wish to send

Step 3: Enter the recipient wallet address and the amount of funds to transfer in the transfer window

Step 4: Connect the hardware device to the wallet

Step 5: Log in to the hardware device and verify that the transaction details are correct.

Step 6: Hit send.

Keevo Hardware wallet ease of use

Despite playing host to several premium features, Keevo maintains one of the most interactive and easy to use user interfaces. Both the desktop wallet app and the hardware device feature a clean user and easily navigable user interface. And plastered throughout the website, especially on the FAQ page of the Keevo website and blog, is a host of explanatory guides teaching you how to interact with the wallet and most of its features.

Keevo Hardware wallet supported currencies and countries.

Keevo supports all the popular cryptocurrencies, and plans are underway to incorporate as many altcoins and tokens as possible.

The wallet is designed and assembled in the US but can be shipped to virtually any crypto-friendly country across the world.

Keevo Hardware wallet cost and fees

Keevo hardware wallet costs $299.

There are, however, two other charges associated with the use of the Keevo hardware wallet. First is the blockchain network fees you have to pay every time you send Crypto to other wallets or exchanges. It is mandatory and is collected by the respective blockchain miners or network administrators.

Second is the subscription cost for the service plans offered by Keevo that is paid monthly/annually. The fee is optional and only applies to individuals who wish to enjoy the beneficiary service and have their carbon key (wallet backup) stored in the ultra-secure Iron Mountain vaults.

Keevo Hardware wallet customer support

Keevo has an active and highly responsive customer support team that you can call, text via the Live chat feature on the website of and desktop app, email, or direct message via the different social media platforms.

The Keevo wallet developers also host regular Ask Me Anything (AMA) sessions on their telegram channel, where you get to interact and engage both its developers and experienced Keevo Wallet users.

What are the pros and cons of using the Keevo Hardware wallet?

Pros:

  • Keevo wallet employs key security measures around the wallet, including storing your carbon key in Iron Mountain vaults.
  • The beneficiary system ensures that your digital assets aren’t lost when you die.
  • Its carbon key simplifies the backup and recovery process.
  • The wallet features advanced security and operational features.

Cons:

  • You have to verify your identity to access their beneficiary system.
  • One may consider Keevo wallet’s price restrictive.

Comparing Keevo Hardware wallet with other hardware wallets

Keevo Hardware wallet vs. Trezor Model T wallet

Keevo and Trezor Model T hardware wallets are highly innovative hardware wallets with a relatively large and high-resolution touch screen. Both feature an intuitive user interface and embrace such effective security and privacy measures like two-factor authentication and backup/recovery options. Further, swallets addresses are generated offline by a hierarchically deterministic system.

But while Trezor will only embrace the industry standard operational and security features, Keevo has introduced several innovative and proprietary security features. For instance, Trezor stores your private keys online and comes with a card for storing the recovery seed. Keevo, on the other hand, doesn’t store your private keys in its secure element. And in place of the backup and recovery seed, it introduces the revolutionary carbon key.

Verdict: Is the Keevo hardware wallet safe?

Yes. Keevo hardware wallet has employed highly effective safety and privacy measures around the wallet. Most of these are proprietary, highly innovative, and fit for eventual adoption as the new industry standard. These include the innovative paperless carbon key that serves as a wallet backup and recovery option, the patent-pending multi-factor authentication, the dual-chip architecture that does not store private keys in the wallet, and the revolutionary beneficiary system that ensures your cryptos don’t die with you upon your passing.

Categories
Cryptocurrencies

BitFi Wallet Review: Is BitFi The Ford Knox Of Hardware Wallets?

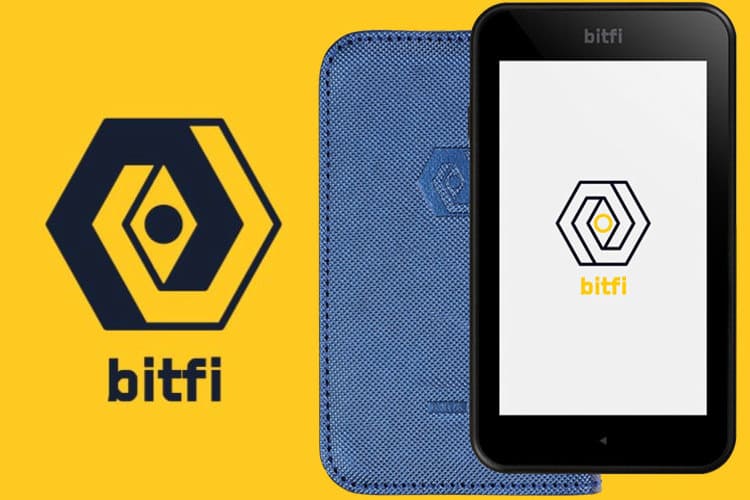
BitFi is a smartphone-like hardware wallet designed and developed by John McAfee – the techpreneur behind McAfee Antivirus software. It is a highly intuitive crypto vault that integrates both industry standard and some innovative operational and security features. For instance, unlike most software and hardware crypto wallets that have a backup seed and store private keys offline, BitFi doesn’t provide you with a recovery seed, and neither does it integrate the cold storage feature.

BitFi became hugely popular because of McAfee’s bold claim that the wallet is “unhackable” and even referring to it as the ‘Fort Knox’ of crypto hardware wallets. A security audit of its source code, however, revealed numerous bugs and vulnerabilities. The wallet was then hacked. This saw McAfee drop the ”Unhackable” tab, agree that no wallet or computer system is unhackable, and defend BitFi by arguing that it was all a marketing stunt.

In this BitFi hardware wallet review, we outline and explain all the security and operational features that first convinced John McAfee that this Crypto vault is unhackable. We will also vet its ease of use, its pros, and cons, and provide you with a step by step guide on how to activate and use BitFi.

Key features

Large screen: BitFi hardware resembles an ordinary smartphone and has a full OLED screen. The on-device screen is large enough to fit the entire wallet address and plays a crucial role in making BitFi as intuitive as possible.

Native interface: You don’t need to download a desktop or mobile app wallet companion for the BitFi hardware wallet. The hardware device features a native user interface that you can use to navigate and interact with the wallet and your private keys.

Multi-wallet hardware vault: BitFi is a multi-wallet hardware vault because there is no limit to the number of wallet addresses you can hold on the device.

Security features

Passcode + SALT: Like any other wallet, BitFi requires you to set up a 6-digit passcode to protect your BitFi account. But unlike any other wallet, it requires you to create “SALT,” a passphrase that you will need to login to the BitFi hardware device.

Open sourced: BitFi is a fully open-sourced hardware wallet whose source code is available on both the official BitFi wallet website and its GitHub page.

Secret phrase: In the place of the near-traditional recovery/backup seed generated by most hardware/software wallets, BitFi lets you create a secret phrase that you can use alongside ‘SALT’ to calculate your private keys.

No storing private keys: Though it is a hardware wallet, BitFi doesn’t store your private keys in cold offline storage. Instead, it uses Salt and your secret phrase to calculate your crypto wallet balances every time you log in. This technically means that you can log in and access your digital portfolio using any hardware BitFi device.

Locked Bootloader: BitFi derives its claim of tamper-proof hardware wallets from the fact that it has a locked bootloader. This means that BitFi’s firmware is locked and will not allow the injection of any foreign programs or instructions.

No counterfeits: BitFi official website claims that the hardware wallet cannot be counterfeited. This argument is based on the fact that the wallet’s firmware uses a specially packaged and unique fingerprint – the Trusted Execution Environment – that cannot be replicated.

How to set and activate the BitFi wallet

Step 1: Start by making your purchase of the Bitfi Knox crypto hardware wallet.

Step 2: Create a user account on Bitfi official website. This step requires you to create a password and verify your email address.

Step 3: After email confirmation, the website will ask for the 6-digit code on your hardware wallet

Step 4:  It will now require you to create a SALT. Think of it as a username that should be unique but easy to remember

Step 5: Create the secret phrase of a minimum of 7 words if they are multi-character or 9words with no special characters. However, you are free to push this to 10, 12, or even 15 words for improved security. You can use the BitFi randomizing system by rolling the dice that accompanies the hardware device and their online word list.

Step 6: Turn on BitFi hardware wallet and connect to the same Wi-Fi as the computer or phone you are using to create a user account.

Step 7: Hit the Sync button on the online wallet user dashboard to connect the website account with the hardware device

Step 8: Enter the SALT and secret phrase to login to the hardware device and access your wallet address and QR code.

Step 9:  Your Bitfi wallet is now active and ready for use

How to add/receive crypto into your BitFi wallet

Step 1: Log in to your Bitfie wallet

Step 2: Copy the wallet address and send it to the person sending you cryptos or have them scan your wallet’s QR code.

Step 3: Wait for the funds to reflect on your wallet.

How to send crypto from your BitFi wallet

Step 1: Log in to your BitFi online wallet and hit the send button on the user dashboard.

Step 2: Select the coin or crypto asset you want to send

Step 3: Enter the recipient’s wallet address and the number of cryptos you want them to receive

Step 4: Log in to your Bitfi hardware wallet and synchronize it with the online user dashboard.

Step 5: Confirm that the transaction details and correct and authorize the transfer via the hardware device.

BitFi wallet ease of use

Bitfi is a very intuitive and beginner-friendly hardware wallet. The setup process is relatively easy and straightforward. The fact that you can access your digital assets even on a (trusted) friend’s BitFi hardware wallet solidifies this ease of use claim.

Additionally, you don’t need to worry about losing/misplacing the paper/card that holds your recovery seed. You do not need it. You only need Salt and the easy to remember Secret phrase to access your digital assets.

BitFi wallet supported currencies.

BitFi is a multicurrency wallet that supports 12 cryptocurrencies and a host of ERC-20 tokens.

It is especially hailed as the first hardware wallet to support Monero crypto. Their official website also mentions that the development team is working towards incorporating more cryptos tokens in the near future.

BitFi wallet cost and fees

BitFi hardware wallet retails at $120.

The only other charge you might have to factor in when using the BitFi wallet is the transaction fee charged and collected by blockchain miners and network administrators to confirm and verify crypto transactions.

BitFi wallet customer support

BitFi has the technical and customer support team on standby 24/7 via phone, email, or live chat functionality on your hardware device.

What are the pros and cons of using the BitFi wallet?

Pros:

  • BitFi is an easy to use and beginner-friendly crypto hardware wallet.
  • The hardware wallet doesn’t store your private keys in a specific device.
  • It is a multi-wallet and multi-signature vault that you can share with family or friends with everyone creating wallet address-specific Salt and Security Phrase.
  • Your private keys never leave the wallet.

Cons:

  • It will only work if connected to the internet via Wi-Fi.
  • The $120 price tag is restrictive.
  • It doesn’t support anonymous user registration or trading.

Verdict: Is BitFi wallet safe?

Yes, Bitfi has embraced highly advanced security and privacy protocols that guarantee your private coins’ safety. For instance, their hardware wallet doesn’t hold any coins. Its specially designed firmware is also locked to eliminate counterfeiting and injection of malicious codes. And though its open-sourced nature helped many blockchain security experts uncover its vulnerabilities and soil its reputation as an ‘Unhackable’ wallet, it has helped identify many more bugs and their patches. Our only reservation with the use of the BitFi hardware wallet is its restrictive acquisition cost and the fact that it has already been hacked.

Categories
Cryptocurrencies

XZEN Hardware Wallet Review: Security, Fees, Ease of Use, Pros, And Cons

XZEN website describes its hardware wallet as a “Hybrid cybersecurity system” that “Combines hardware, software, and services” in guaranteeing maximum security, transparency, and the highest levels of user experience. It was designed and developed by an Estonian Virtual currency wallet and exchange services provider, XZEN EST Ltd, and launched in 2018. It is the native wallet for the XZEN exchange and features a mobile app companion that hosts such interactive services as the crypto exchange and payment service processor.

According to XZEN founder Dmitry Laptev, this highly innovative and versatile Crypto was born of the need to change the security architecture around hardware wallets. It is especially aimed at eliminating the chances of losing your digital assets because of a forgotten PIN or lost backup seed. It is also one of the few hardware wallets that support fiat currencies.

This review will be vetting the hardware wallet to determine if it is as secure and easy to use as advertised. We will outline its key operational and security features, provide you with a step-by-step guide on how to set up and use XZEN wallet, check the number of supported currencies, and compare it with other hardware wallets.

XZEN Wallet key features

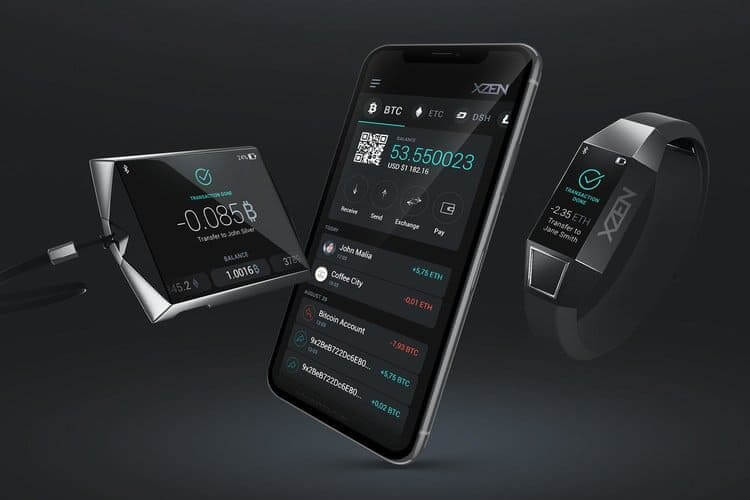
On-device screen: XZEN hardware wallet features a 2.4-inch high-resolution LCD screen that is large enough to fit the entire wallet address.

Mobile compatibility: The hardware wallet has a mobile (Android/iOS) and desktop (Windows/macOS/Linux) app companions that host most of XZEN’s interactive features such as the crypto exchange and portfolio tracking tools.

Inbuilt exchange: XZEN hardware wallet users also interact with the XZEN decentralized exchange hosted on the mobile and desktop apps. The wallet is hybrid and supports both crypto-to-crypto as well as fiat-to-crypto exchanges. Also, it allows you to buy Crypto virtually via any credit/debit card.

Instant transfers: Cryptocurrency transfers on the XZEN platform are instantaneous. Moreover, transfers within the wallet’s ecosystem (from one XZEN wallet to another) do not attract additional charges or commissions.

Contactless payments: Embedded in the XZEN hardware wallet device is an NFC chip that powers contactless payments. It allows you to pay for goods and services in millions of stores worldwide without necessarily connecting your device to the store’s hardware. The chip is also attributed to one of the wallet’s coolest features – wireless charging.

Wireless connections: Just like you don’t need to physically connect an XZEN hardware device to a store’s systems to pay for goods, you also don’t need to connect it to your computer or mobile phone to transfer coins. It is fitted with the Bluetooth 4.2 technology used to communicate with its app companion via a highly secure and AES encrypted channel.

Steel case: The XZEN wallet components are protected by an airtight steel casing that is both dust and waterproof.

Security features

PIN Code + Touch ID: XZEN hardware wallet embraces a multilayered security feature that constitutes both a PIN Code and Touch ID.

Encrypted CPU: The hardware wallet will also feature a highly encrypted CPYU/secure element on which your private keys are stored.

Cold storage: XZEN hardware wallet maintains that the private keys for digital assets are always kept in a 100% offline device and never leave the wallet.

Two-factor authentication: All transfers out of your XZEN wallet must be subjected to two-factor authentication. While you can initiate the outbound transaction via the mobile or desktop app, it must be authorized by the hardware device.

Licensed: XZEN EST Limited is a licensed virtual currency wallet and exchange services provider, authorized and regulated by Estonia’s Financial Intelligence Unit (FIU).

How to set and activate the XZEN wallet

Step 1: Start by ordering the XZEN hardware device from the XZEN wallet’s official website.

Step 2: Open the XZEN wallet official website. Click on the “APP” page. Download the wallet app that is compatible with your phone or computer.

Step 3: Install and launch the app.

Step 4: Choose a username and create a unique multi-character password for the wallet app.

Step 5: Turn on the XZEN hardware wallet and pair it to the phone app via Bluetooth or the USB cable.

Step 6: Once paired, the hardware wallet will request you to create a PIN code and set up the fingerprint ID.

Step 7: It will then provide you with a 12-word recovery seed

Step 8: The wallet will now generate a wallet address that you can use to add/receive funds

How to add/receive Crypto into your XZEN wallet

Step 1: Log into your XZEN crypto wallet app and click on the “Receive” button.

Step 2: Copy the wallet address or QR code provided and send them to the individual sending you coins.

Step 3: Wait for the funds to reflect on your wallet.

How to send Crypto from your XZEN wallet

Step 1: Log in to your XZEN crypto wallet app and hit the “Send” icon.

Step 2: Select the cryptocurrency or token you wish to transfer, especially if you have multiple wallet addresses

Step 3: Enter the recipient address and amounts you want to send

Step 4: Turn on and login to XZEN hardware wallet.

Step 5: Connect the phone or computer to the hardware device via the cable or Bluetooth

Step 6: Confirm that the transaction details are correct and authorize the transaction.

XZEN wallet ease of use

XZEN has one of the most intuitive interfaces – for both the hardware device and the mobile/desktop apps. They are both clean and easy to navigate with little to no help. Several text and video guides throughout the XZEN wallet website can help you master your way around the device and apps. These come in handy in teaching you how to send or receive cryptos via XZEN and in figuring out your way around the crypto exchange.

These, plus the relatively easy and straightforward onboarding process, make XZEN wallet one of the most intuitive hardware wallets.

XZEN wallet supported currencies

XZEN is a multicurrency hardware wallet that is yet to embrace multiple cryptos and tokens. Currently, you can only host Bitcoins, Ethereum, and ERC-20 tokens on the wallet, but the XZEN website hints about an upcoming upgrade that incorporates more popular cryptos.

XZEN wallet cost and fees

XZEN hardware wallet costs $120.

Crypto exchanges within the decentralized exchange and crypto transfers to other XZEN wallets are free. Nevertheless, you will pay a variable network fee every time you send cryptos and tokens to external wallets and exchanges.

What are the pros and cons of using the XZEN Wallet?

Pros:

  • Crypto transfers from one XZEN wallet to another are free.
  • It integrates a hybrid exchange that allows you to pay for Crypto using a card.
  • Embraces a wide range of security and privacy features.
  • Supports anonymous user registration and trading.
  • Your private keys are held in offline cold storage and never leave the wallet.

Cons:

  • Supports a limited number of cryptocurrencies
  • Requires you to verify identity if you want to pay for Crypto via card

Comparing XZEN wallet with other hardware wallets

XZEN wallet vs. Ledger Nano S wallet

XZEN and Ledger Nano S are both multicurrency hardware wallets. Some of the key security measures they have both implemented include the generation of wallet addresses offline, cold storage for private keys, and two-factor authentication. They also have an on-device screen that one can use to check crypto balances while offline and verify transaction details for outbound transfers.

The two, however, have several operational differences. For instance, while XZEN will only support two major cryptocurrencies, Ledger Nano supports 1000+ cryptos and tokens. The on-device screen for the Ledger wallet is smaller than the large and high-resolution color screen on the XZEN hardware wallet. Moreover, XZEN can be more versatile as it is complemented by feature-rich mobile and desktop companion apps.

Verdict: Is XZEN wallet safe?

Yes. With fingerprint protection, offline cold storage, two-factor authentication, password-protected apps, and recovery seed in place, XZEN hardware wallet has put in place adequate security measures around your private keys. And in appreciation of XZEN wallet’s security-focused approach, storing and managing digital assets, the company was honored with the Excellence in Finance Award in 2019 during the global FiNext Conference in Singapore. Our only reservations with the hardware wallet are its relatively expensive price ($120) and its support for a limited number of coins.

Categories
Cryptocurrencies

Walahala Hardware Wallet Review: Is Walahala A Safe Hardware Wallet or Scam?

On the Walahala website, the hardware wallet is described as a next-generation crypto vault. A hardware crypto vault specially designed to give you more control over your digital assets by allowing you to carry all your cryptocurrencies and tokens in one sleek and smart wallet. This hardware wallet takes the shape, size, and weight of a regular credit/debit card but connects directly to your phone or computer via the USB port. It was developed by Walahala – a blockchain technology company – and introduced to the crypto world in late 2019.

It features highly advanced operational and security features that its developers believe will be instrumental in making it one of the easiest to use and safest hardware wallets.

But how safe is the Walahala hardware wallet? Is it easy to use and as beginner-friendly as its developers want us to believe? How does it work, and how many coins and tokens and it support? We answer all these questions and tell you everything else you need to know in this Walahala hardware wallet review.

Walahala wallet key features

Compatible with software app: Unlike most other hardware wallets with on-device screens, Walahala hardware wallet uses a remote screen of the Walahala desktop or mobile app. Both apps are available for all the popular desktop and mobile apps and can be downloaded from the official walahala website.

Inbuilt exchange: Walahala wallet app features a live and ultra-fast decentralized crypto exchange. According to the Walahala website, this exchange can process over 1.5 million transactions per second. The exchange doubles up as a peer-to-peer network that facilitates faster and inexpensive crypto exchanges.

Portfolio tracker: The Walahala wallet app user dashboard has an “Overview” tab that lets you view and monitor your digital asset balances in real-time.

Exchange explorer: Walahala wallet claims to be the first hardware wallet to include the blockchain exchange explorer. This lets you monitor the crypto activity and trends for the different exchanges. Further, it uses Artificial Intelligent (AI)-powered order-matching algorithms to ensure that your buy or sell order is fulfilled at the most attractive market price.

Unlimited storage: There is no limit to the number of wallet addresses or private keys you can hold on your Walahala hardware wallet.

Plasma Core Technology: Walahala wallet has also embraced a blockchain technology similar to Bitcoin’s Lightning network – the Plasma Core Technology – to facilitate instantaneous transaction confirmation. According to the company’s website, the Plasma Core Engine is hosted in the “Quantum Space” and hence its ultrafast performance.

Security features

Password encryption: Your Walahala hardware wallet is secured with a password that doubles up as the wallet encryption tool. However, unlike other hardware wallets that only support alphanumeric passwords, Walahala allows its users to reinforce the password using the special characters when creating a passphrase.

2FA + questionnaire: Outbound transfers from the Walahala hardware wallet have to be subjected to two-factor authentication. You have the option of using the Google Authenticator app, a personalized questionnaire, or verifying your mobile number to receive OTP messages.

Recovery seed: Unlike most hardware and software wallets that provide you with the standard 12/24 recovery seed phrases, Walahala provides you with a 33-word recovery seed for added security.

No wire/wireless connection: The Walahala hardware wallet is immune to such threats as man-in-the-middle hacks as it connects directly to your phone or computer via the USB port and not via wired or wireless connections like Wi-Fi or Bluetooth.

Non-custodial: Walahala is a non-custodial wallet that stores your private keys and all other personal data 100% offline in the credit card like a hardware device. Your keys never leave the wallet.

Offline wallet address generation: The wallet is hierarchically deterministic. Moreover, all the sensitive wallet information like wallet addresses and mnemonic phrases are generated offline by the hardware wallet device and not its software/crypto app companion.

Key erasure protocol: The key erasure protocol for the Walahala Wallet is triggered after ten consecutive but unsuccessful login attempts. It erases all the data held in the hardware wallet and blocks the card.

How to set and activate the Walahala wallet

Step 1: After buying your Walahala hardware wallet, download the Walahala mobile or desktop app companion

Step 2: Chose a username and create a strong password for the wallet app.

Step 3: Connect the hardware device to your computer or phone

Step 4: Create a name for your hardware device

Step 5: Copy the 33-word recovery seed displayed on the wallet app

Step 6: Create a multi-character password for the hardware wallet

Step 7: The device is now active and ready to use

How to add/receive crypto into your Walahala wallet

Step 1: Log in to your Walahala wallet account and tap the “Receive” button on the dashboard.

Step 2: Copy the Walahala Wallet address or QR code and forward it to the party sending you altcoins.

Step 3:  Wait for the coins to reflect in your wallet.

How to send crypto from your Walahala wallet

Step 1: Log in to your Walahala wallet account and click on the “Send” button.

Step 2: If you have multiple wallet addresses, select the coin you want to transfer

Step 3: On the transfer window, enter the recipient’s wallet address and the number of coins you wish to send

Step 4: Connect the Walahala hardware device to the computer and log in.

Step 5: Confirm that the transaction details are correct and hit send.

Step 6: You will receive an OTP code on your preferred two-factor verification device.

Step 7: Verify the code and confirm the transaction.

Walahala wallet ease of use

Walahala hardware wallet is an easy to use and beginner-friendly all-in-one crypto platform. The hardware device is sleek and portable, while its software companions have highly intuitive user interfaces. These are clean, in that they only feature the most important aspects of the wallet and easily navigable.

The onboarding process is also quick and relatively straightforward. And so are the processes of sending and receiving crypto in and out of the wallet.

New users can also rely on the multiple videos and explanatory guides on the Walahala website to learn how to use and interact with the hardware wallet. Plus, they can also download the Demo trader account to learn their way around the Walahala crypto exchange.

Walahala wallet supported currencies.

Walahala is a multi-currency hardware wallet that supports a wide range of cryptocurrencies, including Bitcoin, Ethereum, Litecoin, Ripple, Dash, Walahala Coin, and ERC-20 tokens. The developers have hinted at the possibility of incorporating more digital assets in upcoming wallet updates.

Walahala wallet cost and fees

Walahala hardware wallet retails at $149 (inclusive of free express shipping fees).

Additional costs include the fees charged by the Walahala exchange as well as the blockchain network fees charged by miners and administrators to verify a crypto transaction.

What are the pros and cons of using the Walahala wallet?

Pros:

  • Walahala embraces a number of highly advanced security features.
  • The wallet integrates a variety of highly effective operational features like the inbuilt exchange.
  • Walahala is highly intuitive and beginner-friendly
  • The Plasma Core Technology ensures Walahala has the fastest transaction processing speeds.

Cons:

  • The $149 price tag is quite restrictive.
  • Walahala is relatively new with no solid reputation.
  • The wallet demands KYC verification for 2FA and for using their exchange.

Comparing Walahala wallet with other Multicurrency hardware wallets

Walahala hardware wallet vs. Ledger Nano S

Walahala and Ledger Nano are both highly innovative hardware multi-currency wallets. They have also put in place highly effective security checks that include two-factor authentication and cold storage.

But while Walahala is relatively new and only supports a handful of cryptocurrencies and tokens, Ledger Nano S has a solid reputation of reliability and supports 1000+ cryptos and tokens. Walahala, however, outperforms Ledger Nano S when it comes to the effectiveness of the integrated operational features with their inbuilt exchange and support for the ultra-fast confirmation of crypto transactions.

Verdict: Is Walahala Wallet safe?

Yes, Walahala has embraced all the important security and privacy features. It helps safeguard the privacy of your crypto coins while the offline storage, password encryption, and direct connection to the computer protect your coins from falling into the wrong hands. Moreover, should you lose the wallet or it is compromised, you can always fall back to the 33-word recovery seed.

Our only reservation with this hardware wallet is the uncompetitive price for the hardware wallet, the fact that it is relatively new and with no reputation of reliability, and the negative criticism it has been receiving (and is yet to respond to) on different bitcoin and blockchain forums.

Categories
Cryptocurrencies

Blockchain Lockbox wallet Review: How Safe Is This Blockchain Hardware Wallet?

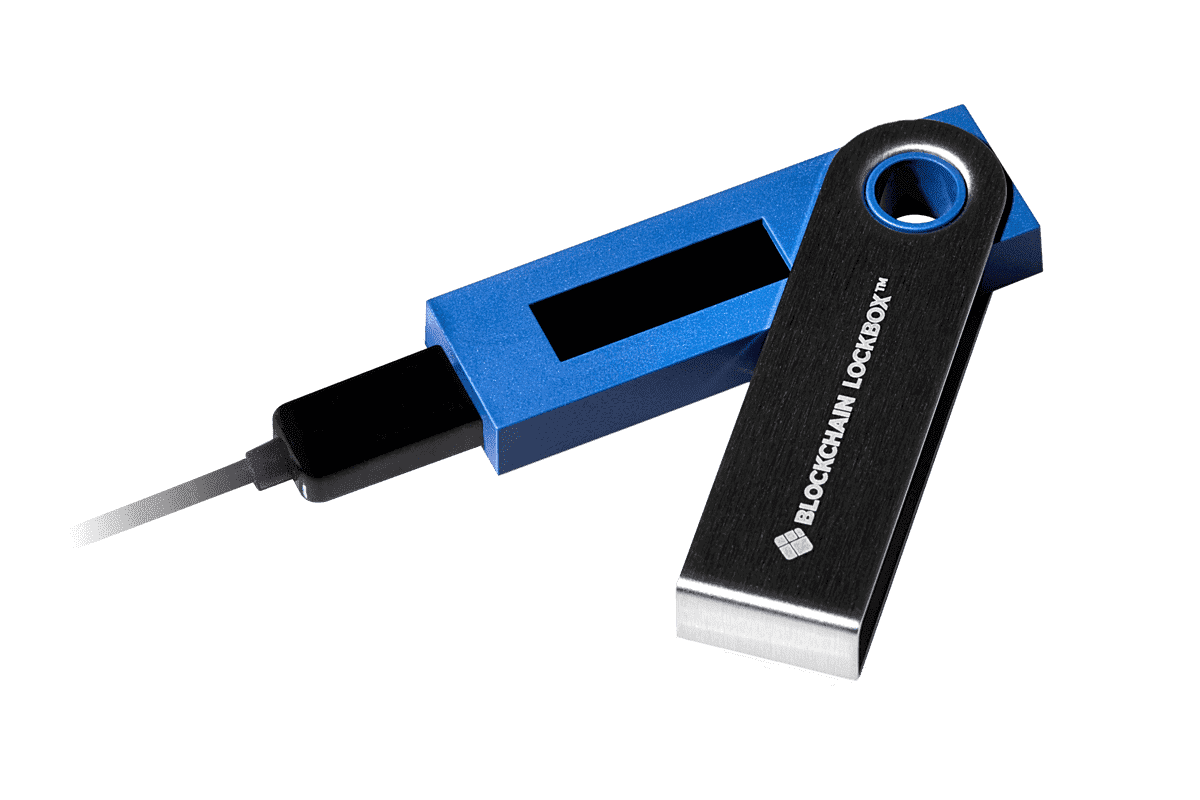
Blockchain Lockbox is an exclusive hardware wallet that’s specially designed to complement the all-popular Blockchain web wallet. Launched in October 2018, Blockchain Lockbox was designed and created by Blockchain wallet founders in collaboration with Ledger Technology Company. According to Blockchain Wallet CEO, Peter Smith, the hardware wallet is supposed to offer their platform users the option and means to manage their digital assets seamlessly, online and offline.

Blockchain Lockbox is marketed as a security-focused crypto wallet that incorporates the most comprehensive range of highly effective safety and privacy measures. These are then complemented by an equally impactful list of operational features aimed at making the Blockchain Lockbox wallet as easy to use as possible.

In this Blockchain Lockbox review, we detail these features and vet their influence on the hardware wallet’s safety and ease of use. We also look at such other factors as the number of currencies supported by the wallet, its pros, and cons, level of customer support advanced, and compare it with equally popular hardware wallets.

Blockchain Lockbox key features

Compatible with blockchain web wallet: Blockchain Lockbox is ideally supposed to compliment and offer an offline alternative of the already popular Blockchain web wallet.

On-device screen: The USB-like hardware device that takes the shape of Ledger hardware wallets features an on-device OLED screen. The screen comes in handy when activating the wallet, checking crypto balances offline, and authenticating outbound crypto transfers.

Navigation button: In addition to the screen are two on-device buttons supposed to help you navigate the hardware wallet and confirm outbound crypto transfers.

FIDO-Certified: Blockchain Lockbox is a FIDO certified hardware wallet. This means that in addition to keeping the private keys for your cryptocurrencies safe, it can also be used to store the security keys for your Google, Dropbox, GitHub accounts, and more.

Blockchain Lockbox security features

PIN Code: Blockchain Lockbox hardware wallet is secured with a PIN code that you get to create when setting up the crypto vault. This 8-digit PIN not only protects but also encrypts the wallet’s content.

Recovery seed: When activating the hardware wallet, you will also be presented with a 24-word backup seed that you can use to recover your lost wallet or private keys.

Ledger technology: Ledger has a solid reputation for coming up with the most secure crypto hardware wallets. So does Blockchain web wallet, and the fact that Lockbox infuses both Ledger and Blockchain wallet technologies speaks volumes about the hardware wallet’s reliability.

Anti-phishing protocols: Blockchain lockbox is an end-point controlled wallet. It has a unique key embedded within its firmware that will only pair with the legit Blockchain wallet website. This implies that Blockchain Lockbox cannot turn on when connected to a clone website, which goes a long way in defeating phishing.

Non-custodial/Cold storage: Blockchain Lockbox, like the blockchain web wallet, is a non-custodial crypto vault that will not store your private keys on the company servers. Instead, it encrypts all your user data – the private keys and any other personal information stored therein – and holds it in the offline hardware device.

Dual Chip architecture: Unlike most other hardware wallets whose secure element will only feature one encryption chip, Blockchain Lockbox features the ultra-secure ST31H320 and STM32F042 chips. Note that both chips are CCEAL5+ (crypto industry-level) certified.

Key Erasure tool: If you enter your PIN code for the crypto wallet unsuccessfully for three consecutive times, the hardware device will be locked, and any content therein permanently deleted.

How to set and activate the Blockchain Lockbox wallet

Step 1: Start by ordering your Blockchain Lockbox hardware wallet from the Blockchain wallet official website

Step 2: Open the Blockchain Wallet website and login into your user account or create one.

Step 3: Connect the hardware device to your computer using the USB cable provided

Step 4: On your Blockchain wallet’s user dashboard, tap on the ‘Balances’ tab and select the “Set up now” icon

Step 5: Chose the device you wish to set up – Blockchain Lockbox.

Step 6: Follow the prompts by the setup wizard to complete the process.

Step 7: Once done, the hardware device will display the “Choose a PIN” message.

Step 8: Press both on-device buttons simultaneously to set a wallet PIN. Toggle between the right and left buttons when selecting a number and press both buttons simultaneously once satisfied with your 8-digit PIN.

Step 9: Write down and verify the 24-word recovery seed provided by the hardware device

Step 10: Your wallet is now active and ready for use

How to add/receive crypto into your Blockchain Lockbox wallet

Step 1: Log in to your Blockchain wallet user account and click on the “Request” tab.

Step 2: Select the cryptocurrency you would like to receive on the drop-down menu.

Step 3: Chose Blockchain Lockbox on the “Receive To” drop-down menu.

Step 4:  The wallet will automatically generate an address and dynamic QR code that you should now copy and send to the party sending your cryptos

How to transfer coins from blockchain web wallet for Blockchain Blockbox

Step 1: Log into your Blockchain wallet account and click on the “Send” icon.

Step 2: Chose the currency you want to transfer from the drop-down menu and Blockchain Lockbox from the “Receive To” drop-down menu.

Step 3:Chose the sub-wallet on which to deposit the funds to (or simply enter the hardware wallet address) and the number of coins you wish to transfer

Step 4: Select the transaction fee and hit send.

Step 5: The wallet will prompt you to connect the Hardware Wallet

Step 6: Log in to the hardware wallet by keying in the PIN code

Step 7: Press the right on-device button to view the transaction details.

Step 8: After verifying that the transaction is correct, press the on-device button to authorize the transfer

How to send crypto from your Blockchain Lockbox wallet

Step 1: Log in to the Blockchain wallet and click the “Send” tab.

Step 2: Select the currency you what to send in the “Currency” drop-down menu and Blockchain lockbox in the “From” drop-down menu.

Step 3: Enter the recipient’s address and the number of coins you want them to receive

Step 4: Select the transaction fees and click on “Continue.”

Step 5: Connect your lockbox hardware wallet and log in.

Step 6: Check the accuracy of the transaction details on the on-device screen and press the right on-device button to confirm and authorize the transfer

Blockchain Lockbox wallet ease of use

The Blockchain Lockbox wallet has the most effortless onboarding process. The process of receiving and sending cryptocurrencies in and out of the wallet is also relatively straightforward. The on-device screen and buttons and the highly intuitive user interface of the Blockchain wallet web service have also played a key role in easing the interaction with the hardware wallet. And all these make Blockchain Lockbox a beginner-friendly hardware wallet.

The Blockchain Lockbox website is also multi-lingual and available in 20+ international languages.

Blockchain Lockbox wallet supported currencies and countries.

Blockchain lockbox is a multi-currency hardware wallet that currently supports four cryptocurrencies – Bitcoins, Ethereum, Bitcoin Cash, and Stellar Lumens. The wallet developers have nevertheless committed to increasing the number of supported assets in line with user-demands.

The wallet can also be shipped into 140 crypto-friendly countries across the world.

Blockchain Lockbox wallet cost and fees

Blockchain Lockbox currently retails at $59 + free express shipping.

The transaction fee for sending cryptos from the web wallet to Lockbox or other wallets and exchanges is highly dynamic. Priority fees translate to higher transaction fees and faster transaction confirmation, while the basic charge translates to lower costs and slow transaction confirmation speeds.

Blockchain Lockbox wallet customer support

Blockchain wallet has a highly responsive customer support team available via email or social media platforms like Twitter and Instagram.

What are the pros and cons of using the Blockchain Lockbox wallet?

Pros:

  • Blockchain lockbox is easy to use and beginner-friendly.
  • The hardware wallet is competitively priced.
  • The wallet embraces a wide range of highly effective security measures.
  • Easily integrates the blockchain wallet.

Cons:

  • It can only be used on the Blockchain Lockbox wallet.
  • The wallet doesn’t support fiat-to-crypto purchase.

Comparing Blockchain Lockbox wallet with other hardware wallets

Blockchain Lockbox wallet vs. Ledger Nano S wallet

Blockchain Lockbox is technically an offshoot of the Ledger class of hardware wallets given that it was designed and created by Ledger in partnership with Blockchain. They both employ a wide range of security features, including two-factor authentication and recovery seed. Both are also multi-currency hardware wallets that are simple to use and quite beginner-friendly.

But while Blockchain lockbox is only compatible with the Blockchain wallet, Ledger Nano S is versatile and compatible with multiple software and hardware wallets. Additionally, while Blockchain lockbox will only support four cryptocurrencies, Ledger Nano S supports 1000+ cryptos and tokens.

Verdict: Is the Blockchain Lockbox wallet safe?

Blockchain Lockbox is a safe wallet that has put in place multiple advanced security features that include two-factor authentication, dual-chip architecture, and anti-phishing protocols. We also appreciate Blockchain Lockbox’s ease of use, competitive pricing, and beginner friendliness. The only downside to the hardware wallet is its rigidity in that it is compatible with the Blockchain wallet.

Categories
Cryptocurrencies

Cobo Vault Review: Is It The Safest Hardware Crypto Wallet Ever Designed?

Cobo Vault is arguably one of the most secure hardware wallets currently available. Created by blockchain expert Lixin Liu, Cobo Vault features a host of premium security features that give it an edge over the competition. These include open sourcing its software, disabling wireless connections to the wallet, and enclosing it in a military-grade casing that’s both water and shock-proof. According to Liu, the device that’s dedicated to the Western Markets was designed with the aim of providing the safest, yet easy to use, hardware wallet.

It is one of the most transparent hardware wallets ever introduced to the public. Virtually, all its aspects are open-sourced. In this guide, we explore this in detail. We’ll highlight its key features, explaining its security features, providing you with a step by step on how it works, and going over its pros and cons.

Cobo Vault Key Features:

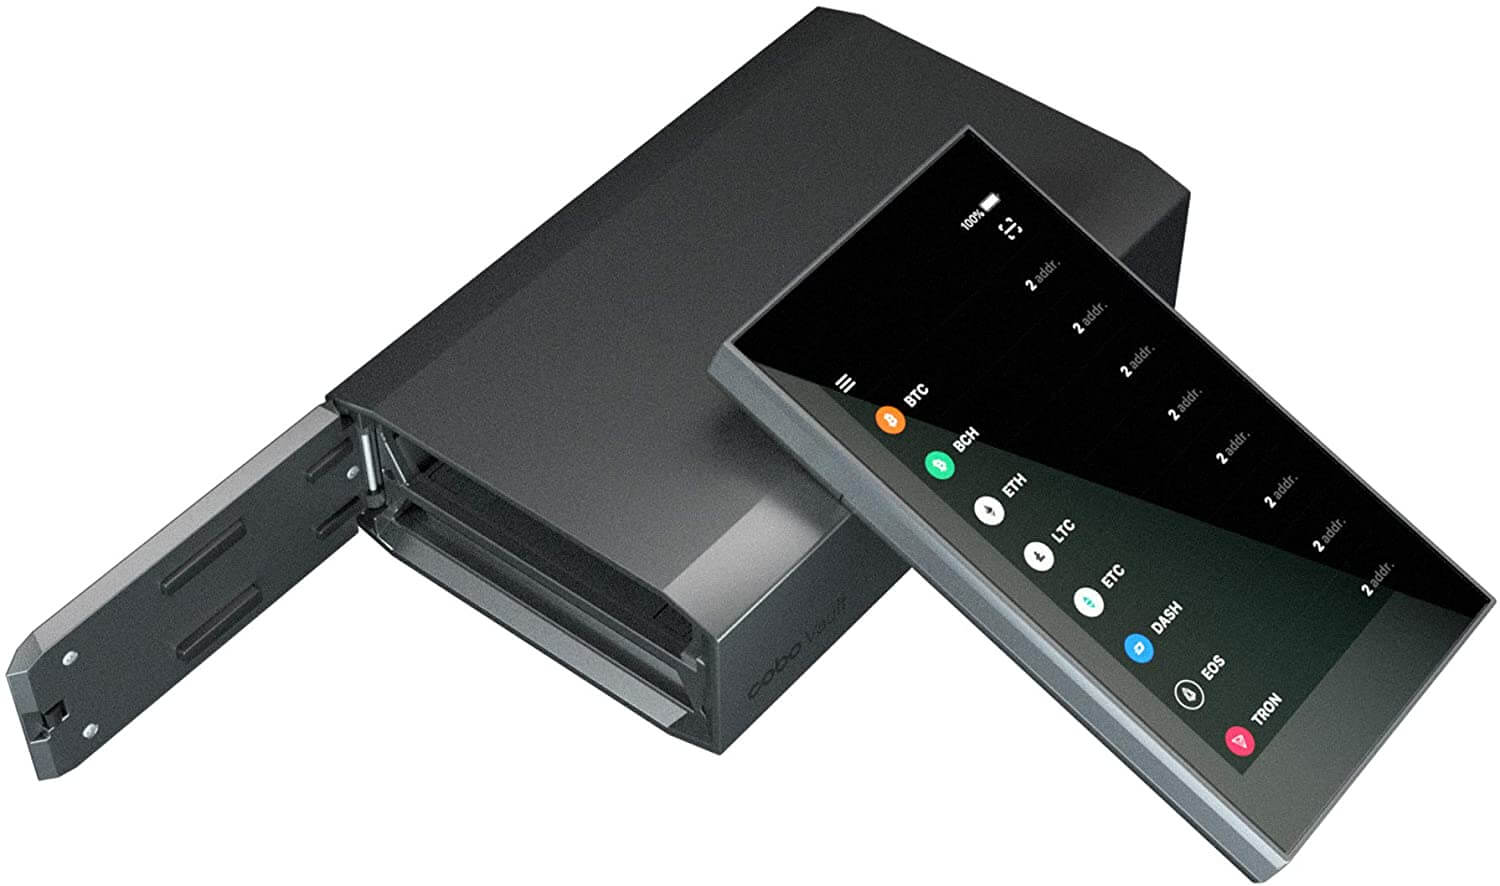
i) 4-inch touchscreen with a fingerprint sensor: Cobo Vault hardware wallet is relatively bulky and features one of the widest screens ever fitted on a hardware wallet. The wallet’s interactive interface is a 4-inch touchscreen with a fingerprint sensor and capable of fitting a full keyboard. The Cobo vault wallet also features a button and a camera that facilitate the wallet’s communications.

ii) Water and shock resistant: Both the metallic and glass casings of the Cobo Vault hardware wallet are made of aerospace aluminum. The military-grade casing is waterproof, impact-resistant, and fulfills the MLD-STD-810G standards set by the US Military.

iii) Rechargeable and removable battery: Cobo Vault hardware wallet features a rechargeable and removable battery. Additionally, instead of relying on the more expensive Li-Ion batteries, the wallet uses the readily available and inexpensive AAA batteries. Most importantly, these batteries have to be detached and charged on a charging dock as a further safety guide.

iv) Multi-coin and tokens support: The Cobo Vault hardware wallet currently supports up to 10 cryptocurrencies and the ERC-20 tokens. Its providers have, nevertheless, hinted on the possibility of expanding this number of supported cryptos during the upcoming firmware updates.

Cobo Vault security features:

Multi-character password:

Like any other hardware or software wallet, Cobo vault has a password as its first protection measure. You get to set this password during wallet installation and activation. Unlike most other crypto wallets, however, Cobo Vault allows you to set up a 30-character long password. Plus, you also have the option of using a pattern password.

Communication via QR Codes:

Unlike most other hardware wallets that use both wired and wireless connections like Bluetooth or Wi-Fi to connect to their crypto apps, Cobo vault uses QR codes. It does not have a USB port, and neither does it support Bluetooth nor Wi-Fi connections. To send/receive cryptos in/out of the wallet, you have to use its camera on the wallet device to scan the receiver’s QR code.

Open-sourced software:

Like most other hardware and software crypto wallets, Cobo vault has outsourced the technology used in coming up with the wallet. This has exposed it to scrutiny and auditing by crypto and blockchain industry experts who affirm its security.

Cobo vault has gone ahead and open-sourced its wallets secure element – often considered the most opaque part of the hardware – making it the first hardware wallet to expose this sensitive aspect of its wallet’s operations.

Firmware Upgrade through SD Card:

In light of the fact that the Cobo vault hardware wallet doesn’t have a USB port and doesn’t support wireless connections, it can only be updated via an SD card.

12-24 word recovery seed:

When installing the Cobo vault hardware wallet, you will also be furnished with a 24-word recovery seed that you can use to recover your private keys if you ever forget your password or lose the device. The Cobo Vault package will also feature a Cobo tablet – a stainless metallic wallet that you will use to store this recovery seed.

Increasing lockout period:

Cobo Vault further protects your wallet against brute force attacks by incrementally pushing up the lockout time between two subsequent password input attempts.

Self-destruct security feature:

In addition to the increased lockout period for failed password input, the Cobo vault hardware wallet has a self destruct feature. The wallet will delete any form of data stored within the wallet’s secure element should anyone try to open the body of the device.

Hidden vaults:

You get to create a vault/ wallet address for every crypto stored in your Cobo vault. But you also have the option of creating multiple hidden wallet addresses with individual passcodes for these cryptocurrencies and tokens.

No physical attack points:

The Cobo Vault Hardware wallet is completely air-gapped with no physical points of attack, safe for the SD card used during the firmware update. By disabling Wi-Fi, USB cable, and Bluetooth connections, Cobo Vault effectively eliminates the possibility of a man-in-the-middle attack.

Encryption chip:

The device features an encrypted chip that integrates BIP32, 39, and 44 security protocols. The Chip is proprietary and bank-grade, and it works by auto-generating truly random numbers for your private keys.

Setting up Cobo Vault hardware wallet

Step 1: Power on your device

Press and hold the power button for 3 seconds to boot the Cobo Vault wallet and proceed to choose your desired language.

Step 2: Visit Cobo official website

Using your desktop, laptop, or mobile phone, open Cobo Vault’s official website and click on start to display the web authentication QR code. The size of this code can be adjusted inwards or outwards.

Step 3: Scan the QR code using your Cobo Vault device

Use the camera on your Cobo vault device to scan the QR code displayed on the Cobo vault.

Step 4: Input the 8-digit code shown on your device

For the Cobo vault device verification, scan the 8-digit code on the website. If it succeeds, the website will display the “Authenticated” message while the device displays a “Success” note. But if your hardware and the website don’t pair, and the authentication process fails, it is possible that the device might have been tampered with.

Step 5: Set a strong password

Proceed to set a strong, memorable, and highly unique password. An ideal password is ten characters long. But, the Cobo Vault wallet makes it possible for you to create a 30-character password with a mix of symbols, numbers, and letters. Plus, you have the option of choosing to set up a pattern as your password.

Step 6: Create your vault

Proceed to create a new vault for storing your digital assets. To get started, tap on the ‘Create vault’ icon, click ‘Next,’ and then “Understand” to complete the process.

Step 7: Back up or record the recovery phrase

After creating the first vault, the device will display a set of 24-words known as the seed that is used in recovering your private keys should you forget the password for the device. Record these on the indestructible metal tablet shipped alongside the device. The device will ask you to confirm that you correctly recorded the seed.

Step 8: Start loading cryptocurrencies and tokens

Your wallet is now active and ready for use. You can start moving your cryptocurrencies from exchanges and other wallets into the Cobo Vault Wallet.

Step 9: Synchronize with Cobo Vault Mobile App

Accessing your vault from your mobile phone is quite easy. All you are required to do is synchronize your Cobo vault mobile app with your device. Start by downloading the app from Google Play or iOS. Open the app and click on “Bind” from the “Add wallet” option. Agree to their terms and conditions and click “confirm” to begin scanning the QR code.

If the code doesn’t scan currently on the first trial, click on “difficulty scanning” and retry.

Supported Crypto Assets and countries

Unlike most other hardware crypto wallets that support hundreds – sometimes thousands – of cryptocurrencies and tokens, you can only store a maximum of 11 cryptocurrencies and ERC-20 tokens on the Cobo Vault hardware wallet. These include:

  • Ethereum (ETH)
  • Dash
  • Bitcoin (BTC)
  • BitcoinCash (BCH)
  • Ethereum Classic (ETC)
  • EOS
  • XRP
  • Litecoin (LTC)
  • Zcoin (XZC)
  • Tron (TRX)
  • Decred (DCR)
  • ERC- 20 tokens

The Cobo wallet developers argue that there is no limit to the number of cryptos you can store within your Cobo crypto wallet. They are also regularly releasing firmware updates for the wallet that involves increasing the number of supported cryptocurrencies.

Virtually any crypto trader/investor looking for a safe storage unit for their digital assets can purchase the Cobo Vault hardware wallet form their official website and have it shipped to any part of the world.

Cobo Vault hardware wallet ease of use:

The fact that the Cobo Vault wallet will only use the QR code scanner for communications with the company’s website and mobile apps complicate its use – especially the initial activation and verification process. The processes of sending and receiving coins into the wallet are, however, quite straightforward as the wallet eliminates the need to type in the lengthy wallet addresses. You only need to scan the other party’s QR code.

Thanks to its relatively large touch screen and fingerprint sensor, interacting with the wallet when checking crypto balances, creating additional vaults, or setting passwords for hidden vaults is relatively simple.

Cobo Vault hardware wallet customer support:

Cobo vault’s website is multilingual and available in both English and Mandarin. Its developers have also availed both written and video tutorials on their website aimed at helping address some of the most common challenges faced by Cobo Vault users.

You can also contact the Cobo Vault customer support team by raising a ticket on their website, via email, or reaching out through the official Cobo Vault social media pages (Facebook, Weibo, Twitter, or LinkedIn).

Cobo wallet fees and charges:

The unlimited number of premium security features integrated into the Cobo Vault hardware wallet explains the relatively high price of the different Cobo Vault wallet models. Ideally, there are three models of the Cobo Vault Wallet: Cobo Vault Essential costs $99, Cobo Vault Pro costs $149, while Cobo Vault Ultimate costs $479.

You, however, won’t be charged to download and install the Cobo Vault mobile app or for the continued use of the Cobo wallet. The blockchain network operators will nevertheless institute transaction fees that vary based on the amounts transferred and type of coin. These fees go to blockchain miners and not Cobo Vault.

Pros and Cons of Cobo Vault hardware wallet

Pros 

  • The contactless nature of the hardware wallet goes a long way in eliminating the man-in-the-middle hacks.
  • It’s the first truly open-sourced hardware wallet – given that this open-sourced nature extends to its secure element.
  • Its large display allows users to use a full keyboard and eases interactions with the wallet.
  • The increased lockout period and self-destruct features pay a critical role in preventing such physical intrusions as the brute force attack.
  • Cobo Vault wallet employs a combination of several security features, all aimed at keeping your private keys private.

Cons

  • One may consider the wallet too complicated and not user-friendly.
  • The different models of the Cobo Vault wallet are a bit expensive.
  • The wallet supports less than a dozen cryptocurrencies.

How Does Combo Vault wallet Compare to other Wallets in the Market? 

Cobo Vault differs significantly, with some of the most common hardware wallets available today. For instance, in addition to the common security features employed by such hardware wallets as Trezor and Ledger Nano, Cobo Vault introduces the self-destruct mode. It also limits the device’s wireless connectivity and embraces a military-grade casing. That is, fire, water, and impact-proof. The likes of Trezor and Ledger Nano may, however, be considered more user-friendly, support a wide range of crypto assets, and are also less costly.

Final Verdict: Is Cobo Vault the safest hardware wallet?

Thanks to its tamper-proof design, open-sourced secure element, self-destruct feature, and limited connectivity, Cobo Vault makes it on the list of the most secure hardware wallets available today. We consider it ideal for long-time crypto investors specializing in popular cryptos. Its security and cool design notwithstanding, we take offense with its steep cost $479 cost, especially considering that it only supports 11 cryptocoins.