Categories
Cryptocurrencies

BitBox02 Hardware wallet Review: How Safe Is The Bitbox Hardware Wallet?

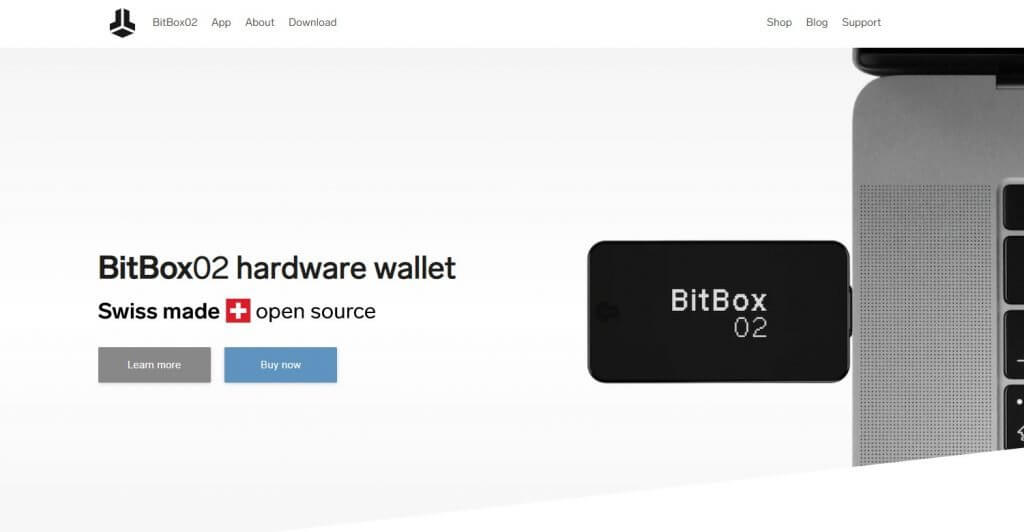
Bitbox02 is a hardware crypto wallet developed by Shift Cryptosecurity AG, a technology company based in Zurich, Switzerland. It has a minimalistic design but packs a wide range of highly effective security features. And this falls in line with its mission of providing users with a secure and independent hardware wallet. According to the Shift Crypto website, the hardware wallet was developed by an international team of programming and crypto security specialists as an improvement of BitBox01.

Some of this wallet’s key features include an OLED display and invisible touch sensors for ease of navigation and a secure element, multi-signature support, and enterprise-grade encryption. In this review, we will be vetting BitBox02’s safety and ease of use by detailing its key security features, its step-by-step activation guide, number of supported currencies, and its pros and cons:

Key features:

Solid architecture: BitBox02 is ultralight, weighing only 12g. It is also made from a highly durable polycarbonate that can resist such elements as heat and water.

OLED display: BitBox02 features a white and 128*64 pixels OLED display. It plays a key role in easing in-wallet navigation and is large enough to fit a wallet address.

Invisible touch sensors: In addition to the OLED display is a range of invisible touch sensors that line up the sides of the wallet device. These also play a key role in navigating the wallet and approving outbound crypto transactions.

Desktop and mobile app compatible: BitBox02 is a cross-platform hardware wallet. It has a compatible desktop app for all the popular desktop operating systems like Windows, macOS, and Linux. Their website also hints at an upcoming mobile crypto wallet.

Multi-wallet: The wallet’s software is available in two downloadable data sheets; the BitBox02 multi and BitBox02 BTC. BitBox02 BTC ensures that the wallet will only support Bitcoin Cryptocurrency, while BitBox02 Multi supports popular cryptos.

Security features:

Password: Both the BitBox02 hardware wallet and compatible BitBox02 apps have a password as their primary deterrence against unauthorized access. You get to set both when activating the wallet and creating a user account.

Open-sourced: BitBox02 hardware wallet is highly transparent in that it is built on a fully open-sourced technology. This implies that both the app and the wallet firmware are open for viewing and auditing by wallet users and crypto security experts.

Secure element: BitBox02 wallet’s secure element is made up of dual chips that are used to store your encrypted private keys. The dual-chip architecture is designed using proprietary technology. They are also reinforced with a monotonic counter technology that limits the number of login attempts and a password stretcher that extends the amount of time required between login attempts while erasing the wallet contents after 15 unsuccessful attempts.

Instant backup: The BitBox02 hardware wallet comes with an SD card that you can use to back up your private keys. Unlike most other hardware wallets that provide you with an easy-to-forget recovery seed, the BitBox02 hardware wallet presents you with an SD card that you can use to back up your recovery seed instantaneously.

Enterprise-grade encryption: Your private keys, passwords, personal data held in your BitBox02 wallet is highly encrypted using the AES-256-CBC technology. Your wallet’s communications with other third party websites and systems are also subjected to end-to-end encryption.

Two-factor authentication: Outbound crypto transfers must also be subjected to two-factor verification processes.

Cold storage: Your private keys and any other personal data held in the wallet is held in offline cold storage. This gives you absolute control over your private keys and their backup.

FIDO-certified: BitBox02 wallet is FIDO certified as a Universal two-factor authenticator.

How to set and activate the BitBox Hardware wallet

Step 1: Start by ordering your BitBox hardware wallet on the Shift Crypto website.

Step 2: Download the BitBox02 desktop wallet app that’s compatible with your computer operating system.

Step 3: Plugin the hardware device (ensure the SD card is inserted)

Step 4: Chose a name for the wallet and create a unique wallet password.

Step 5: You will now have access to the BitBox02 wallet dashboard. Start by agreeing to the security information displayed to proceed.

Step 6:  On the ‘create a new wallet’ tab, enter your preferred wallet name, and create a password

Step 7: Remove the SD Card and keep it safe.

Step 8: The wallet is now active and ready to use

How to add/ receive crypto into your BitBox Hardware wallet

Step 1: Start by logging in to the BitBox02 wallet.

Step 2: If you are operating the multi-crypto wallet, select the coin you would like to receive

Step 3: Copy the wallet address or QR code and forward it to the party sending you crypto.

Step 4: Wait for the funds to reflect in your account.

How to send Crypto from your BitBox Hardware wallet

Step 1: Log in to your BitBox02 wallet

Step 2: If you are operating a multi-cryptocurrency wallet, select the coin you wish to send

Step 3: Enter the recipient’s wallet address and the amount of crypto you wish to send

Step 4: Insert the BitBox0 hardware wallet

Step 5: Confirm the transaction details on the hardware device and authorize the transfer by pressing the invisible touch sensors on the device.

BitBox Hardware wallet ease of use

The BitBox02 hardware wallet package doesn’t give you a manual/user guide, just a link to their website printed on the packaging box’s underside. It, however, is quite easy to use. Setting up the wallet, linking it with the desktop app, and creating a user account is quite straightforward.

Interacting with the app by sending or receiving crypto into the wallet or backing up your digital assets is also quite easy. And all these play a key role in making BitBox02 the most user-friendly hardware wallet.

BitBox Hardware wallet supported currencies and countries.

The number of cryptocurrencies supported by the BitBox02 hardware wallet depends on the firmware installed. You can choose BitBox02 BTC that will only support Bitcoin and Litecoin or BitBox02 multi that supports a wider range of cryptocurrencies.

You can also integrate the app with MyEtherWallet that makes it possible for you to support BTC, LTC, ETH, and 1000+ tokens.

BitBox02 wallet can be shipped to virtually every crypto-friendly country in the world.

BitBox Hardware wallet cost and fees

BitBox02 hardware wallet retails at €99.

You will only have to pay the variable crypto transaction fee when sending cryptocurrencies and tokens to another wallet or exchange.

BitBox Hardware wallet customer support

BitBox02 hardware wallet distributors have a highly responsive customer support team accessible via email or such Shift Crypto official social media pages on Facebook, Twitter, Instagram, Telegram, and follow their blogs on Medium.

What are the pros and cons of using the BitBox Hardware Wallet?

Pros:

  • BitBox02 hardware wallet has a strong emphasis on security.
  • It is easy to backup and recover your wallet using the SD card.
  • It is compatible with both desktop and mobile apps for easy navigation.
  • You can integrate MyEtherWallet that expands the number of supported currencies.
  • It is easy to use.

Cons:

  • Will only support a limited number of coins and tokens.
  • The screen is really small.
  • One may consider their €99 price tag restrictive.

Comparing BitBox Hardware wallet with other hardware wallets

BitBox Hardware wallet vs. Ledger Nano S wallet

Bitbox02 and Ledger Nano are both crypto hardware wallets that take pride in the number and effectiveness of integrated security features. Some of their similarities include integrating two-factor authentication, sleek design, and the fact that they both store your private keys in offline cold storage.

But unlike Ledger Nano S that supports 1000+ cryptocurrencies and tokens, the BitBox02 hardware wallet will only support a handful of crypto assets. Plus, while Ledger Nano S presents you with a set or recovery seed that you can use to backup your private keys. Unlike Ledger Nano S, however, BitBox02 has a simpler setup guide and supports multi-signature functionality.

Verdict: Is the BitBox02 Hardware Wallet safe?

Yes, BitBox02 hardware wallet embraces some of the most effective security measures. These include the fact that the wallet is open-sourced, is FIDO certified to serve as a Universal two-factor authenticator, two-step verification for outbound transfers, and backing up your wallet in an SD card. But these aren’t the only factors endearing BitBox02 to its users. Others include its rather straightforward setup process and its intuitive user interface.

Categories
Cryptocurrencies

SafePal S1 Hardware wallet Review: How Safe Is Safepal T Hardware Wallet?

SafePal S1 hardware crypto wallet was introduced to the crypto community in 2019. And though it’s relatively new, SafePal is a highly innovative wallet that seeks to provide crypto users with a “Secure, Simple, and Enjoyable crypto management solution.” The wallet has the backing of prominent crypto industry players like Binance Exchange. It has also integrated a host of operational and security features to help it achieve this goal.

According to the SafePal S1 website, the wallet was developed by a group of software, cybersecurity, and hardware experts, with the blessings of Binance. And one of its approaches to solving the constant challenges faced by other crypto hardware wallets was making it a 100% cold storage wallet.

This review will detail its features, understand how it works, vet its ease of use and fees. We will also provide you with a step-by-step guide on how to use SafePal Hardware Wallet before telling you if SafePal S1 is indeed the safest hardware wallet yet.

Key features

High-resolution screen: SafePal S1 hardware wallet has a sleek design that takes the shape of an MP3 player. It features a relatively wide and high-resolution color screen and a D-pad controller that you use to navigate the wallet. It also features a camera whose key role is scanning QR codes for other wallets and exchanges.

Mobile app compatible: SafePal hardware wallet developers have also come up with the SafePal wallet app that you can use to manage your crypto balance and facilitate crypto exchanges.

Monitor crypto portfolio: The SafePal mobile wallet app features the balance and activity tabs that you can use to monitor your crypto portfolio in real-time. For instance, the activity tab outlines your crypto transaction history (inflows and outflows) and, in turn, helps shape your crypto budget.

Integrated exchange: One of SafePal’s key partners is Binance – the largest crypto exchange in the world. And this partly explains why SafePal Wallet mobile app features BinanceDEX that SafePal users can use to trade and exchange different cryptos and exchanges.

Send crypto via social media: SafePal’s innovativeness is best highlighted by the wallet user’s ability to send crypto via the different social media networks. A SafePal wallet user can, for instance, send altcoins and tokens to an individual (regardless of whether they have a SafePal wallet or not) via social media.

Security features

Pin code: SafePal hardware wallet is secured with a PIN code that you set when creating a user account. It is also fitted with the number randomization tool that helps you avoid key loggers and other spying tools.

Password + pattern for the app: The SafePal mobile wallet app, on the other hand, is secured with a password or a pattern.

Recovery seed: SafePal will also present you with a backup and recovery seed for your wallet and private keys. When creating a user account on the platform, you will be presented with either 12 or 24 random phrases that form your wallet’s recovery seed. Write them down and save them offline.

Secure element: The SafePal hardware wallet is also fitted with a hack-proof EAL5+ secure element. This is a global finance industry-grade crypto chip that stores your private keys.

Two-factor authentication: All crypto transactions initiated via the SafePal mobile app must be signed and authenticated using the hardware device.

Key-deletion tool: SafePal S1 wallet features a key deletion tool that allows you to add and delete cryptos and tokens with ease.

Tamper-proof: The hardware wallet’s package features two tamper-proof seals, and so does its secure element. In the case of a suspected cyber hack or if someone tried to tamper with its secure element, the key deletion and self-destruct features will be triggered.

Offline cold storage: SafePal S1 hardware device is a 100% offline vault that connects to your phone or computer via a USB cable. It doesn’t maintain wireless (Wi-Fi, Bluetooth, or otherwise) connections with internet-connected devices.

How to set and activate the Safepal S1 Hardware wallet

Step 1: Download the SafePal S1 mobile app after purchasing the SafePal S1 hardware device

Step 2: Install and launch the app.

Step 3: Create a password and pattern for the mobile app

Step 4: Connect the SafePal S2 hardware device to the computer and choose your preferred language.

Step 5: Open the SafePal app and click on the ‘Add Wallet’ icon. Alternatively, tab the scan button on the top-right corner of the app.

Step 6: Follow the setup wizard prompts to create a user account.

Step 7: Chose a recovery seed (between 12-word seed and 24-word seed) and write it on the mnemonic cards that accompany the hardware wallet package.

Step 8: Verify that you’ve correctly copied this mnemonic phrase.

Step 9: Create and verify a PIN code for the mobile device

Step 10: Scan your wallet’s QR code using the mobile app to connect the two.

How to add/receive crypto into your SafePal S1 Hardware wallet

Step 1: Log in to your SafePal S1 wallet mobile app on click on the “Receive” icon

Step 2: Copy the wallet address and forward it to the party sending you crypto coins.

Alternatively:

Step 3: Have the party sending you cryptos/tokens scan your wallet’s QR code.

Step 4: Wait for the funds to reflect on the wallet.

How to send crypto from your SafePal S1 Hardware wallet

Step 1: Log in to the SafePal S1 mobile wallet app and click on the “Send” button.

Step 2: From the list of hosted cryptocurrencies and tokens, select the coin you want to send

Step 3: Enter the recipient’s wallet address or scan their QR code and the number of coins/tokens you wish to send

Step 4: Select the fee level.

Step 5: Confirm that the transaction details are correct and hit the send button. The app will then display a dynamic QR code specific to that transaction.

Step 6: Use the SafePal S1 hardware wallet to authorize the transfer. Simply use the hardware wallet’s camera to scan the app’s QR code and enter the PIN to sign and authorize the transaction.

Step 7: Confirm that the transaction has sailed through on the mobile app via the

SafePal S1 Hardware wallet ease of use

Though lengthy, SafePal S1 has a straightforward onboarding process. The wide display screen on the hardware wallet and easily navigable mobile wallet app interface has made interacting with the crypto vault, receiving, and sending cryptos relatively easy.

SafePal S1 hardware wallet is also available in over ten international languages.

SafePal S1 Hardware wallet supported currencies and countries.

According to the SafePal S1 website, the hardware wallet can support 1000+ cryptocurrencies and tokens. Wallet addresses are also generated offline by the hardware device.

SafePal S1 Hardware wallet cost and fees

SafePal S1 hardware wallet costs $59.99, but the company behind the brand is currently running a limited-time discount of $39.99.

The only other charge you will have to part with is the blockchain network’s network fees for transaction verification and confirmation.

What are the pros and cons of using the SafePal S1 Hardware Wallet?

Pros:

  • Very safe as it stores all your private keys offline in a tamper-proof secure element
  • SafePal S1 is cheaper than most other crypto hardware wallets
  • The hardware wallet supports a wide range of both cryptocurrencies and tokens
  • It features the largest and most liquid crypto exchange
  • The hardware is tamper-proof and embraces stringent security measures

Cons:

  • One may consider the wallet’s activation process quite laborious and not beginner-friendly
  • It maintains a rather complicated crypto transfer process

Comparing Safepal S1 Hardware wallet with other hardware wallets

Safepal S1 Hardware wallet vs. Ledger Nano S

SafePal S1 and Ledger Nano S are both highly advanced crypto hardware wallets. Their similarities include the fact that they both host 1000+ crypto coins and tokens. They store the client’s private keys offline and employ multi-layer protection tools around all the wallets, including two-factor authentication and offline wallet address generation. Both are also compatible with mobile apps and feature on-device screens that help ease navigation.

The two are also different in the pricing and mode of operation. For instance, while the Ledger Nano S hardware wallet costs around $60.00, SafePal S1 costs a paltry $39.99. Similarly, while the SafePal hardware device and its mobile app companion will only communicate through the hack-proof QR Codes, Ledger Nano S connects to its app companion via a wireless Bluetooth connection that is susceptible to man-in-the-middle attacks.

Verdict: Is Safepal S1 Hardware wallet safe?

SafePal S1 is a safe hardware wallet. It has embraced several highly effective security and privacy measures to safeguard the integrity of the device and private keys held therein. And it all starts with tamper-proof packaging with two proprietary seals. It has also employed multiple security features, including two-factor authentication, offline generation of wallet addresses, and a 6-digit passcode for the hardware device and password + pattern for the SafePal S1 mobile wallet app. You only have to part with the $39.99 wallet cost.

Categories
Cryptocurrencies

Archos Safe-T Mini wallet Review: Features, Security, Ease of Use, Pros, and Cons?

Safe T Mini is an offline hardware wallet developed by Archos – the French Multinational electronics manufacturer – and introduced to the market in July 2018. It is an ultra-safe secure element hosted on a small circular device made of polycarbonate material. It is an off-shoot and the more affordable alternative of Archos flagship – Safe T Touch hardware wallet. But apart from the visual difference between the two Archos hardware devices, they share a similar commitment to maintaining user funds safe.

In this Safe T Mini hardware wallet review, we will be detailing some of the operational and security features embraced by the wallet. We will also look at how they have impacted Safe T’s ease of use, the number of supported cryptos and compare it to similar hardware wallets. More importantly, we will tell you if Safe T Mini is indeed a safe crypto hardware wallet.

Archos Safe T key features

On-device screen: Archos Safe T Mini hardware wallet features a small OLED screen that you can use to check your crypto balance offline and authenticating transaction details for outbound transfers.

Navigation buttons: Below the screen of the Safe T hardware device are two big navigation buttons. Their key role in helping you navigate the hardware device, especially when checking and confirming outbound crypto transfers.

Web Extension controlled: Given the relatively small screen of the hardware device, most of the Safe T Mini operations like initiating crypto transfers and tracking your portfolio are executed via the Safe T web extension. But unlike most other wallets that will connect to virtually any web browser, you will need a special software bridge (compatible with Windows, Linux, or macOS) to connect the hardware device and the extension.

Compatible with software wallets: Safe T Mini hardware wallet is also compatible with several other software wallets, including Electrum, MyEtherWallet, and MyCrypto. Linking the hardware wallet with either of these software wallets helps boost the wallet’s efficiency and increases the number of supported currencies.

Security features

Passcode: When setting up the Safe T Mini hardware wallet, you will be required to set up a six-digit passcode that serves as its primary security feature. You are also advised to support this with a multi-character password when you link it to either of the supported software wallets.

Recovery seed: Safe T Mini allows for the recovery of private keys should you lose access to the hardware device. That’s why you will be provided with a 24-word backup seed that you can use to restore wallets and recover private keys. For added security, these are generated by the hardware device offline and not by the web extension.

Two-factor authentication: Even though most Safe T wallet transactions are initiated via the web extension, they must be signed and verified by the hardware device.

Open source: Safe T mini hardware wallet is also built on an open-sourced technology. Its source code is available for viewing and auditing by its users and blockchain/crypto security experts. You can access this code on the Safe T Mini hardware’s page on GitHub.

Secure element: Safe T Mini hardware features a hack/tamper-proof secure element that stores your private keys. It is a combination of the ultra-safe and highly encrypted chipset memory as well as a Secured Electrically Erasable Programmable Read-Only Memory.

Cold storage: Safe T Mini stores all your private keys and any other sensitive data in the hardware device 100% offline. None of this information is recorded or stored in Archos servers.

Key deletion tool: If you enter the hardware device’s PIN code incorrectly four consecutive times, you will trigger the key erasure protocol to delete all the wallet content and lock the devices.

How to set and activate the Archos Safe-T Mini Wallet

Step 1: After purchasing the Safe T Mini hardware device, download the software bridge that’s compatible with your computer device from the Archos.com website

Step 2: Install the software and connect the device to the computer using its USB cable.

Step 3: The hardware device is pre-loaded with a firmware that will automatically initiate the wallet activation process

Step 4: On the activation popup window, click “Install Firmware.”

Step 5: After successful installation, unplug and then reconnect the hardware device.

Step 6: The wallet has been successfully connected to the computer

Step 7: Now use the device to generate the 24-words recovery seed and write it down

Step 8: Choose a Username for your wallet

Step 9: Create a unique 6-digit passcode for the hardware device

Step 10: The wallet is now active and ready for use. Now you can start generating wallet addresses for the cryptos and tokens you want to store here.

How to add/receive Crypto into your Archos Safe-T Mini Wallet

Step 1: Log in to your Safe T Mini wallet web extension page and click on “Receive.”

Step 2: Copy the wallet address or the QR code

Step 3: Send them to the individual or exchange sending you Crypto

Step 4: Wait for funds to reflect on your app.

How to send Crypto from your Archos Safe-T Mini Wallet

Step 1: Log in to your Safe T Mini wallet web extension and click ‘Send’ on the user dashboard.

Step 2: From the list of cryptos and tokens hosted on the wallet, select the coin you want to transfer

Step 3: On the transfer window, enter the recipient’s wallet address

Step 4: Enter the number of coins you wish to send and hit send.

Step 5: Connect the Safe T hardware device to the computer and sign in to authorize the transaction.

Alternatively:

Link the hardware wallet with such software wallets as Electrum or MyCrypto that have an easier sending and receiving Crypto process.

Archos Safe-T Mini Wallet ease of use

Safe T Mini is relatively easy to use. It features an on-device screen that is complimented by a clean and easily navigable user interface for the Safe T web extension. And though one may consider its onboarding process to be complex and too laborious for a beginner crypto trader/investor, it is quite straightforward. Moreover, one can link the Safe T hardware wallet with the more convenient and easier to use software wallets.

Most importantly, the multilingual Archos website (available in 5 languages) contains numerous videos and explanatory guides that you can use to guide your interaction with the wallet.

Archos Safe-T Mini Wallet supported currencies.

Archos Safe T Mini is a multicurrency hardware wallet. And though its website claims that the wallet supports over 75% of all cryptocurrencies and tokens, we found it interesting that you can’t store some hugely popular cryptos like Ripple (XRP).

Archos Safe-T Mini Wallet cost and fees

Safe T Mini hardware wallet has its retail price capped at $59.99 or €49.99.

Storing coins and interacting with most other aspects of the wallet is free, but you will have to pay blockchain network fees every time your send cryptos and tokens to other wallets and exchanges. This fee is collected by blockchain miners or network administrators and not Archos.

Archos Safe-T Mini Wallet customer support

Archos has a highly responsive customer support team. Safe T Mini wallet users can contact this team via phone for after-sales services, email, or direct message them on such social media platforms as Twitter and Telegram.

What are the pros and cons of using the Archos Safe-T Mini Wallet?

Pros:

  • Safe T Mini wallet has embraced a host of highly effective security measures, including 2FA and data encryption.
  • It is relatively inexpensive when compared to other hardware wallets like Safe T Touch.
  • It is hugely transparent and is built on an open-sourced technology.
  • Safe T Mini is ultra-light (12g) and thus highly portable.

Cons:

  • The wallet doesn’t support some leading cryptocurrencies like Ripple.
  • It is not beginner-friendly

Comparing Archos Safe-T Mini wallet with other hardware wallets

Archos Safe-T Mini wallet vs. Ledger Nano S wallet

Safe T Mini and Ledger Nano are both highly secure and transparent hardware wallets. They both support a wide range of cryptocurrencies and tokens and embrace a multi-layered security protocol around. For instance, they both have the two-factor authentication functionality enabled, they are built on an open-sourced technology, and store client private keys and personal data in 100% offline vaults.

However, some of the differences between the two include the fact that Ledger has a more solid reputation. It supports a larger number of coins and cryptos (including all the popular cryptocurrencies) and can be considered more beginner-friendly. Safe T Mini wallet, on the other hand, has a more responsive customer support system.

Verdict: Is the Archos Safe-T Mini hardware wallet safe?

Safe T Mini hardware wallet is a safe wallet and has reliable and highly effective security measures. These include two-factor authentication, storing client funds in 100% offline storage, key erasure tool, military-grade encryption of user data/private keys, and providing wallet users with a recovery seed. You only have to part with the $59.99 acquisition cost.

Categories
Cryptocurrencies

XZEN Hardware Wallet Review: Security, Fees, Ease of Use, Pros, And Cons

XZEN website describes its hardware wallet as a “Hybrid cybersecurity system” that “Combines hardware, software, and services” in guaranteeing maximum security, transparency, and the highest levels of user experience. It was designed and developed by an Estonian Virtual currency wallet and exchange services provider, XZEN EST Ltd, and launched in 2018. It is the native wallet for the XZEN exchange and features a mobile app companion that hosts such interactive services as the crypto exchange and payment service processor.

According to XZEN founder Dmitry Laptev, this highly innovative and versatile Crypto was born of the need to change the security architecture around hardware wallets. It is especially aimed at eliminating the chances of losing your digital assets because of a forgotten PIN or lost backup seed. It is also one of the few hardware wallets that support fiat currencies.

This review will be vetting the hardware wallet to determine if it is as secure and easy to use as advertised. We will outline its key operational and security features, provide you with a step-by-step guide on how to set up and use XZEN wallet, check the number of supported currencies, and compare it with other hardware wallets.

XZEN Wallet key features

On-device screen: XZEN hardware wallet features a 2.4-inch high-resolution LCD screen that is large enough to fit the entire wallet address.

Mobile compatibility: The hardware wallet has a mobile (Android/iOS) and desktop (Windows/macOS/Linux) app companions that host most of XZEN’s interactive features such as the crypto exchange and portfolio tracking tools.

Inbuilt exchange: XZEN hardware wallet users also interact with the XZEN decentralized exchange hosted on the mobile and desktop apps. The wallet is hybrid and supports both crypto-to-crypto as well as fiat-to-crypto exchanges. Also, it allows you to buy Crypto virtually via any credit/debit card.

Instant transfers: Cryptocurrency transfers on the XZEN platform are instantaneous. Moreover, transfers within the wallet’s ecosystem (from one XZEN wallet to another) do not attract additional charges or commissions.

Contactless payments: Embedded in the XZEN hardware wallet device is an NFC chip that powers contactless payments. It allows you to pay for goods and services in millions of stores worldwide without necessarily connecting your device to the store’s hardware. The chip is also attributed to one of the wallet’s coolest features – wireless charging.

Wireless connections: Just like you don’t need to physically connect an XZEN hardware device to a store’s systems to pay for goods, you also don’t need to connect it to your computer or mobile phone to transfer coins. It is fitted with the Bluetooth 4.2 technology used to communicate with its app companion via a highly secure and AES encrypted channel.

Steel case: The XZEN wallet components are protected by an airtight steel casing that is both dust and waterproof.

Security features

PIN Code + Touch ID: XZEN hardware wallet embraces a multilayered security feature that constitutes both a PIN Code and Touch ID.

Encrypted CPU: The hardware wallet will also feature a highly encrypted CPYU/secure element on which your private keys are stored.

Cold storage: XZEN hardware wallet maintains that the private keys for digital assets are always kept in a 100% offline device and never leave the wallet.

Two-factor authentication: All transfers out of your XZEN wallet must be subjected to two-factor authentication. While you can initiate the outbound transaction via the mobile or desktop app, it must be authorized by the hardware device.

Licensed: XZEN EST Limited is a licensed virtual currency wallet and exchange services provider, authorized and regulated by Estonia’s Financial Intelligence Unit (FIU).

How to set and activate the XZEN wallet

Step 1: Start by ordering the XZEN hardware device from the XZEN wallet’s official website.

Step 2: Open the XZEN wallet official website. Click on the “APP” page. Download the wallet app that is compatible with your phone or computer.

Step 3: Install and launch the app.

Step 4: Choose a username and create a unique multi-character password for the wallet app.

Step 5: Turn on the XZEN hardware wallet and pair it to the phone app via Bluetooth or the USB cable.

Step 6: Once paired, the hardware wallet will request you to create a PIN code and set up the fingerprint ID.

Step 7: It will then provide you with a 12-word recovery seed

Step 8: The wallet will now generate a wallet address that you can use to add/receive funds

How to add/receive Crypto into your XZEN wallet

Step 1: Log into your XZEN crypto wallet app and click on the “Receive” button.

Step 2: Copy the wallet address or QR code provided and send them to the individual sending you coins.

Step 3: Wait for the funds to reflect on your wallet.

How to send Crypto from your XZEN wallet

Step 1: Log in to your XZEN crypto wallet app and hit the “Send” icon.

Step 2: Select the cryptocurrency or token you wish to transfer, especially if you have multiple wallet addresses

Step 3: Enter the recipient address and amounts you want to send

Step 4: Turn on and login to XZEN hardware wallet.

Step 5: Connect the phone or computer to the hardware device via the cable or Bluetooth

Step 6: Confirm that the transaction details are correct and authorize the transaction.

XZEN wallet ease of use

XZEN has one of the most intuitive interfaces – for both the hardware device and the mobile/desktop apps. They are both clean and easy to navigate with little to no help. Several text and video guides throughout the XZEN wallet website can help you master your way around the device and apps. These come in handy in teaching you how to send or receive cryptos via XZEN and in figuring out your way around the crypto exchange.

These, plus the relatively easy and straightforward onboarding process, make XZEN wallet one of the most intuitive hardware wallets.

XZEN wallet supported currencies

XZEN is a multicurrency hardware wallet that is yet to embrace multiple cryptos and tokens. Currently, you can only host Bitcoins, Ethereum, and ERC-20 tokens on the wallet, but the XZEN website hints about an upcoming upgrade that incorporates more popular cryptos.

XZEN wallet cost and fees

XZEN hardware wallet costs $120.

Crypto exchanges within the decentralized exchange and crypto transfers to other XZEN wallets are free. Nevertheless, you will pay a variable network fee every time you send cryptos and tokens to external wallets and exchanges.

What are the pros and cons of using the XZEN Wallet?

Pros:

  • Crypto transfers from one XZEN wallet to another are free.
  • It integrates a hybrid exchange that allows you to pay for Crypto using a card.
  • Embraces a wide range of security and privacy features.
  • Supports anonymous user registration and trading.
  • Your private keys are held in offline cold storage and never leave the wallet.

Cons:

  • Supports a limited number of cryptocurrencies
  • Requires you to verify identity if you want to pay for Crypto via card

Comparing XZEN wallet with other hardware wallets

XZEN wallet vs. Ledger Nano S wallet

XZEN and Ledger Nano S are both multicurrency hardware wallets. Some of the key security measures they have both implemented include the generation of wallet addresses offline, cold storage for private keys, and two-factor authentication. They also have an on-device screen that one can use to check crypto balances while offline and verify transaction details for outbound transfers.

The two, however, have several operational differences. For instance, while XZEN will only support two major cryptocurrencies, Ledger Nano supports 1000+ cryptos and tokens. The on-device screen for the Ledger wallet is smaller than the large and high-resolution color screen on the XZEN hardware wallet. Moreover, XZEN can be more versatile as it is complemented by feature-rich mobile and desktop companion apps.

Verdict: Is XZEN wallet safe?

Yes. With fingerprint protection, offline cold storage, two-factor authentication, password-protected apps, and recovery seed in place, XZEN hardware wallet has put in place adequate security measures around your private keys. And in appreciation of XZEN wallet’s security-focused approach, storing and managing digital assets, the company was honored with the Excellence in Finance Award in 2019 during the global FiNext Conference in Singapore. Our only reservations with the hardware wallet are its relatively expensive price ($120) and its support for a limited number of coins.

Categories
Cryptocurrencies

Walahala Hardware Wallet Review: Is Walahala A Safe Hardware Wallet or Scam?

On the Walahala website, the hardware wallet is described as a next-generation crypto vault. A hardware crypto vault specially designed to give you more control over your digital assets by allowing you to carry all your cryptocurrencies and tokens in one sleek and smart wallet. This hardware wallet takes the shape, size, and weight of a regular credit/debit card but connects directly to your phone or computer via the USB port. It was developed by Walahala – a blockchain technology company – and introduced to the crypto world in late 2019.

It features highly advanced operational and security features that its developers believe will be instrumental in making it one of the easiest to use and safest hardware wallets.

But how safe is the Walahala hardware wallet? Is it easy to use and as beginner-friendly as its developers want us to believe? How does it work, and how many coins and tokens and it support? We answer all these questions and tell you everything else you need to know in this Walahala hardware wallet review.

Walahala wallet key features

Compatible with software app: Unlike most other hardware wallets with on-device screens, Walahala hardware wallet uses a remote screen of the Walahala desktop or mobile app. Both apps are available for all the popular desktop and mobile apps and can be downloaded from the official walahala website.

Inbuilt exchange: Walahala wallet app features a live and ultra-fast decentralized crypto exchange. According to the Walahala website, this exchange can process over 1.5 million transactions per second. The exchange doubles up as a peer-to-peer network that facilitates faster and inexpensive crypto exchanges.

Portfolio tracker: The Walahala wallet app user dashboard has an “Overview” tab that lets you view and monitor your digital asset balances in real-time.

Exchange explorer: Walahala wallet claims to be the first hardware wallet to include the blockchain exchange explorer. This lets you monitor the crypto activity and trends for the different exchanges. Further, it uses Artificial Intelligent (AI)-powered order-matching algorithms to ensure that your buy or sell order is fulfilled at the most attractive market price.

Unlimited storage: There is no limit to the number of wallet addresses or private keys you can hold on your Walahala hardware wallet.

Plasma Core Technology: Walahala wallet has also embraced a blockchain technology similar to Bitcoin’s Lightning network – the Plasma Core Technology – to facilitate instantaneous transaction confirmation. According to the company’s website, the Plasma Core Engine is hosted in the “Quantum Space” and hence its ultrafast performance.

Security features

Password encryption: Your Walahala hardware wallet is secured with a password that doubles up as the wallet encryption tool. However, unlike other hardware wallets that only support alphanumeric passwords, Walahala allows its users to reinforce the password using the special characters when creating a passphrase.

2FA + questionnaire: Outbound transfers from the Walahala hardware wallet have to be subjected to two-factor authentication. You have the option of using the Google Authenticator app, a personalized questionnaire, or verifying your mobile number to receive OTP messages.

Recovery seed: Unlike most hardware and software wallets that provide you with the standard 12/24 recovery seed phrases, Walahala provides you with a 33-word recovery seed for added security.

No wire/wireless connection: The Walahala hardware wallet is immune to such threats as man-in-the-middle hacks as it connects directly to your phone or computer via the USB port and not via wired or wireless connections like Wi-Fi or Bluetooth.

Non-custodial: Walahala is a non-custodial wallet that stores your private keys and all other personal data 100% offline in the credit card like a hardware device. Your keys never leave the wallet.

Offline wallet address generation: The wallet is hierarchically deterministic. Moreover, all the sensitive wallet information like wallet addresses and mnemonic phrases are generated offline by the hardware wallet device and not its software/crypto app companion.

Key erasure protocol: The key erasure protocol for the Walahala Wallet is triggered after ten consecutive but unsuccessful login attempts. It erases all the data held in the hardware wallet and blocks the card.

How to set and activate the Walahala wallet

Step 1: After buying your Walahala hardware wallet, download the Walahala mobile or desktop app companion

Step 2: Chose a username and create a strong password for the wallet app.

Step 3: Connect the hardware device to your computer or phone

Step 4: Create a name for your hardware device

Step 5: Copy the 33-word recovery seed displayed on the wallet app

Step 6: Create a multi-character password for the hardware wallet

Step 7: The device is now active and ready to use

How to add/receive crypto into your Walahala wallet

Step 1: Log in to your Walahala wallet account and tap the “Receive” button on the dashboard.

Step 2: Copy the Walahala Wallet address or QR code and forward it to the party sending you altcoins.

Step 3:  Wait for the coins to reflect in your wallet.

How to send crypto from your Walahala wallet

Step 1: Log in to your Walahala wallet account and click on the “Send” button.

Step 2: If you have multiple wallet addresses, select the coin you want to transfer

Step 3: On the transfer window, enter the recipient’s wallet address and the number of coins you wish to send

Step 4: Connect the Walahala hardware device to the computer and log in.

Step 5: Confirm that the transaction details are correct and hit send.

Step 6: You will receive an OTP code on your preferred two-factor verification device.

Step 7: Verify the code and confirm the transaction.

Walahala wallet ease of use

Walahala hardware wallet is an easy to use and beginner-friendly all-in-one crypto platform. The hardware device is sleek and portable, while its software companions have highly intuitive user interfaces. These are clean, in that they only feature the most important aspects of the wallet and easily navigable.

The onboarding process is also quick and relatively straightforward. And so are the processes of sending and receiving crypto in and out of the wallet.

New users can also rely on the multiple videos and explanatory guides on the Walahala website to learn how to use and interact with the hardware wallet. Plus, they can also download the Demo trader account to learn their way around the Walahala crypto exchange.

Walahala wallet supported currencies.

Walahala is a multi-currency hardware wallet that supports a wide range of cryptocurrencies, including Bitcoin, Ethereum, Litecoin, Ripple, Dash, Walahala Coin, and ERC-20 tokens. The developers have hinted at the possibility of incorporating more digital assets in upcoming wallet updates.

Walahala wallet cost and fees

Walahala hardware wallet retails at $149 (inclusive of free express shipping fees).

Additional costs include the fees charged by the Walahala exchange as well as the blockchain network fees charged by miners and administrators to verify a crypto transaction.

What are the pros and cons of using the Walahala wallet?

Pros:

  • Walahala embraces a number of highly advanced security features.
  • The wallet integrates a variety of highly effective operational features like the inbuilt exchange.
  • Walahala is highly intuitive and beginner-friendly
  • The Plasma Core Technology ensures Walahala has the fastest transaction processing speeds.

Cons:

  • The $149 price tag is quite restrictive.
  • Walahala is relatively new with no solid reputation.
  • The wallet demands KYC verification for 2FA and for using their exchange.

Comparing Walahala wallet with other Multicurrency hardware wallets

Walahala hardware wallet vs. Ledger Nano S

Walahala and Ledger Nano are both highly innovative hardware multi-currency wallets. They have also put in place highly effective security checks that include two-factor authentication and cold storage.

But while Walahala is relatively new and only supports a handful of cryptocurrencies and tokens, Ledger Nano S has a solid reputation of reliability and supports 1000+ cryptos and tokens. Walahala, however, outperforms Ledger Nano S when it comes to the effectiveness of the integrated operational features with their inbuilt exchange and support for the ultra-fast confirmation of crypto transactions.

Verdict: Is Walahala Wallet safe?

Yes, Walahala has embraced all the important security and privacy features. It helps safeguard the privacy of your crypto coins while the offline storage, password encryption, and direct connection to the computer protect your coins from falling into the wrong hands. Moreover, should you lose the wallet or it is compromised, you can always fall back to the 33-word recovery seed.

Our only reservation with this hardware wallet is the uncompetitive price for the hardware wallet, the fact that it is relatively new and with no reputation of reliability, and the negative criticism it has been receiving (and is yet to respond to) on different bitcoin and blockchain forums.

Categories
Cryptocurrencies

Argent wallet Review: Is It The Safest Mobile Wallet App Yet?

Argent is a smart contract wallet developed by Gerald, Julien, and Itamar of Argent Labs and launched in 2018. It is a revolutionary crypto wallet that embraces futuristic security and privacy measures in keeping your private keys safe. For instance, instead of the recovery seed synonymous with virtually every wallet’s security, the wallet introduces “Argent Guardians.” 

Moreover, while your average crypto wallet will only help you store, secure, and manage your altcoins, Argent does all these while allowing you to earn interest and borrow against your digital assets. It is also a Defi-centric wallet that features virtually all the most popular decentralized finance apps.

On the official Argent wallet website, Argent is described as the simplest and most secure crypto vault as well as the “Future of Money.” But how safe and convenient is this crypto wallet app? We answer these questions and tell you everything you need to know about the Argent wallet in this review.

Argent wallet key features

No transaction fees: Argent is the lone Ethereum based crypto wallet app that pays the transaction fee (GAS) on behalf of its clients. In effect, you won’t be charged a transaction fee when using the Argent wallet – regardless of the amounts involved.

PoolTogether dApp: Argent features the PoolTogether Defi app, a “No-loss savings game” that allows individuals to pool together and invest their Dai Coins and let the pool earn interest, with one person getting a chance to win the accumulated interest every week. The platform is powered by smart contracts to eliminate bias.

MakerDao: Argent features yet another Defi app – MakerDao. This is a smart-contract-powered service hosted on the Decentralized network that makes it possible for anyone to lend and earn interest on their digital assets or borrow, invest, and pay back with interest.

Compound Finance: Compound Finance is yet another Defi app that lets you lock your funds with the Compound Finance protocol that, in turn, lends these funds to dApp developers and other crypto investors within the Ethereum network while earning you regular interest.

Inbuilt exchange: You don’t have to leave the Argent wallet to buy, sell, or exchange your digital assets. The wallet features an in-built proprietary exchange and integrates the Kyber Network that has a crypto exchange where you can buy, sell, or exchange crypto for free.

Purchase crypto with fiat: Argent wallet makes it possible for anyone to buy crypto via either credit/debit cards or direct bank transfers.

Human readable addresses: Most crypto wallets (hardware, software, and app) use the traditional hexadecimal (a mix of letters, characters, and numbers) wallet address system. Argent, however, allows you to create a human-readable wallet address (forinstance.argent.xyz) that goes a long way in eliminating the costly errors of getting the wallet address wrong.

Argent security features

Password + Biometrics: Argent wallet is secured with a password that you get to set when creating a user account for your new wallet. You also have the option of activating the biometric security features like fingerprint and Face ID for compatible devices.

Argent guardians: In the place of recovery seeds, the Argent wallet has Argent Guardians. These may be people like close family members using Argent, a phone number or email address that you can use to activate two-factor activation, or other wallets (like Trezor or Ledger). Through smart contracts, you can give these people or devices limited power over your wallet, including powers to help recover your wallet should you forget the password or help you recover lost wallets and private keys.

Transaction limits: Argent wallet lets you set the daily/weekly/monthly crypto transaction limits. This indicates that even if a hacker was to gain access to your wallet, there is a limit to how much they can get away with.

Freeze crypto wallet: Should you lose control of your account or suspect that it has been hacked, you can use Argent Guardians to freeze your wallet.

Non-custodial: Argent wallet doesn’t store your private keys or any of your personal data in their servers. Rather, this information is encrypted and stored on your mobile device.

How to set and activate the Argent wallet

Step 1: Download and install the Argent crypto wallet Google Play Store or Apple App Store

Step 2: Launch the installed app and select “Create a new wallet.”

Step 3: Chose a unique username for your wallet.

Step 4: The wallet will ask for both your mobile number and email address. It will then send you a verification code via SMS and also send you the Activation link via email (both are time-sensitive)

Step 5: You will then receive an email stating whether your wallet has been created or if you have been added to the waitlist.

Step 6: If (or when) the wallet is activated, the app will display a message asking you to finish the wallet creation process

Step 7: Create a passcode to secure your wallet and set up the fingerprint login option (optional)

Step 8: Your Argent wallet is now active and ready to use

How to add/receive crypto into your Argent wallet

Step 1: Log in to your Argent wallet and click on the “Add Funds” tab

Step 2: The wallet deposit will present you with your wallet address and QR code

Step 3: Copy either and forward them to the party sending you altcoins.

Step 4: Alternatively, choose to buy coins from the integrated exchanges

Step 5: Follow the prompts to deposit fiat into the exchange and purchase your preferred crypto.

How to send crypto from your Argent wallet

Step 1: Log in to your Argent wallet and tap on the “Send” icon

Step 2: If you have multiple assets in your wallet, choose the wallet from which to send coins

Step 3: On the transfer window, enter the recipient’s wallet address and the amount of crypto you want to send

Step 4: Alternatively, select the recipient’s wallet address from your contacts tab

Argent wallet ease of use

Argent wallet is highly intuitive and embraces a minimalist design that only features a few buttons on the user interface. It also has smooth and lag-free navigation.

The wallet app is also multilingual and available in four languages. And all these make it appealing to both expert and novice traders.

Argent wallet supported currencies and countries.

Argent is a multicurrency but Ethereum-specific crypto wallet app that currently supports more than 70 cryptocurrencies and tokens. These include Ethereum, Ethereum Classic, all the ERC-20 tokens, and the non-fungible ERC-721 tokens.

Argent wallet cost and fees

Argent is a fee-less cryptocurrency, and you, therefore, will not be charged to download, send/receive crypto into your wallet, or to store these coins in there.

What are the pros and cons of using the Argent wallet:

Pros:

  • Argent wallet is truly free as they pay the GAS transaction fees on your behalf.
  • The wallet employs highly innovative and effective security measures.
  • You don’t have to worry about forgetting your recovery seed when you have Argent Guardians.
  • Argent integrates several Defi apps that let you invest and earn interest from your digital assets.
  • Transaction limits and the ability to freeze the wallet minimize the extent of damage a hacker can cause

Cons:

  • Argent is an Ethereum-only wallet.
  • Though built on the Ethereum network, it doesn’t give you access to most dApps or the block explorer.
  • The fee-free approach may not be sustainable in the long run.

Comparing Argent wallet with other Ethereum-based wallets

Argent wallet vs. MyEtherwallet

Argent and MyEtherwallet are Ethereum-specific wallets that will only support altcoins and cryptos built on the Ethereum blockchain network. However, they embrace different operational and security measures in that while Argent is free, MyEtherwallet charges transaction fees for outbound transactions. Similarly, while MyEtherwallet relies on recovery seed to backup your private keys, the Argent wallet introduces the Guardians. Further, Argent also hosts more cryptos and tokens, embraces more security features, and has an easier-to-use interface.

Verdict: Is the Argent wallet safe?

Well, the Argent wallet has put in place adequate security measures aimed at securing the wallet and limiting the amount of harm that a hacker can cause should they gain access to your account. But a recent security report about Argent Wallet described a highly severe vulnerability that could have allowed hackers to use a bug in Argent’s code and access accounts without Argent Guardians and empty their private keys. And while this vulnerability was discovered and patched early enough by crypto security experts, one can’t help but wonder why it went undiscovered by the Argent team for so long and how many other bugs and vulnerabilities are yet to be discovered.  

Categories
Cryptocurrencies

SpectroCoin wallet Review: Is Spectrocoin a Safe Custodial Wallet?

Spectrocoin wallet is the official crypto vault for the larger Spectrocoin blockchain platform. It was launched in 2014, a year after the establishment of the Spectrocoin exchange by Juѕtas Dоbіlіаuѕkаѕ, Vytautas Kаrаlеvіčіuѕ, and Mаntаѕ Mockevičiu.

At the time of going public, the Spectrocoin wallet was a web service that allowed users to store Bitcoins and Euros. However, recent upgrades to the wallet have seen it embrace more crypto and fiat currencies, integrate more deposit and withdrawal methods, and even launch the Spectrocoin wallet mobile app.

This review will detail all Spectrocoin wallet features and querying the security measures it has employed in keeping your private keys safe. We will also provide you with a step-by-step guide on how to interact with the wallet, ease of use, and compare its effectiveness with similar multi-currency wallets.

Spectrocoin wallet key features

Cross-platform wallet: Spectrocoin wallet is a cross-platform wallet currently available as a web wallet and a mobile wallet. You can create a user account on their website or download the crypto vault app on Google Play Store, Apple App Store, and Microsoft Store for Windows phones.

API Integrated exchange: Spectrocoin blockchain platform started as a crypto exchange. The wallet dashboard features an API integration tool that you can use to access and use the Spectrocoin exchange.

Integrates Spectrocoin debit card: In addition to the exchange and crypto wallet, the Spectrocoin blockchain platform also launched a debit card. Wallet users are free to apply for the debit card, allowing automatic crypto conversion to Euro for ATM withdrawal and Point of Sale payments.

Purchase crypto via Fiat deposits: Spectrocoin has also integrated more payment processing methods than most other multi-currency wallets. Deposits into the wallet may be in the form of bank transfers, Cryptocurrencies from other wallets or exchanges, credit/debit cards, electronic wallets like Skrill and Neteller, and even Gold.

Security features

Password: The Spectrocoin wallets (both web and mobile apps) are secured by the passphrase you set when creating your user account.

Two-factor authentication: Spectrocoin embraces two-factor authentication and allows you to verify and authorize crypto transactions on your wallet via SMS notification, Google Authenticator, and Email authentication.

Cold storages: Spectrocoin is a custodial wallet that stores your private keys on your behalf. According to the platform developers, most of these private keys are held in highly secure third-party servers. They also add that only 1% of the total digital assets under their care are held in hot wallets.

Military-grade encryption: All of your private data held by the Spectrocoin wallet, including the wallet’s communications with exchanges and other third-party platforms, is highly encrypted.

How to set and activate the SpectroCoin wallet

Step 1: Start by downloading the Spectrocoin wallet for your respective phone’s operating system.

Step 2: Install and launch the app.

Step 3: Complete the user profile by keying in your wallet’s email and country of residence

Step 4: Create a multi-character passphrase for your wallet

Step 5: Agree with Spectrocoin’s terms of conditions and click ‘Sign Up.’

Step 6: You will now be asked to complete the ‘Know Your Customer’ procedures by emailing them a copy of your email and selfie

Step 7: You will receive an email notification informing you that your SpectroCoin wallet is now active and ready to use

Alternatively:

Create a user account by linking the wallet to your Google Account or Facebook Profile

How to add/receive crypto into your SpectroCoin wallet

Step 1: Log in to your Spectrocoin wallet, and on the user dashboard, tap on the “Receive” icon.

Step 2: Copy the public wallet address or its QR code and forward it to the party sending you coins.

Alternatively:

Step 3: Use the buy option to purchase and swap crypto on the SpectroCoin exchange

Step 4: Follow the prompts to make a purchase and move the coins to the wallet once successful.

How to send crypto from your SpectroCoin wallet

Step 1: Log in to your SpectroCoin and click on the “Send” icon.

Step 2: Since Spectrocoin is a multi-currency wallet, select the cryptocoin you want to send

Step 3: On the transfer window, enter the recipient’s wallet address as well as the amount of crypto you want them to receive

Step 4: Check that the transfer details are okay and hit send.

SpectroCoin wallet ease of use

Spectrocoin wallet has one of the most interactive and easily navigable user interfaces. The processes of creating a user account on the wallet or sending and receiving coins into and out of the wallet are also quite straightforward. Moreover, it is multilingual and available in 10+ languages.

By using the wallet, you technically have access to all the other crypto-related resources offered by the Spectrocoin blockchain platform, including their exchange, debit card, and merchant tools.

SpectroCoin wallet supported currencies and countries.

Spectrocoin is a multi-currency wallet that supports 12 cryptocurrencies, including Bitcoin, Ripple, Litecoin, Dash, Stellar Lumens, NEM, Tether, TrueUSD, and USD coins. Besides, you can purchase cryptos on the SpectroCoin exchange using 30+ fiat currencies.

The wallet is currently available in over 150 countries across the world.

SpectroCoin wallet cost and fees

Spectrocoin is a free wallet that does not charge you to download or store your crypto therein. Crypto transfers to other Spectrocoin wallets are also free. However, you will have to part with several fees as you interact with the platform, including a network charge imposed on all outbound transfers to non-SpectroCoin wallets and exchanges. These are highly variable and largely dependent on such factors as the type of coin and transaction amounts.

Credit card purchases attract an average fee that amounts to 5.5% of the transaction amounts. And while SEPA bank transfers to the wallet are free, you can only deposit Euros and, therefore, have to cover the currency conversion fees. Electronic transfer fees, on the other hand, range from 2-3% of the transaction amounts. 

SpectroCoin wallet customer support

SpectroCoin has a readily available customer support team available via live chat on the company website, on the phone, via email, and even on different social media platforms. Interestingly, you can also visit their physical address at their offices in London.

What are the pros and cons of using the SpectroCoin wallet?

Pros:

  • Spectrocoin employs such reliable security measures as two-factor-authentication
  • The wallet supports multiple payment processing systems.
  • Spectrocoin is an all-in-one platform that gives you access to both the wallet, crypto exchange, debit card.
  • The wallet has an easy and straightforward registration process.

Cons:                                                            

  • Spectrocoin wallet doesn’t support anonymous user registration or trading.
  • It is not an open-sourced wallet
  • You have limited control over your digital assets as the wallet stores the private keys on your behalf

Comparing SpectroCoin wallet with other Multi-currency wallets

SpectroCoin wallet vs. eToro wallet

SoectroCoin and eToro wallets are similar to some extent in that they both are custodial wallets and part of a larger crypto platform. They both avail such additional services as a crypto exchange in the case of eToro and exchange and debit cards to SpectroCoin users. They also have highly intuitive platforms designed for both experienced and beginner crypto traders. They are widely available in 100+ countries and maintain a readily available customer support system.

But while eToro supports 20+ cryptocurrencies, tokens, and hordes of fiat currencies, SpectroCoin supports 12 cryptos and one fiat currency.

Verdict: Is SpectroCoin’s wallet safe?

Spectrocoin is a custodial wallet that stores and secures private keys on behalf of their clients. And some of the security and privacy measures it has taken to these assets safe include maintaining as much as 99% of these coins in cold storage. It also demands that wallet users pass the KYC requirements to deter and possibly eliminate fraud. Moreover, all crypto transactions, especially outbound coin transfers, must be subjected to two-factor authentication. We consider these measures adequate, and the fact that it has never been hacked is enough testament to their effectiveness.

Categories
Cryptocurrencies

NEO Wallet Review: Is It The Safest Neo Blockchain Wallet Yet?

Neo wallet is a web-based crypto wallet developed for the Neo Blockchain by the Neo community. According to its developers, the wallet is specially designed and aimed at addressing the three key challenges facing most crypto wallets: ease of use, security, and transaction processing speeds. To achieve this, they ensured that the wallet is ultralight, integrated an easily navigable user interface, and embraced all the critical security and privacy measures.

But have these measures been effective in making Neo Wallet the most secure and easy to use a crypto vault? What other measures have the wallet embraced to boost its security and effectiveness? We answer these and more in this Neo Wallet review.

NEO Wallet key features

Web-wallet: Neo wallet is a web wallet and one of the few online-based Neo-specific crypto vaults. However, the wallet’s versatility is quite limited, as you can only access a NEO Wallet using Google Chrome or Microsoft’s Edge browser.

Community-led project: Neo Wallet is a highly transparent and community-led crypto project. It is developed by blockchain experts from within the Neo blockchain community, but it has been audited and received the necessary approval from the Neo Network administrators.

Transaction tracking: One of Neo Wallet’s key features is its crypto-tracking tool that allows you to monitor your crypto inflows and outflows. The tool helps you keep tabs on your crypto spending and budget.

Contact list: Another handy and unique feature from the Neo wallet is the contact list button on the user dashboard. Here you can save the wallet addresses for the parties (both individuals and exchanges) you regularly engage instead of manually keying in their public addresses every time you wish to send them Neo coins or GAS, simply select their address from your contact list.

Earn through stacking: Neo Wallet also makes it possible for you to earn through staking your NEO Coins. Staking here refers to committing a portion (or the entirety) of your NEO coins to the network in return for a share of the interest by the blockchain in GAS tokens.

Security features

Password encryption: The password is the primary security feature used by the Neo Web wallet in keeping your digital assets secure. And it also serves as an encryption tool for the password.

Wallet backup: Neo wallet simplifies the process of backing up your private keys and the entire wallet by providing you with a backup icon on the user dashboard. And there are two primary ways of backing up your wallet: First, you can save a copy on your computer or phone. Secondly, you can write down the wallet details, especially the private keys and public addresses, and save them offline on paper.

Open source: The Neo web wallet is also built on an open-sourced technology that can be vetted and audited by virtually anyone. This code can be accessed on either the web wallet’s official website, Neo.org and GitHub.

Non-custodial: Though it is web-based and works by relaying your Neo activity to the Neo blockchain processors, Neo is a non-custodial wallet. This implies that it will only store your private keys on your device and not on the wallet or blockchain servers.

Anonymous trading: Neo web wallet promotes anonymous trading by limiting the amount of client personal data they collect or store. You will note that the wallet doesn’t collect any personal information, and any other data collected by the wallet is encrypted and saved in your device.

How to set and activate the NEO wallet

Step 1: Open the Neowallet.cn website to access the wallet registration page

Step 2: Click on the “Start” icon and select “Create a wallet.”

Step 3: Backup the wallet by clicking on “Backup your current wallet,” after which the auto-generates the wallet backup and saves it as a file in your computer

Step 4: Click on the “I have backed up my current wallet” icon to access your public address, QR code and to view your wallet’s private key

Step 5: Your account is now active and ready for use

How to add/receive crypto into your NEO wallet

Step 1: Log in to your Neo wallet and on the user dashboard, click “Receive.”

Step 2: Copy the public wallet address and forward it to the party sending you coins or have them scan the wallet WR code

Step 3: Wait for the funds to reflect on your wallet

How to send crypto from your NEO wallet

Step 1: Log in to your Neo web wallet account and click the “Home” icon the user dashboard to open the Transfer page

Step 2: Select the type of cryptocurrency you wish to send

Step 3: On the receiver tab, you can choose to enter the recipient’s wallet address or simply use the contacts button if you have their address saved in your wallet

Step 4: Enter the number of coins you wish to send on the ‘value’ tab

Step 5: Check that these details are accurate and click ‘Confirm Transfer.’

NEO wallet ease of use

Neo web wallet has one of the easiest to use user interface that is specially designed for both experienced and novice trader NEO traders. The contact list and wallet backup tabs are especially important as they eliminate errors when sending cryptos and simplify the wallet backup processes.

The fact that it is online-based also ensures that the wallet is ultra-light, meaning that it does not consume much of your computer space while maintaining faster transaction processing speeds.

Note, however, that the wallet is only available in two languages: English and Chinese.

NEO wallet supported currencies and countries

Neo web wallet is Neo-specific and will only host NEO coins – native to the blockchain – and Gas tokens.

NEO wallet cost and fees

Creating a user account and storing your Neo or Neo GAS on the Neo web wallet is free.

You will, however, be charged a small transaction fee every time you send Neo coins to another wallet. The transaction charge goes to the Neo Network and not Neo web wallet and is hugely dependent on the type and amount of crypto you want to send.

What are the pros and cons of using the NEO wallet?

Pros:

  • Web Wallet is online based and therefore available on the move, plus it doesn’t eat into your computer space
  • The online wallet allows you to easily backup your account vis the backup wallet icon the dashboard
  • Neo wallet is highly intuitive and easy to use for both novice and experienced traders
  • The transaction processing fees are relatively low
  • The Neo staking feature makes it possible for you to earn for holding a specific amount of Neo coins in your wallet
  • The wallet encourages anonymous trading as it doesn’t collect personally-identifiable client data

Cons:

  • The wallet ignores key security measures like two-factor authentication and HD wallet address generation
  • It is online-based and therefore immune to the inherent threats facing hot wallets
  • It can only support two cryptocurrencies

Comparing NEO wallet with other Neo blockchain wallets

NEO wallet vs. NEON Wallet

Neo wallet and Neon wallet’s primary difference is that Neo is a web-wallet while Neon is a lightweight desktop client. Otherwise, they are both neo-specific wallets built and managed by members of the Neo-blockchain community. They are also light and connect to the Neo mainnet via remote nodes.

Further, they are lightweight and specially designed to offer faster transaction processing speeds than their GUI counterparts. The Neo web wallet, however, carries the day when it comes to the number of integrated features, especially when you consider the contact list, Claim, and Backup wallet tabs on the user dashboard.

Verdict: Is the NEO wallet safe?

Neo web wallet has put in place several measures to guarantee the privacy and anonymity of the crypto wallet. It, for instance, does not collect any client data when you are creating a user account. It also encrypts all the data held in your wallet and stores it in your device. However, it doesn’t support the all-important two-factor authentication, and its online nature exposes it to numerous hot-wallet related threats.

Categories
Cryptocurrencies

Lisk Core Crypto Wallet Review: Is It The Safest LISK Wallet Yet?

Lisk Core crypto wallet is a full node desktop client and one of the most popular wallets for the LISK blockchain. And on their website, LISK Core is described as a highly innovative wallet focusing on both “Best user experience and security.” But Lisk Core is more than a crypto wallet and can easily pass for a Lisk Blockchain annex. It not only provides you with a direct link to the LISK blockchain but also integrates the unique App-Builder tools.

This review seeks to determine whether Lisk Core is the most secure Lisk wallet yet and how its integration with the Lisk blockchain network has improved its efficiency. We will also be looking at such factors as ease of use, customer support, pros, and cons before comparing it to equally popular Lisk wallets.

Lisk Core wallet key features:

Full node desktop client: Lisk core wallet directly integrates the graphical user interface for the Lisk Blockchain. Therefore, installing the desktop client translates to downloading the Lisk blockchain on to your computer and synchronizing it with Lisk mainnet. The process may be time-consuming and takes up significant computer storage space.

Blockchain explorer: The desktop client also integrates a blockchain explorer tool for Lisk Mainnet. Via the explorer, you can monitor the Lisk decentralized network, monitoring transactions, wallets, and vet blockchain delegates.

Hardware wallet support: Lisk core desktop client is also highly versatile. It, for instance, can be integrated with Trezor and Ledger hardware wallets. And this integration comes in handy in maxing the number of supported cryptocurrencies and boosting the wallet’s safety.

Vote for delegates: Lisk blockchain operates on the proof-of-stake consensus algorithm. Staking LSK tokens gets you involved in the Lisk network’s decision-making processes. It could, for instance, ensure that you participate in voting for Lisk network delegates.

Lisk SDK App builder: One of the unique features that help set Lisk apart from the competition is the LISK SDK that gives you a platform to develop decentralized apps. And unlike other blockchain-linked app builder platforms that seek to introduce new programming languages, LSK SDK supports the all-popular JavaScript and TypeScript languages. Plus, you also get to interact with some of the Dapps built on Lisk SDK.

Lisk Core security features:

Password encryption: You will be required to create and secure your Lisk Core desktop client with a password when installing the wallet and creating a user account. This passphrase doesn’t just secure your wallet but also serves as an encryption tool.

Open source: The wallet Lisk desktop wallet is built on an open-sourced technology. Anyone is free to view and audit its code for possible loopholes or malicious codes. Blockchain security experts are especially advised to query this code, that’s available on GitHub and participate in the Lisk Bug Bounty Program that rewards individuals who discover loopholes or suggest security patches for Lisk.

Non-custodial: Though Lisk desktop client integrates directly with the blockchain user interface, it doesn’t store your digital assets in the Lisk servers. Rather, the Lisk desktop wallet saves your private keys within the computer.

Recovery seed: The Lisk Core desktop client will also backup your wallet and provide you with a recovery seed. That comes in handy when recovering lost private keys or restoring the desktop client on a different computer.

How to set up and activate the Lisk Core crypto wallet:

Step 1: Download the Lisk Desktop client from the wallet’s official website or GitHub

Step 2:  Install and on upon launching, click ‘Create New Wallet.’

Step 3: Enter your name and create a unique multi-character password for the wallet

Step 4: The wallet will provide you with a recovery seed. Copy the phrases correctly on a piece of paper and keep them safe, offline.

Step 5: The wallet is now active and ready for use

How to add/receive LSK tokens to your Lisk Core crypto wallet:

Step 1: Log in to your Lisk desktop client and on your user dashboard, click on the “Receive” tab

Step 2: This reveals your public wallet address. Copy it and forward it to the party sending you crypto

Step 3:  Wait for the coins to reflect on your wallet

How to send cryptos from your Lisk Core wallet

Step 1: Log in to your Lisk Core desktop wallet and on the user dashboard, click “send.”

Step 2: If you have more than one cryptocurrencies hosted here, select the crypto address from which you wish to transfer funds

Step 3: Enter the recipient’s wallet address and the number of cryptocurrencies you wish to send

Step 4: Confirm the accuracy of these details and hit send

Lisk Core ease of use

Downloading and installing the Lisk Core desktop client and creating a user account is easy and straightforward. It is also highly intuitive and easy to use as it features a unified and scalable navigation menu that is compatible with multiple sizes of computer screens.

The Lisk SDK app builder platform can also be considered user-friendly as it comes available in popular programming languages JavaScript and TypeScript. However, we must observe that the desktop client and its tools are more adapted for programmers and developers looking to build and launch a decentralized app on the ultra-secure Lisk blockchain.

Supported currencies and countries

Lisk Core desktop wallet supports both Bitcoins and LSK Tokens and is available in virtually all crypto-friendly countries worldwide.

Lisk Core wallet cost and fees

The Lisk Core wallet desktop client is free, and you won’t be charged when you install the wallet or store your BTC and LSK cryptos here.

But every time you initiate a transfer out for either crypto, you will be charged network fees – collected by the respective blockchains and not Lisk Core wallet.

Lisk Core customer support

Lisk Core wallet has a relatively responsive customer support team. And client assistance starts with the regularly updated FAQ and announcement pages on their website. The FAQ addresses all the common challenges Lisk core wallet users face, while the Announcements page features recent news and explanatory guides about updates to the wallet.

You are also encouraged to join the Lisk community forum and interact with the wallet developers and other users. Here, you can raise queries about the wallet and have them answered by your peers or wallet developers.

For more personalized queries, you can reach out to the Lisk customer support team by sending them an email, joining the live chat via Discord app, or direct messaging them on the wallet’s official wallet social media pages like Twitter, Facebook, or Reddit.

What are the pros and cons of using Lisk Core Crypto Wallet

Pros:

  • The desktop client is highly secure as it integrates multiple security features over the wallet.
  • It is highly intuitive and features an easy to use and easily navigable user interface.
  • Its integration with the Lisk blockchain gives you access to all the mainnet’s features, including voting rights.
  • Lisk core desktop client provides you with a link to the Lisk SDK where you can develop Dapps for free.

Cons:

  • It can only support Bitcoins and LSK tokens.
  • It is not beginner-friendly but specially designed for technical Dapps developers.
  • The Lisk core wallet is a full node desktop client that takes consumes significant computer storage space and RAM.
  • Comparing Lisk Core Crypto wallet with other Lisk wallets

Verdict: Is Lisk Core Crypto wallet safe?

Well, Lisk Core is a full node desktop client and, as such, may be considered secure than most other web and app-based wallets. In addition to this, Lisk core has embraced multiple security features around the wallet that include encrypting data in the wallet with a password, open sourcing the wallet technology, and providing users with a recovery seed. However, we must mention that being a full node desktop client doesn’t make the wallet immune to online hacks and phishing attacks. And that its failure to embrace premium encryption tools or two-factor authentication goes against its security-focused mantra.

Categories
Cryptocurrencies

GUI Light Wallet Review: Security, Features, And Ease of Use

The GUI light wallet is a highly innovative crypto wallet that stores and helps you manage your IOTA tokens. According to the IOTA foundation, GUI Light is specially designed to provide IOTA altcoin holders with the most user-friendly, simple, and inexpensive way of securing and interacting with their digital assets. The wallet was launched in 2016 and has since been subjected to several upgrades that introduced vital security and operational features.

In this GUI Light wallet review, we will be vetting the effectiveness of its security features. We will also look at the wallet’s user-friendliness and highlight its pros and cons before comparing it with other IOTA-only crypto wallets.

We start by looking at its key operational features.

Key features:

Integrated into IOTA GUI: GUI Light wallet draws its name from the fact that it is incorporated into the IOTA network’s Graphical User Interface. It not only allows you to store your IOTA coins but also provides you with a direct link to the IOTA network.

Double spend warnings: The double-spend warning feature is a recent upgrade to the GUI Light wallet aimed at helping you avoid conflicting transactions. It warns you every time you attempt to initiate an outbound transfer twice, especially if the first transaction hasn’t been confirmed. You can choose the ‘Yes, send it now’ option for legitimate transfers and ‘No, Cancel’ option for a double-spend transaction.

Light node: There are two versions of the GUI IOTA wallet: Full node and Light Node. The GUI Light Wallet is light, non-technical, and specially designed for beginner traders. It makes it possible for you to run and interact with the IOTA network without installing the desktop client that eats into your computer speed and storage space.

Highly versatile: GUI Light wallet is a desktop app wallet. It is also highly versatile and compatible with all the popular operating systems, including Windows, macOS, and Linux.

Track your portfolio: On the GUI Light wallet user dashboard is the History tab as well as the balance display tab that lets you track your IOTA tokens inflow and outflow. These go a long way in helping monitor your spending as well as budgeting and finance management.

Security and privacy features:

Password: Like any other crypto wallet, the GUI Light wallet is secured with a password that you set when creating a user account.

Recovery seed: When setting up your GUI light wallet user profile, you will be provided with a recovery seed. Write it down and keep it safe, as you will need it to reset the wallet password and recover your private keys from a lost wallet.

Open source: The GUI Light wallet is built on an open-sourced technology. This implies that virtually anyone can view and audit the wallet’s source code and possibly identify malicious codes or other security loopholes.

Community-led development: The fact that the GUI Light wallet was created and is currently maintained by the IOTA Foundation it centralizes its operations. However, the foundation is gradually walking away from this centralized control of the wallet by bringing onboard developers from the IOTA community. It hopes to ultimately dissociate itself from the wallet and hand it over to the community developers who will direct future upgrades and further developments.

Non-custodial: This desktop app wallet stores your private keys in your computer and not on the IOTA Foundation servers, giving absolute control over your wallets.

How to set up and activate the GUI Light wallet

Step 1: Open GitHub and search for GUI Light wallet

Step 2: Download the most recent update of this desktop wallet that is compatible with your desktop/laptop’s operating system

Step 3: Click on install and select light node

Step 4: Complete the registration tab by entering your email address and setting your wallet’s password

Step 5: The wallet will provide you with a recovery seed. Copy these phrases onto a piece of paper and store them on a safe place offline

Step 6: Your wallet is now active and ready for use

How to add/receive coins to GUI Light wallet

Step 1: Log in to your GUI Light Wallet

Step 2: On the user dashboard, click on ‘Receive.’

Step 3: This will reveal your wallet address and QR code. Copy either and send them to the individual sending you IOTA Coins

Step 4: Wait for the coins to reflect on your wallet

How to send crypto from GUI Light wallet

Step 1: Log in to your GUI Light wallet

Step 2: On your user dashboard, click on ‘Send.’

Step 3: Enter the recipient’s wallet address and the amount of IOTA coins you wish to send

Step 4: Confirm the correctness of these details and hit send.

GUI Light wallet ease of use

GUI Light wallet has one of the easiest and most straightforward onboarding processes. The wallet is easy to navigate and fast in executing crypto transactions. Further, all the important tabs like Send, Receive, and History are neatly arranged and easily accessible on the user dashboard.

Importantly, a recent community-led upgrade to the GUI Light wallet introduced different translations to the wallet. GUI Light wallet is now multi-lingual, supporting more than 15 international languages.

GUI Light wallet supported currencies and countries

GUI Light wallet will only support IOTA coins. And unlike most other crypto-specific wallets that integrate an inbuilt exchange or third party crypto conversion platform, GUI is quite rigid. You first have to convert your crypto or fiat currencies into IOTA on third party exchanges before adding them to your crypto wallet.

GUI Light wallet cost and fees

GUI Light Wallet is free to download, install, and use.  Therefore, you will not be charged to receive or send IOTA coins from your wallet. Instead of the traditional miner and administration fees charged by most blockchain networks, IOTA Network uses proof of work consensus to fund crypto operations. Here, you are required to commit your computational power and approve two previous transactions before you can have your transaction checked and validated.

What are the pros and cons of using GUI Light wallet:

Pros:

  • GUI Light wallet is one of the handful crypto wallets that don’t charge transactions fees on transfers out
  • GUI Light wallet is incorporated into the IOTA blockchain network’s user interface
  • GUI Light wallet is gradually moving towards community-led management and development of the crypto wallet
  • The wallet is non-custodial, and this gives you control over your private keys

Cons:

  • Beginner traders may find GUI Light wallet too complex
  • The IOTA network has been a target of most phishing and hacking schemes that have almost resulted in the loss of tokens and significant downtimes
  • There is no mobile app for the GUI Wallet app
  • The desktop wallet will only support one altcoin – IOTA Coins
  • Comparing GUI Light wallet to other IOTA crypto wallets

GUI Light wallet vs. Nostalgia light wallet

Both GUI Light Wallet and Nostalgia wallet are IOTA specific and will only support IOTA coins. They can also be considered light wallets, as they don’t require you to download the IOTA network full node to your computer. Their differences stem from the fact that while the GUI wallet is incorporated into the IOTA networks user interface, Nostalgia will only work if connected to a full node network that has its Proof of Work feature activated. Moreover, while light wallet is a desktop wallet, Nostalgia is a Google Chrome browser extension.

Verdict: Is GUI Light wallet safe?

GUI Light wallet is highly convenient, easy to use, and inexpensive crypto vault for IOTA Coins. It has also put in place several effective security measures that not only deter unauthorized access but also boost the privacy of your digital assets. These include a multi-character password, building the wallet on open-sourced technology, private keys, and moving towards a community-led development model that guarantees transparency. There are, however, numerous user concerns about the safety of the private keys stored in the crypto wallet, especially after the constant hacks and lack of such handy security measures as two-factor authentication. 

Categories
Cryptocurrencies

BitPie Wallet Review: How Safe Is This Multi-Blockchain Wallet?

On the official Bitpie website, the crypto wallet app is described as an “industry-leading multi-blockchain wallet” devoted to client funds’ safety. Launched in 2015 by Bither – a blockchain technology company – Bitpie markets itself as an easy to use, highly secure, and inclusive crypto platform.

And in an attempt to live up to these claims, BitPie has embraced a host of security and operational features in the past few years. These include open-sourcing the wallet technology, supporting the widest range of blockchains, integrating a hardware wallet, and establishing a highly intuitive interface.

But have these measures been effective in guaranteeing the crypto wallet’s safety and ease of use? We answer this question and tell you everything you need to know about the BitPie crypto wallet app in this review.

BitPie key features:

Mobile wallet: BitPie is a mobile-only crypto wallet app available for Android and iOS smartphones.

Multi blockchain wallet: BitPie wallet describes itself as the most inclusive crypto vault, adding that it supports the most diverse types of blockchain mainnets in the world. It supports the Ethereum blockchain, Bitcoin blockchain, and its folks, EOS blockchain, and EOS based tokens, as well as all stable currencies.

Built-in exchange: You don’t have to leave the mobile crypto app to buy or exchange cryptocurrencies and tokens. BitPie wallet features an in-built exchange where you can buy and exchange cryptos at highly competitive rates.

Dapp Browser integrated: BitPie wallet app also features a DAPP page that hosts a DAPPs browser and crypto market news section. Here, you have access to real-time market news and all the popular DAPPs in virtually any niche. More importantly, the DAPP page provides you with tools necessary for creating your custom DAPP or crypto token.

Integrates hardware wallets: BitPie developers have also come up with the world’s first wearable hardware wallet referred to as BitHD. It is a wristwatch-like hardware wallet that stores your private keys offline, and you can easily pair to your BitPie mobile wallet app via Bluetooth.

Security and privacy features:

Password: BitPie, like most other app-based crypto wallets, has a multi-character password as its primary defense against unauthorized access.

Military-grade encryption: In addition to limiting the amount of personal data that BitPie can collect about its clients, the wallet is also highly encrypted. The encryption covers all the personal data held in a BitPie wallet, passwords, and private keys.

Non-custodial: BitPie crypto wallet app doesn’t store your cryptocoins on the company servers. Rather, these are highly encrypted and saved on your mobile phone – giving you absolute control over their use. And you can boost this privacy further by linking the BitPie crypto app with the BitPie hardware wallet.

Anti-fraud system: To curb crypto-related frauds and safeguard your private keys, BitPie subjects all its members to such anti-fraud procedures as KYC and AML in line with the set governmental regulations.

Recovery seed: When creating a user account on your BitPie mobile wallet app, you will be presented with a recovery seed. These random phrases come in handy when recovering lost private keys or restoring your wallet on a new smartphone.

How to set up and activate the BitPie Wallet

Step 1: Download the BitPie crypto mobile app from Google Play Store, Apple App Store, or the official BitPie website

Step 2: Install the wallet, and upon launch, click on ‘Create new wallet.’

Step 3: Complete the registration process by entering your email and creating a password

Step 4:  Follow the prompts to complete the verification process

Step 5: The wallet will provide you with a set of words that form the recovery seed. Write it down and keep it safe offline.

Step 6: Your account is now active and ready to use

How to add/receive coins to BitPie Wallet

Step 1: Log in to your BitPie crypto wallet account app, and on the user dashboard, select ‘Receive.’

Step 2: This reveals your wallet’s public address and QR code

Step 3: Copy either of these and forward it to the party sending you cash

Step 4:  Wait for the cryptos to reflect on your account

How to send crypto from BitPie Wallet

Step 1: Log in to your BitPie crypto wallet app, and on your user dashboard, select ‘Send.’

Step 2: If you are holding multiple cryptocurrencies, click on the cryptocoin you wish to send

Step 3: On the popup tab, enter the recipient’s wallet address and the number of coins you wish to send

Step 3: Confirm the accuracy of these transaction details and hit send

BitPie Wallet ease of use

BitPie crypto wallet has a straightforward onboarding process. The app is highly intuitive with easy and straightforward processes for sending and receiving cryptocurrencies. All these play a crucial role in making BitPie one of the most beginner-friendly crypto wallet apps. However, keep in mind that BitPie subjects all its platform users to AML and KYC verification procedures.

BitPie Wallet supported currencies and countries

BitPie mobile app is a multicurrency wallet implying that it supports a wide range of cryptocurrencies, including bitcoin and its folk currencies like Litecoin and Bitcoin Cash, Ethereum and its Ethereum Classic fork as well as all the ERC20 tokens. It also supports EOS altcoin, all the EOS-blockchain-based tokens, and all popular stable coins.

The wallet is also available in 100+ countries across the globe.

BitPie Wallet cost and fees

Downloading and installing the BitPie crypto wallet app is free. Similarly, you won’t be charged for storing your coins here.

However, you will be charged a network fee every time you initiate an outbound transaction to other crypto wallets or exchanges. The fees are nevertheless highly dynamic and let you decide how much you wish to pay for every transaction. Ideally, high transaction fees will always translate to faster transaction processing, while low fees lead to sluggish transaction processing speeds.

BitPie Wallet Customer support

BitPie crypto wallet also has a highly responsive customer support team. Most of the wallet information, including the setup process and common challenges facing BitPie users, is addressed on the website’s announcement section.

Both the BitPie website and crypto wallet app are multi-lingual and available in Mandarin, Japanese, and English.

You can also contact the team directly via email or direct message them via their official social media pages on Facebook, Telegram, Twitter, Reddit, and Weibo.

What are the pros and cons of using BitPie Wallet

Pros:

  • BitPie crypto wallet app is highly intuitive and beginner-friendly
  • The wallet is feature-rich supports a host of premium service, including an inbuilt exchange
  • Through the integrated DAPP browser, you have access to the most popular DAPPs and tools to create your own crypto tokens
  • BitPie has also embraced highly effective security measures that include military-grade encryption and an anti-fraud system
  • The reduce-by-fee transaction pricing model lets you determine the fee and processing speeds for each transaction

Cons:

  • The wallet uses a lot of phone storage and consumes a lot of internet data
  • It is a hot wallet and, therefore, exposed to inherent threats affecting hot wallets
  • Experienced crypto traders may consider BitPie wallet features too basic

Comparing BitPie Wallet to other multicurrency crypto wallets

BitPie Wallet vs. eToro

BitPie and eToro are both multi-blockchain wallets and support different types of blockchain networks. They are also highly intuitive, beginner-friendly, relatively secure, maintain highly responsive customer support, and host inbuilt crypto exchanges.

However, unlike eToro that will only support less than 20 cryptocurrencies, BitPie supports hundreds of cryptocurrencies, tokens, and stable coins. Additionally, while eToro stores private keys in their servers on behalf of clients, BitPie gives you absolute control over your digital assets.

Verdict: Is BitPie Wallet safe?

Well, BitPie has put in place several effective security measures aimed at safeguarding the integrity of your private keys. These include securing your account with a password, encrypting data stored therein, storing your passwords within the mobile device, and providing you with a recovery seed. We must, however, observe that the wallet ignores critical security features like the 2FA. These, plus its relatively low fees and annexed features like an inbuilt exchange, make it suitable for active traders and smallholder crypto investors.

Categories
Cryptocurrencies

MyMonero wallet Review: How Safe Is This Desktop And Mobile Wallet App?

MyMonero is a lightweight desktop and iOS app wallet developed by Monero Project steward, Riccardo Spagni, and the Monero Core Team. It was launched in 2014 as an alternative to Monero GUI – the full node client for Monero blockchain. And it seeks to address some of the challenges faced by Monero GUI users, including slow transaction processing speeds, extended wallet startup times, and drag on your computer memory, storage, and battery life.

On the MyMonero website, this desktop and mobile app wallet is described as the “Sweet spot between convenience, security, and features.” The website further adds that its development team has “Ironed out the technical details … so you can get back to business” by prioritizing the crypto wallet’s design.

But has MyMonero lived up to its expectations when it comes to balancing the ease of use with security and privacy? We answer this question and more in this MyMonero review.

MyMonero key features

Cross-platform support: MyMonero is a highly versatile crypto wallet that is compatible with multiple operating systems. Unlike the traditional Monero GUI that was only available as a desktop client, MyMonero is available as a web wallet, desktop app (Linux, Windows, and macOS compatible), and iOS mobile app.

Lightweight: MyMonero crypto wallet is also extremely light as it offloads all the heavy work to the MyMonero servers. This implies that you no longer have to download the Monero blockchain that drains its storage and RAM while eating into the battery life of your phone or computer.

Synchronized cross-platform experience: One of MyMonero wallet’s unique features is its cross-platform synchronization experience. This implies that you can easily get access to your wallet account, view transaction history and balances on any device. You only need the seed words to login to your wallet via any device.

Smart contacts management tool: MyMonero has an inbuilt Rolodex that helps you keep track of your private addresses, payment IDs, and OpenAlis addresses. You can also use smart Rolodex to manage your wallet contacts.

Speedy transfers: One of the benefits of MyMonero wallet’s lightweight nature is its speedy startup and fast transaction processing capabilities. You no longer have to wait, hours on end, for the full node client to sync with your wallet to initiate a Monero transaction.

MyMonero Security and privacy features

Password: Like any crypto wallet, MYMonero is secured with a password. The user sets this multi-character password during app installation and when registering a wallet account. It serves to protect your wallet from authorized attacks and also doubles up as an encryption tool.

Non-custodial: While MyMonero wallet servers run virtually all the wallet transactions, it won’t store your private keys. These are stored within the computer or mobile devices, giving you total control over your digital assets.

Strong encryption: All the data held in a MyMonero wallet is highly encrypted, especially the private keys and wallet communications with project servers and other third-party systems.

Native privacy: Monero takes pride in being one of the safest and most private blockchain networks around. MyMonero has taken this a step further and promotes anonymous crypto transactions by ensuring that the wallet doesn’t ask for any of your personally-identifiable details like name, address, or email. It also doesn’t keep logs for your crypto transactions, location, or device IP address. This approach to privacy beats the rudimental privacy systems put in place by some popular crypto wallets.

Open sourced: MyMonero wallet is also built on an open-sourced technology. Its users and blockchain security experts can view, audit, and recommend adjustments to the wallet app from its GitHub wallet repository.

How to set up and activate the MyMonero wallet

Step 1: Open the MyMonero official website and download the web wallet that is compatible with your device’s operating system

Step 2: Install and launch the wallet app to start the registration process

Step 3: Note that the app doesn’t ask for registration details. Rather, it will provide you with a private login key made up of 12 random phrases that double up as the wallet’s recovery seed and request that you set a password.

(Note: Write this private login key down on a physical piece of paper and keep it safe. You will not only need it to access the wallet on different devices, but it will also be needed when recovering lost private keys)

Step 4: Confirm that you have correctly written down the private login key by reentering it on the prompt tab

Step 5: Chose your preferred language and login to your MyMonero wallet

Step 6: Your account is now active and ready for use

How to add/receive coins to MyMonero wallet

Step 1: Log in to your MyMonero wallet, and on the user dashboard, click ‘Receive.’

Step 2: Copy the wallet’s public address or the QR code and forward either to the party sending you the Monero cryptos

Step 3: Wait for the coins to reflect on your wallet

How to send crypto from MyMonero wallet

Step 1: Log in to your MyMonero wallet and click the ‘Send’ tab on the user dashboard

Step 2: On the popup window, enter the recipient’s wallet address and amount of XMR you wish to send

Step 3: Enter the payment ID (This helps differentiate your transaction from others and is especially important when sending cryptos to an exchange)

Step 4: Set the privacy level for your transactions, from minimum to high or Paranoid (Monero pushes private transactions by bundling several transactions together and making it impossible to track either one to your crypto wallet. The ring size, presented as “With # others,” refers to the number of transactions bundled alongside yours).

Step 5: Confirm the correctness of the transaction details and hit send

MyMonero wallet ease of use

Downloading and installing the MyMonero wallet app or registering a user account on the MyMonero web wallet is easy. It also features a highly intuitive and beginner-friendly user interface. The user dashboard is also multi-lingual, easily navigable, and only features the most important aspects of the wallet. The process of sending and receiving cryptos into MyMonero wallet is equally easy and straightforward.

MyMonero wallet supported currencies.

MyMonero wallet will only support Monero (XMR)  altcoins.

MyMonero wallet cost and fees

Downloading and installing the MyMonero wallet is free, and so is storing your XMR altcoins in the wallet. However, you will be charged a transaction fee every time you send XMR coins to another wallet or exchange. Ideally, there are two types of fees acting on an XMR transaction.

First, is the tax charged based on the amount of data it takes to complete the transaction. It is measured in Kilobytes and is charged at 0.002XMRs per KB. Second is the miner’s fee, which is approximately 50% of the transaction cost.

What are the pros and cons of using MyMonero wallet

Pros:

  • MyMonero is a light wallet that doesn’t require you to download the full node blockchain
  • MyMonero is private and highly encrypted to guarantee the privacy of your digital assets
  • The wallet has one of the most interactive and beginner-friendly user interfaces
  • The wallet is also relatively inexpensive
  • It allows for anonymous registration and facilitates private crypto transactions

Cons:

  • MyMonero will only support XRM cryptocurrencies
  • It is an online wallet and still susceptible to the inherent risks facing hot wallets
  • The wallet doesn’t support multi-signature functionality
  • Comparing MyMonero wallet to other Eth-based crypto wallets

MyMonero wallet vs. Monero GUI

MyMonero desktop wallet can be best described as the stripped-down version of the Monero GUI. The two are almost identical in that they have similar roles in storing XRM coins and facilitating Monero transactions. The only difference between the two is that Monero GUI is a full node desktop client, while MyMonero is a light desktop app. These make MyWallet relatively easier to use and faster compared to Monero GUI.

Verdict: Is MyMonero wallet safe?

Well, MyMonero embraces the privacy-oriented nature of the Monero blockchain in the execution of its functions. It will not ask for the client’s personal data, nor collect or keep logs of your crypto activity. Additionally, any information stored within the open-sourced wallet is highly encrypted. These features have made MyMonero one of the most secure and one of the most private crypto wallets. However, we must observe that, though it is non-custodial, MyMonero is still online-based and, therefore, exposed to the inherent risks facing hot wallets. 

Categories
Cryptocurrencies

Monerujo wallet Review: What Makes This Android Crypto Wallet App Unique?

Monerujo, the android wallet for Monero, is considered the first-ever open-sourced mobile app that Monero altcoin users can rely on to store and manage their XRM altcoins. And while it is not the official Monero smartphone app, it has been developed by Monero community experts. It also features prominently on the list of best wallet apps recommended by the Monero network developers.

But how safe is this Android-only mobile wallet app? We seek to answer this question and tell you everything you need to know about the Monerujo wallet in this review. We will look at its key operational features, security measures in place, and ease of use. Additionally, we will provide you with a step-by-step guide on setting up, sending, or receiving XRM coins to your Monerujo wallet.

Monerujo key features:

Multi-account support: Monerujo is a multi-account crypto wallet. This implies that there is no limit to the number of user accounts and wallets addresses that you can create and host on the Monerujo wallet. More importantly, there is no limit to the number of XRM coins you can store in a Monerujo wallet.

Pay BTC addresses: You don’t have to leave your wallet or engage in lengthy and time-consuming XRM-BTC conversions to make payments on a BTC store. Monerujo currently allows you to pay into a Bitcoin address directly, without going through a crypto exchange.

Lightweight wallet app: Monerujo is a light wallet that doesn’t require you to download the full node blockchain into your phone. Rather, the wallet app uses remote nodes to synchronize the app functions with the Monero Blockchain. This ensures that the crypto wallet app doesn’t drain your phone’s storage, RAM, or battery life.

Integrates hardware wallet: Monerujo is a Monero-only wallet, but to expand the scope of the number of supported cryptos as well as its security features. Currently, Monerujo integrates Ledger Nano S that, in turn, supports over 1000 cryptocurrencies and tokens.

Security and privacy features:

Password encryption: Like most other crypto wallet apps, Monerujo is secured with a password that you set when installing and creating a user account. The password also serves as a security tool that is used by the wallet to encrypt all the user data stored therein – including private keys.

Open sourced: Monejuro is an open-sourced and community-led crypto project. Its source code is available on GitHub and is open for viewership, auditing, and critique by its users and the crypto community. This makes Monejuro one of the most transparent crypto wallet apps.

F-droid privacy: The Monero network and XRM coins take pride in guaranteeing your transactions’ security and transparency. And to achieve this and avoid leaving digital footprints when you download the wallet app from your Gmail-linked Google Play Store, Monejuro is now available on the ultra-private F-Droid app repository.

Hierarchically deterministic: The Monejuro crypto wallet app is also hierarchically deterministic. This implies that every time you initiate a crypto transaction, the wallet auto-generates a new public address, effectively masking your real address and throwing-off any would-be crypto trackers.

Non-custodial: Monejuro doesn’t store your private keys within the Monero Foundation servers. Instead, these are encrypted and stored within your smartphone, giving you absolute control over your private keys.

Recovery seed: When installing the crypto wallet app and creating a user account, you will be provided with a series of random phrases that form your recovery seed. The seed comes in handy when you are looking to recover private keys from a lost wallet.

How to set up and activate the Monerujo wallet

Step 1: Download the Monejuro crypto wallet app from Monejuro official website, Google Play Store GitHub, or the F-Droid mobile app repository.

Step 2: Install and launch the app. Click on ‘Create New Wallet’

Step 3: Create a unique username for the wallet

Step 4: Create a password for your wallet

Step 5: Click on ‘Make Me A Wallet Already’ to authorize the wallet to generate public and private wallet addresses.

Step 6: The phone screen will now display all the important wallet information, including its Public address, view key, and Spend key, wallet restore key and a mnemonic seed that comprises 25 random words. Write these words down and keep them safe offline.

Step 7: Click on the “I Have Noted The Mnemonic Seed” to complete the setup and access your wallet’s user dashboard.

How to add/receive coins to Monerujo wallet

Step 1: Log in to your Monerujo wallet, and on the user, dashboard click on the green ‘Receive’ button

Step 2: The wallet will display both the wallet address and QR code, copy either and forward and to the party sending you XRMs

Step 3: Wait for the funds to reflect in your wallet – may take up to 20 minutes.

How to send crypto from Monerujo wallet

Step 1: Log in to your Monerujo wallet app and click on the Orange ‘Give’ button

Step 2: The app will display a transaction page where you can enter the recipient’s wallet address, Payment ID (optional) and private note (optional)

Step 3: Enter the number of coins you wish to send. This can be expressed in the form of XRM altcoins or any of the supported fiat currencies.

Step 4: Check the accuracy of the transaction details and hit ‘Confirm.’

Monerujo wallet ease of use

Monerujo’s crypto wallet’s onboarding process is relatively straightforward. It doesn’t request personal information from the user when creating a wallet. The user dashboard is also easily navigable, and so is the process of sending and receiving XRMs into the wallet.

Monerujo wallet supported currencies and countries.

Monerujo is a Monero-first crypto wallet that is specially designed to store and help manage XRM coins. It, therefore, will only support Monero cryptocurrency.

Monerujo wallet cost and fees

Downloading and installing the Monerujo crypto wallet app is free. Plus, the wallet does not charge you for storing your Monero altcoins therein.

You will, however, be charged Monero network fees every time you initiate a transfer out. This fee is typically influenced by the level of anonymity you want to achieve with the transaction (the Ring Size) and the transaction processing speed. Typically, large ring size and high transaction priority levels translate to higher transaction fees and vice versa.

Monerujo wallet Customer support

Monerujo has a readily available and highly responsive customer support team. In addition, you can contact them by raising a support ticket on the Monejuro wallet website, sending them an email, or interacting with the development team via their respective handles on such social media platforms as Reddit, Telegram, or Twitter.

What are the pros and cons of using Monerujo wallet

Pros:

  • The open-sourced nature of the Monerujo crypto wallet guarantees maximum security and transparency.
  • Monerujo doesn’t collect or store any information that may be personally identifiable to you.
  • It is highly versatile and makes it possible to pay a Bitcoin address directly from a Monero wallet.
  • It is highly convenient as it is accessible on mobile platforms.

Cons:

  • Monerujo is Android only crypto wallet app
  • It will only support money crypto coins
  • It is unregulated

Comparing Monerujo wallet to other Monero specific wallets

Monerujo wallet vs. MyMonero

Monerujo and MyMonero are both lightweight wallets, specially designed to store Monero cryptocurrencies. They are to the extent that they will only support Monero altcoins, allow for anonymous user registration and transaction processing, and allow you to set the transaction fee.

But while Monerujo is an online-only wallet app, MyMonero is a cross-platform vault available as a web-wallet, desktop app, and iOS app. Monero, however, carries the day when it comes to compatibility with hardware wallets as it integrates ledger Nano S and its ability to pay into bitcoin addresses directly.

Verdict: Is the Monerujo wallet safe?

Well, Monerujo has embraced premium security and anonymity measures aimed at keeping your digital assets. For instance, it facilitates the execution of anonymous crypto transactions. It doesn’t collect or keep logs of a user’s private information. It is highly encrypted and also built on open-sourced technology.

These features, plus the fact that you can download the app on the highly anonymous F-Droid repository, make Monerujo one of the most secure crypto wallet apps. However, we must mention that being an online-based wallet, Monerujo is exposed to common challenges facing hot wallets – like phishing and hacking – especially since it doesn’t support 2FA. 

Categories
Cryptocurrencies

Zcash Wallet: Features, fees Security and more

Let’s be clear –  Zcash is both the name of a cryptocurrency (ZEC) and a wallet. This review is about the wallet.

Zcash Wallet was built to handle ZEC. ZEC was developed from Bitcoin but with the aim of improving the anonymity of users and their transactions.

Zcash Wallet is a free, secure, beginner-friendly mobile wallet for addressing all your ZEC needs. Yes! It can address all your ZEC needs because it even has an onboard cryptocurrency exchange – a rare phenomenon among cryptocurrency wallets.

This review is about the Zcash Wallet, and all that appertains to it. We will look at its security, highlight it’s ease of use, follow through the installation and setup processes, and look at its pros and cons. We’ll also explore tips on getting customer support and resolving common issues. Stay tuned!

Key Features

  • Integrated cryptocurrency converter (onboard cryptocurrency exchange) – You can fund your Zcash Wallet with almost any other cryptocurrency out there; the wallet will convert it to ZEC for you. You can also send your ZECs to almost any altcoin wallet address, and it will surely be converted to the appropriate currency before it’s sent out.
  • Enhanced security – Zcash Wallet integrates some of the most advanced security features available in a cryptocurrency wallet, as will be seen later in this post.
  • Easy to use – you can log in with Facebook, Google, or your mobile number. You can also share your wallet address through these social media platforms.
  • Friendly customer support – Zcash Wallet customer service representatives exhibit rare compassion when addressing users.
  • Available in multiple languages – While you will probably only need to use the app in one language, the availability of the app in multiple languages increases its user base, which means you have more Zcash Wallet users to make free transactions with.
  • Simple and intuitive user interface.

Security

Zcash Wallet’s developers invested some decent efforts into hardening it from actual and perceived crypto-wallet threats. The security of this wallet is best viewed from two dimensions: it’s architecture and configurable features.

Architectural features include the wallet’s use of the hierarchical deterministic (HD) algorithm for generating addresses. HD key generation dramatically simplifies the task of backing up a wallet since the user is not required to generate key backups manually.

Zcash also supports multi-signature (multi-sig) transaction signing.

Multi-sig allows you to sign a transaction by more than one device, thereby addressing the risk of unauthorized transactions in case the primary device is compromised.

In the traditional banking industry, corporate accounts often require more than one signatory to allow movement of funds out of the account. This is pretty close to what multi-sig does to crypto transactions.

Multi-factor Authentication

Perhaps the most outstanding security feature offered by Zcash Wallet is multifactor authentication, also known as MFA.

MFA has recently gained a lot of attention among cybersecurity communities. This technology enhances authentication and identity management by requiring you to provide additional verification after you log in.

It’s simple but super-effective. With Zcash, you need to provide a code sent to an authenticator app of your liking, for example, Google Authenticator or Microsoft Authenticator.

So, even if someone has your password, they need to access your authenticator app as well to log in to your account. You need to note that this is one of the very few wallets out there that implement multi-factor authentication.

Just a word of caution – if you choose to secure your wallet with MFA, proceed with care because if you lose your phone and don’t have the MFA key, there is no way you will access your wallet. This is precisely why the MFA option is not automatically activated when you set up your account.

Shielded Address support

You should also expect to find privacy in the goodies basket that comes with this wallet.

Zcash Wallet provides shielded address support which encrypts addresses and other transaction information such that this information becomes invisible to anyone on the network. This feature makes it more difficult to trace transactions to their origins and is one of the main advantages of ZEC over Bitcoin.

We can go on all day praising this app’s security, but, hey, it’s not an open-source project! There is a certain faith the crypto community places on open-source wallets. So goes their argument:

“Proprietary software is only secure as long as its code has not found its way to the public. But one day, one time, this code will be leaked into the public domain, and reverse engineers and hackers will begin flexing their skills – it will just be a matter of time before they hack their way into the system. But if it is an open-source wallet, this community of reverse engineers and hackers are part of the development team. You get the logic?”

It’s a bit controversial, but we’d rather go with the majority verdict that open-source wallets are more secure.

Even if Zcash has all these security features, you need to treat your wallet as your bank account, and its overall security is your responsibility.

Fees

Zcash brands itself as a secure and free wallet. Let’s focus on the free part of it.

Sending and receiving coins between Zcash wallets is free. However, network fees may creep in if you are sending coins to another ZEC wallet. Exchange fees will also apply if you are sending ZEC but want them to arrive like some other altcoin.

Downloading and Setting up an Account

Zcash Wallet is a mobile-only wallet available on both Android and iOS platforms. Downloading this app from either the Android PlayStore or the iOS AppStore is no different from downloading any other app.

Once downloaded, you can restore a previous account or create a new one. If it’s your first time interesting with ZEC, the easiest way to create a new wallet is by signing in with a social media account.

While setting up an account with other cryptocurrency wallets usually involves a lengthy process where you need to provide passphrases, PINs, and other authentication paraphernalia, this process has been simplified to a single button push, or a few taps at most, with the Zcash Wallet. This wallet gives you several convenient sign-in options, including signing in with Facebook, Google, or your mobile number. It’s incredibly easy to log in, and you need to install the wallet to believe it.

Once you log in, you should tune your preferences and security settings.

Sending Funds

Sending funds with Zcash Wallet is a no-brainer, but let’s look at it anyway.

  • The send button is found on the main screen of the application. Tap on it to initiate a funds transfer.
  • The next option is supplying destination information. The app provides two options: sending funds to other cryptocurrency addresses, or a Zcash Wallet address. We already saw that conversion to other currencies takes place automatically by the inbuilt exchange. They call this feature “Smart Pay.” If you are sending funds to another Zcash Wallet user, select the second option, and provide their User ID or email. If you provide an email, the app will check whether an account with such an email exists. In case it doesn’t, Zcash Wallet will create a new account and send a verification to that email. Next, you will see a summary of the transaction, including network fee and estimated arrival amount.

Receiving Funds

As earlier said, you can receive funds from any wallet, including those that hold other currencies. Receiving funds from another Zcash Wallet is free and instant. But if you are receiving them from a different network, expect the sent amount less than the exchange fees. To receive coins,

  • Tap on the receive icon on the main screen of the application.
  • You will immediately see a ZEC deposit address, a QR code, and your User ID.
  • If the source of the funds is another Zcash Wallet, tap the User ID to copy it. For faster and hassle-free sharing, tap the share button at the top right corner of the screen.
  • If you are receiving funds from another altcoin wallet, tap on the smart address tab to view the list of supported currencies. Since the list is long, you can search directly by typing the name of the currency. The search bar is a bit tiny but look for the magnifying glass icon. Next, select the currency of the sender. At this point, the app will automatically generate a wallet address, QR code, a memo, and any other information needed to receive funds. It will also tell you the minimum amount you can receive. How convenient! As usual, tap to copy or simply push the share button to share using the messaging apps on your phone.

Supported Cryptocurrencies

Since the wallet has an integrated exchange, it can support virtually any currency. However, it can only store ZEC. This is not a problem because if you want to send or receive funds in a different currency, you can always do it.

Customer Care

Zcash delivers customer support primarily through the email [email protected] although [email protected] appears more active.

There seems to be a lot of negative energy on the Interweb flying in the direction of Zcash’s customer support. To be fair, Zcash’s customer care can be described as responsive. Whether that solves your issues or not is beside the point. These folks always respond to individual complaints even on non-official support communication channels such as the app’s download page. So, an 8 out of 10 sounds fair.

Users seem to experience a variety of challenges with the app ranging from failed logins to transactions not reflecting in their accounts, but those are not customer support issues, they are probably technical challenges.

Wallet’s Pros and Cons

Pros

  • The wallet is remarkably easy to use. Right from installation to sending funds, everything is set to fulfill the desires of the lazy user.
  • User-friendly interface – the interface is not fancy, but it’s very functional. It only has two major parts: all the buttons you need at the top half of the screen, and all the news and tips you need in the remaining half. The news section is exceptionally succinct, and you won’t find irrelevant posts.
  • On-board cryptocurrency exchange – With this feature, you only need one wallet to do all your business in the crypto world.
  • Zcash boasts of some of the best security features in the market – multi-sig, multifactor authentication, HD key generation, and much more. Is there a wallet that can compete with this? One wonders.
  • Provides cold storage – Although cold storage is a security advantage, it’s worth mentioning it separately as some users give it primary consideration when selecting a wallet.
  • It’s easy to restore your wallet from any Android or iOS device if your phone gets lost. Please note that it may take some time before your funds reflect in the new wallet.
  • It provides email notifications for each transaction. So you’re always updated on your account activity. This feature increases your chances of recovering stolen funds.
  • The app is fast and pretty stable.

Cons

Nothing can be perfect, and the wallet isn’t an exception. Some of its outstanding shortcomings include:

  • It only has a mobile option. This might inconvenience some users.
  • It is not open source.

Final Remarks

The Zcash Wallet is a truly outstanding digital solution. From its ease-of-use to secure operation, it only gives you reasons to be loyal.

As we have seen in this review, the app has some of the best security features you can find in a cryptocurrency wallet. It is also among the few wallets that will allow you to send or receive funds from almost any network.

If you ever experience issues with your account and contact their customer care, you will be more than delighted with their hospitality.

Nevertheless, it’s narrow support for platforms, and the lack of open-source scrutiny might be a bother to some. All things considered, this wallet is one of the best ZEC wallets ever built.

Categories
Crypto Guides

How Do ‘Ring Signatures’ Increase The Privacy Of A Crypto Network

Introduction

Cryptocurrencies are the primary application of blockchain. Transparency and Privacy are two terms that go side by side concerning cryptocurrencies. Users of cryptocurrencies are looking for more and more Privacy with more adaptability of cryptocurrencies. Anyone can open the bitcoin ledger and check the ongoing transactions and find out the users who are transacting and the amounts of the transactions as well. Hence to increase the Privacy of the cryptocurrency network, Ring Signatures have been introduced to cryptocurrencies.

What are Ring Signatures?

Ring signatures are nothing but digital signatures performed by anyone from a group of members but not possible to know who has done the signature. We can add any group of members without any additional setup. The concept was initially developed to leak the information, especially from high ranking individuals. This way, we will not know who leaked the news, but one can ascertain the information is authentic. The concept is developed by Ron Rivest, Adi Shamir, and Yael Tauman and announced at Asiacrypt in 2001.

Since then, there have been certain developments made in the ring signatures called traceable ring signatures to overcome vulnerabilities raised due to malicious or irresponsible people. The modification or further development of this is what is used in crypto note coins developed to overcome the weaknesses of bitcoin. By this development, the ring signatures were effective enough to obscure the sender’s information in the peer to peer transactions.

Now the concept is further developed called Ringed Confidential Transactions (Ring CT’s), which obscures the transaction amount as well instead of obscuring only the sender’s information. Monero Labs formally announced this in 2015. We all know that Privacy is strictly entitled when it comes to the transactions in the Monero platform, and now we know why, i.e., because of the concept of ring signatures.

How Do They Work?

Cryptocurrencies work on the principle of digital signatures. Ring signatures are digital signatures, which are group signatures. Ring signatures require multiple partial digital signatures of different users who may be part of the network already to form a single digital signature, which is used to sign the transaction. Thus, to validate the signature, multiple private keys are required, which wouldn’t be possible to obtain. The name ring came up because of the use of various users’ output to generate a single digital signature.

Let us see an example of a transaction in Monero blockchain and see how the concept of ring signature works.

⭕ A intends to send 50 coins to B in the Monero network basically to B’s Monero crypto wallet and initiates a transaction.

⭕ In general, this transaction would be signed using A’s private/public key combination, but in this case, a unique one time spend key is generated that starts with the output from the sender’s wallet.

⭕ The other signatures are picked up randomly from the users in the ring from the past outputs in the network to create a unique digital signature, which wouldn’t be possible to determine the original signer.

⭕ Even though the public key of the original sender is used, since the signature is created using different users’ previous outputs, it is not possible to determine the sender’s identity.

Ring signatures have started to become vital, especially where Privacy is a matter of concern in cryptocurrency networks. CryptoNote coins are the most well-known coins for Privacy. Monero and Bytecoins are excellent examples which use ring signatures and Ring CT’s.

Categories
Cryptocurrencies

BRD Wallet Review 2020: What Are Its Features, Cost, Pros, And Cons

BRD Wallet is a non-custodial mobile wallet built on the iOS platform. Non-custodial implies that Private keys for your digital assets are held on your mobile device, and not on BRD’s servers. The wallet has gained popularity in the recent past, primarily due to its support for anonymous trading, as well as the inclusion of multilayered security features aimed at preserving the integrity and safety of the user’s account and private keys.

But BRD is more than just a wallet, it is a blockchain network with its own native token. In this BRD wallet review, we will be looking at all the popular operational and security features associated with BRD, its fees and ease of use, and tell you whether it is a secure wallet.

BRD Key features:

Multiplatform: BRD Wallet is a mobile-based crypto wallet. It is built on the iOS platform and was originally designed for Apple product users. A surge in popularity has, however, seen the release of the android BRD wallet version for Android OS powered devices. 

Fast: The BRD wallet uses the Special Payment Verification (SPV) protocol to connect to the Bitcoin blockchain, effectively guaranteeing the fastest crypto transaction confirmation speeds.

Native tokens: BRD is one of the few networks that maintains its own native token, the BRD Token.

Reward program: The BRD wallet is also one of the few networks that have an active loyalty reward scheme. The more BRD tokens you buy and hold in your wallet, the higher the rewards. 1,000 BRDs will get you 25% off trading fees, 2,500 BRDs gets you access to phone support, while 100,000+ BRDs gets you a phone call with BRD wallet CEO.

Support for debit cards: The BRD wallet doesn’t just make it possible to exchange coins, you can also easily pay for your Bitcoins or any other coins within the BRD network, using debit and credit cards.

Open source technology: The BRD wallet is also established on an open-sourced technology platform. This has, over the years, been vetted and audited by internet security experts with possible loopholes identified and patched. 

Blockchain toolbox: Most recently, BRD introduced the BRD blockchain toolbox referred to as the Blockset. This is a technology platform that blockchain technologists can use to create enterprise apps. According to BRD, Blockset will at first support Bitcoin, XRP, Hedera, and Ethereum blockchains before bringing more networks on board.

Security features:

Password protected: When installing the BRD wallet app, you will be required to set a six-digit password.

Biometric features: In addition to the passcode, BRD also incorporates other security features such as fingerprint and Facial recognition biometrics.

Anonymous trading: When creating a user account with BRD wallet, the company doesn’t ask for information personally identifiable to you, like your name, physical address, or email address. Neither will you be subjected to the KYC verification process. And this allows for anonymous crypto transactions.

12 phrase seed backup: Should you ever forget the account password, or lose access to the mobile device hosting your private keys, you can always recover your BRD wallet account using the 12 phrase recovery, generated by the wallet during installation.

AES hardware encryption: The private keys and any other information stored in your BRD wallet is also highly encrypted using the AES hardware encryption technology.

BRD Wallet ease of use:

BRD wallet is an easy to use crypto vault. While it hosts numerous features, they are all neatly organized on the user dashboard. The BRD wallet account registration processes are also easy and straightforward.

The mobile wallet app is also multilingual, supporting up to 13 international languages and currently available to the crypto community members in over 150 countries across the world. 

Currencies supported

BRD wallet was initially designed to be a Bitcoin Only wallet. Over time, however, the mobile vault has incorporated several other cryptocurrencies and tokens, including Bitcoin Cash and Ethereum, stable coins like TrueUSD, and all the ERC 20 tokens.

It has Bitcoin as the default wallet address, and therefore, you will need to manually add the wallet for any other crypto you wish to transact. The process is, however, easy as you only need to head over to the cryptocurrency exchange list on your user dashboard, and click on the ‘Add’ icon that displays against the coin you wish to buy/send.

BRD crypto wallet cost and other fees

Acquiring the BRD wallet and storing your digital assets is free. Transacting through the app, however, attracts variable fees, depending on factors such as the blockchain network involved, the number of coins being exchanged, and the medium of exchange.

If you, for instance, wish to buy crypto assets using a credit card, you incur as much as 5% in transaction fees.  Your bank or debit card provider may also charge a processing fee when you wish to make cash deposits like USD, EUR, CAD, DKK, and GBP for purchases of different cryptocurrencies within the app.

Setting up the BRD crypto wallet:

How to install a BRD wallet:

Step 1: Download the BRD crypto wallet app from the Google Play Store on your Android or the Apple App Store for your iOS mobile device and install it.

Step 2: Create and memorize a six-digit passcode that you will be using to access the wallet app.

Step 3: The crypto wallet app will then auto-generate 12 phrases that serve as the backup seed for your account. You will need them to recover your wallet and private keys therein if you forget the password.

Step 4: You are now set and can start transferring cryptocurrencies to the wallet and buy or sell in the app-based exchange.

Note: Before you start transacting using the app, we advise that you first add a biometric security feature such as the fingerprint or Face ID to the app as an additional security layer.

Sending and receiving coins:

To receive funds into your BRD Wallet:

Step 1: Log in to your BRD crypto wallet app.

Step 2:  On your user dashboard, click on the coin you wish to receive.

Step 3:  Tap the receive option to display the wallet address and the QR code. Copy either and send them to the party sending you coins.

To send payments from your BRD Wallet:

Step 1: Log in to your BRD crypto wallet app.

Step 2: On your user dashboard, click on the coin you wish to send.

Step 3: Tap the send option to display the payment details. Enter the recipient’s wallet address and the number of coins you wish to send.

Step 4: Confirm the payment details and hit send.

BRD hardware wallet pros and cons:

Pros:

  • Its open-sourced nature and integration of biometric features speak a lot about the app development team’s dedication to its security.
  • The wallet app is relatively easy to use, as it features a friendly user interface.
  • The app simplifies crypto exchanges by making it possible to buy digital assets via debit cards, credit cards, and even cash.
  • It combines a wide range of security features that include; encryption, biometrics, pin code, and open-sourced codes to preserve the integrity of the app.
  • The app has very low latency and some of the fastest bitcoin transaction processing speeds.

Cons:

  • One may consider the number of digital currencies supported by the mobile wallet limiting.
  • It is still a hot wallet, and this implies that it is susceptible to internet threats like remote hacker access and ransomware.
  • Some essential services, like phone support, are only available to individuals with a large number of BRD coin deposits.
  • The fact that it supports credit/debit cards and bank transfers beats its intention of anonymous trading as their transactions can always be tied back to a specific crypto account.

BRD wallet compared to competitors:

Comparing BRD with Infinito crypto wallet apps.

BRD and Infinito are both technologically advanced and highly innovative crypto wallet apps. Equally, Their bots have similar attention to account security as they both advocate for a strong password and biometric backups. However, BRD pales in the face of Infinito when it comes to the number of supported cryptocurrencies and the app’s ease of use. While BRD supports just a handful of coins and tokens, Infinito hosts 2000+ digital currencies.

Comparing the BRD crypto wallet app with Trezor hardware wallet.

The Trezor hardware wallet is superior to the BRD wallet app in three key security and operational areas. First, it stores the owners’ coins offline. Secondly, it has the backup of the physical on-device button used to authorize any crypto transaction. And lastly, it supports more coins and tokens. One may, however, consider the BRD wallet app easier to acquire as it is freely available, easier to use, and more beginner-friendly.

Customer support:

BRD wallet has a fairly responsive customer support team that you can engage with on the live chat, through email or one of their social media handles. This team is multilingual and can communicate in over 13 languages.

The only downside is that you need to buy and maintain a balance of 2,500+ BRD tokens to have access to phone support to BRD’s customer service team. 

Verdict: Is the BRD crypto wallet app safe?

Several features of the BRD crypto wallet app give us a lot of confidence about the security of their wallets, and the safety of private keys stored therein. These include its open-sourced technology, the use of a passcode, the integration of Biometric security features, and the backup seed. BRD crypto app has an above average safety score, but we recommend that you first invest in a very strong antivirus before installing the crypto wallet app. 

Categories
Cryptocurrencies

Atomic Crypto Wallet Review: How Safe Is The Atomic Wallet?

Atomic wallet is a decentralized, multi-currency, and feature-rich cryptocurrency vault where crypto enthusiasts can store and exchange digital currencies. It is a multi-platform hot wallet that launched in 2017 under the stewardship of Konstantin Gladych – Changelly co-founder –and Charlie Shrem​ – an American entrepreneur cum Bitcoin advocate and founding member of the Bitcoin Foundation.

It has, however, taken more than just the reputation and rich industry experience of crypto app founders to create an online buzz around the wallet. Much of this is attributable to its feature-rich platform that allows for crypto exchange, swapping, and staking currencies. Equally important was its commitment to crypto privacy and user anonymity.

In this Atomic wallet review, we will be looking to understand if it indeed is one of the safest crypto vaults around. We will also explore some of the wallet’s essential features, look at its pros and cons, vet its cost and transaction fees before comparing it with equally reputable crypto vaults.

Key Features:

Multi-platform: Atomic wallet is available as both a mobile app and a desktop app. The mobile app is available in both Android and iOS versions, while the desktop version supports all the popular operating systems, including Windows, MacOS, Linux, Ubuntu, Debian, and Fedora.

Inbuilt exchange: Atomic Wallet has an in-built exchange to facilitate both peer-to-peer crypto exchanges as well as in-app Crypto swaps. To achieve this, the app has partnered with some of the leading Decentralized Exchanges like Binance, Changelly, and Shapeshift.

Cold staking: In addition to Crypto investing and in-app trading, Atomic Wallet exposes you to the lucrative coin staking. Investors in supported coins like Tezos, Vechain, Pundi, and NEO GAS can now commit their coins safely to validators and get rewards.

Portfolio management: Atomic wallet also features the price tracking and portfolio management tool that allows you to monitor the value of your Crypto investments in real-time and on a unified interface.

Educational and trading resources: The crypto wallet app has also partnered with several crypto market data providers like CoinMarketCap, to help you monitor coin prices in real-time. It also has an elaborate crypto education and a news section that keeps you upbeat with the current happenings in the crypto industry.

Supports card purchases: Atomic wallet in collaboration with Simplex ensures that you get to buy cryptocurrencies using credit and debit cards while safeguarding your right to privacy and living true to its commitment of anonymous crypto trading.

Security features:

Password: When creating a user account on either the mobile or desktop wallet app, you will be required to create a strong multi-character password for your account.

Recovery seed backup: Upon registering an account with the Atomic wallet, you will be presented with 12 words recovery seed. You will need this to recover your wallet and private keys therein if you ever lose the phone or computer hosting it or forget the account password.

Non-custodial wallet: Atomic wallets are non-custodial, and the company servers will, therefore, not store the private keys on your behalf. You will always have full custody and control of your private keys, as they will be stored within your device.

Anonymous trading: Unlike most other Crypto wallet apps, Atomic wallet won’t ask you for such sensitive personal information as your name or email address. Neither will it subject you to the KYC and AML verification checks. The app was specially designed to support anonymous Crypto storage and trading.

AES Symmetric encryption: Any data, including the private keys stored in your wallet, will also be highly encrypted using the AES Symmetric encryption technology to prevent unauthorized access to your digital assets.

Ease of use:

Atomic wallet is also developed using highly advanced technology that makes it possible to maintain a highly sophisticated yet easy to use platform. Navigating through the Crypto wallet app is easy, and so is carrying out basic functions like buying and selling Crypto or monitoring your investment portfolio.

The apps can also be highly customized, allowing to change themes, text and icon sizes, and color. Additionally, both the app and website are multilingual, supporting English, Chinese, Spanish, Dutch, French, Russian, Turkish, Portuguese, Japanese, and German languages.

Currencies and countries supported

Atomic Crypto wallet app is available to virtually any cryptocurrency enthusiast in the world. It doesn’t have international membership restrictions or limitations to the use of virtual networks meaning that even individuals in countries with strict Crypto policies can access the wallet using a VPN.

Currently, Atomic Crypto wallet supports more than 300 cryptocurrencies and individual tokens as well as all the entire ERC 20 tokens.

Atomic crypto wallet cost and fees

You wouldn’t be charged for downloading, installing, and using Atomic wallet and its integrated features. Only the crypto exchange and swapping transactions have minimal charges that go to the network validators/miners and not the atomic wallet developers.

These transaction fees by Crypto exchanges are highly variable and dependent on the transaction volumes and the blockchain network used. Credit card purchases via the Simplex platform; on the other hand, carry a fixed charge of 2% the transaction amount.

Most notably, Atomic crypto wallet app has no limit to the number of coins you buy, sell, or hold in your wallet.

Customer support

Atomic cryptocurrency wallet has a responsive customer support team. For faster response, often a few hours, use the live chat option on the wallet app or their website. Alternatively, open a support ticket, send an email or contact them on their social media platforms like Telegram, Twitter, Reddit, or Facebook.

The customer support team is complemented by an elaborate FAQ section on the Atomic wallet website that features explanatory videos detailing how to interact with the app.

Setting up the Atomic crypto wallet

How to install the Atomic crypto wallet:

Step 1: Start by downloading the crypto wallet app on Google Play, App Store, or on the Atomic wallet website.

Step 2: Click ‘Open Wallet’ to create a new wallet.

Step 3: Create and memorize a super-strong password to protect your trader account.

Step 4: The app will now auto-generate 12 words recovery seed. Write it down on a piece of paper and store it in a secure place. You will need this to recover your private keys should you forget your password or lose the phone.

Step 5: Click next to your account’s user dashboard, and you are set to start buying, selling, swapping, and staking over 300 digital currencies.

How to receive cryptocurrencies into your Atomic wallet:

Step 1: Launch the Atomic wallet user dashboard.

Step 2: Click on the cryptocurrency you wish to receive to access its wallet address.

Step 3: Copy the address and send it to the person sending you cryptos and wait for the funds to reflect in the wallet.

How to send cryptos into your Atomic wallet:

Step 1: Lunch the Atomic crypto wallet user dashboard.

Step 2: Click on the cryptocurrency you would like to transfer out and chose the send option.

Step 3: On the popup window, enter the recipient’s wallet address and the number of coins you wish to send.

Step 4: Confirm that the details are correct, enter your account password, and hit send.

Atomic crypto wallet pros and cons:

Pros:

  • Atomic wallet embraces a host of security features to protect your privacy, like Passwords and private keys; plus, the wallet is hierarchically deterministic.
  • Supports anonymous trading and won’t ask or keep your personal information on private keys.
  • Supports a relatively large and constantly growing list of cryptocurrencies, tokens, and collectibles.
  • Hosts several advanced features, including an inbuilt exchange, real-time crypto market access, and a crypto news section.
  • It supports credit card purchases conducted through the Simplex platform.

Cons:

  • One may consider the fixed 2% fee charged on credit card purchases punitive.
  • The Atomic wallet code isn’t open sourced, raising questions about the developer’s transparency in their security claims.
  • The Atomic swap feature will only support the swap of three cryptocurrency pairs.
  • The app doesn’t support biometrics or the 2FA features making susceptible to internet security threats.

Comparing Atomic Crypto wallet with other cryptocurrency wallets:

Comparing Atomic wallet with Coinomi

Atomic and Coinomi are both hot wallet apps with a shared commitment for account security, easy to use wallet platforms, and integrating as many features into the app as possible. But Coinomi takes this a step further and makes their wallet supportive of as many cryptocurrencies as possible (17000+) and introduces more security measures like IP anonymization. In addition to an inbuilt exchange, Coinomi is also supportive of the DApps browser and the conversion of cryptos into redeemable gift cards.

Verdict – is Atomic wallet safe?

While Atomic crypto wallet lives to the true meaning of anonymous crypto trading and has never been hacked, we still consider its commitment to the wallet safety average. You must note that while it has taken significant strides in coming up with HD wallets and passwords and the backup seed, none of these protects your wallet from remote access breaches. The wallet would, therefore, only be suitable for low volume active traders and not long-term investors. 

Categories
Cryptocurrencies

CoolWallet S Crypto wallet review: How cool is CoolWallet S?

CoolWallet S is an innovative crypto vault by CoolBit X that blends the effectiveness of both the hardware and hot wallets to come up with the most secure hybrid crypto wallet. It has both the features of hardware and hot wallet in that it features a portable hardware component in the form of a card that’s then controlled via a crypto app. Each has its individual security measures and won’t function without the other.

The wallet offers the best of both worlds. It differs from the rest of the hardware wallets in that it uses a wireless connection to communicate with an app. And while most other hardware devices are USB-like, CoolWallet S is designed to imitate the exact dimensions, durability, and portability of a credit card. It is also waterproof, temperature resistant, and bendable.

In this CoolWallet S review, we take a deeper look into its key operational and security features, its pros and cons, and ease of use.

Key Features:

Mobile friendly: Most hardware wallets available today were designed with the desktop app, chrome extension, or a web trader in mind. They connect to a computer via a USB cable. CoolWallet S, on the other hand, is specially designed to work alongside iOS and Android-based apps.

Durable: The CoolWallet S card is made using the credit and debit card technology to make it extremely durable.

Sleek design: The CoolWallet S card has a cool design as it features an on-card screen and an authorization button.

Button: Like most USB-like hardware wallets, CoolWallet S features an on-card button used to authorize transactions or for navigating the card screen.

Inbuilt exchange: The CoolWallet S features a Changelly API that serves as its internal exchange. Using the exchange, CoolWallet S users can swap different cryptos and tokens without leaving the wallet.

Wallet connect feature: The portable wallet uses Bluetooth of the Near Field Communication features to connect wirelessly with the smartphone hosting the ColWallet S app. The connection is always shown on the card screen by the Bluetooth connection indicator, and you can use it with up to three devices.

Innovative UI: CoolWallet S presents you with two easy to use interfaces on the card and on the smartphone app. You can use to either check the balances of your digital assets, create new wallet addresses, or view your transaction history.

Security features:

Pass-code: When personalizing the card and registering with the app, you will be required to create a strong pass-code. You will need it every time you want to log into your app or card.

Biometrics security features: The app is further fortified with biometric security checks like the fingerprint and face ID. Unlike most crypto wallet apps that will use either the password or the biometric, CoolWallet S employs the 2+1 authentication features that allow you to use both the password and biometric checks to access your account.

AES 256 encrypted Bluetooth connection: The card is detached from its associated app and will only connect via a Bluetooth connection. The connection is further secured with AES-256 encryption to eliminate possible compromise of wallet data.

Seed phrase available: Like in the case of any other Crypto wallet app, CoolWallet S also has 12 words seed backup that you can use to recover your private keys in you forgot the password or if the app or card were compromised.

Hierarchically deterministic: The wallet is hierarchically deterministic, allowing you to create multiple wallet addresses that help throw off trackers.

Ease of use:

Apart from both the app and card having very friendly user interfaces, the wallet also designed with the global crypto community in mind. For instance, instead of using English words for passwords and recovery seed phrases, CoolWallet S uses numerals to accommodate the non-English speaking crypto enthusiasts.

Setting an account with CoolWallet S is also easy and straightforward. You also don’t need professional help to send/receive coins into your wallet. Plus, its simplistic app design makes exchanging currencies and tracking your crypto assets beginner-friendly.

Currencies and countries supported

CoolWallet S supports 30+ major cryptocurrencies, including Bitcoin, Ripple, Ethereum, Bitcoin Cash, Litecoin, Dash, and ZEN Cash and USDT. It also supports all ERC 20 tokens and is available in 100+ countries across the world.

CoolWallet S crypto wallet cost and fees

The CoolWallet S costs $99 or $159 when buying a pair. This gets you the CoolWallet S card, its charging dock, and a special paper where you can note down the recovery seed.

You won’t be charged for preserving your digital assets on this wallet, but sending and swapping tokens and coins on the integrated Changelly platforms attracts variable transaction fees. These are dependent on the amounts traded and the blockchain network.

Customer support

CoolWallet S has a highly responsive support team. This can be accessed by opening a support ticket on the website, via email, by contacting them via the live chat or on their different social media platforms. Most of the queries will be satisfactorily answered within two hours.

There, however, is no phone support.

Setting up the CoolWallet S crypto wallet

How to install the CoolWallet S crypto wallet:

Step 1: Start by downloading and installing the CoolWallet S app for your iOS or Android phone.

Step 2: Press the button on the card to activate it and turn on Bluetooth for your phone.

Step 3: The app will soon show a string of letters and numbers representing your wallet address. Click connect to pair.

Step 4: On the app, select ‘Create’ to start the wallet creation process.

Step 5: The app will then ask you to choose the length of your recovery seedeither12-, 18- or 24- words sets. (We advise you to use the on-card screen and not the app to select the seed set). Note the seed down on a piece of paper or save it as an image file.

Step 6: Verify that you have captured the right seed by answering a random seed query.

Step 7: Click the ‘Create a New Wallet’ option on the app to finish the setup process.

(You can now activate the biometric security features on the settings page of your app).

How to receive cryptocurrencies into your CoolWallet S:

Step 1: Log in to your CoolWallet S app and select Receive on the user dashboard.

Step 2: Click on the crypto/token you would like to receive (if not listed, add it automatically at the coin display tab on the settings page).

Step 3: Clicking on the cryptocurrency will display your wallet address and QR code.

Step 4: Copy either and send them to the individual/entity, sending you the coins.

How to send cryptos into your CoolWallet S:

Step 1: Log in to your CoolWallet S app and select Send on the user dashboard.

Step 2: On the pop-up menu, enter the recipient’s wallet address in the TO field and the number of coins you wish to send.

Step 3: Chose the cryptocurrency you wish to send.

Step 4: Review the transaction by confirming the amounts to send and the recipient’s wallet address. This tab will also display the transaction fee that you can modify based on the speed at which you would like to have the order confirmed.

Step 5: Press ‘Send.’

CoolWallet S crypto wallet pros and cons:

Pros:

  • The wallet embraces a multi-layered security protocol guaranteeing the absolute safety of your private keys.
  • CoolWallet S has a sleek design that isn’t just highly portable but also quite convenient.
  • Provides a one of a kind offline wireless storage for your digital assets.
  • It is easy to set up and use for crypto beginners due to its very friendly and simplistic user interface.
  • CoolWallet S hosts a number of important features that include the Changelly API that allows for swaps and in-app crypto exchanges.

Cons:

  • At $99, it is more expensive than equally reliable hardware crypto wallets like Trezor or Ledger Nano.
  • It supports a limited number of cryptocurrencies (less than a hundred) compared to other hardware wallets that support 1000+ coin and tokens.
  • The CoolWallet S technology isn’t open sourced and thus inadequately audited.
  • You will have to re-enter the seed words every time the app/card firmware is updated, which can be cumbersome.

Comparing CoolWallet S with other cryptocurrency wallets:

Comparing CoolWallet S with Ledger Nano S hardware wallet

CoolWallet S can be said to have employed more security measures to fortify both the app and card than Ledger Nano S hardware wallet. It is also more versatile as it features a larger on-card screen and probably easier wallet setup process. The Ledger Nano S hardware wallet, on the other, carries the day when it comes to the number of supported cryptocurrencies. It is also more affordable and even more reputable based on its developer’s exposure to the crypto world and by virtue of having been a pioneer hardware wallet.

Verdict – is CoolWallet S safe?

CoolWallet S is, without a doubt, one of the safest cryptocurrency wallets available today. It is also is one of the most versatile, given that you can use either the mobile app or the card-like hardware device to monitor your digital assets. And this makes it appealing to both the low-volume traders and high-volume investors alike. To enjoy these benefits, however, you will need to dig deeper into your pockets.