Categories
Cryptocurrencies

Xapo Wallet Review: Is Xapo The Most Secure Custodial Wallet?

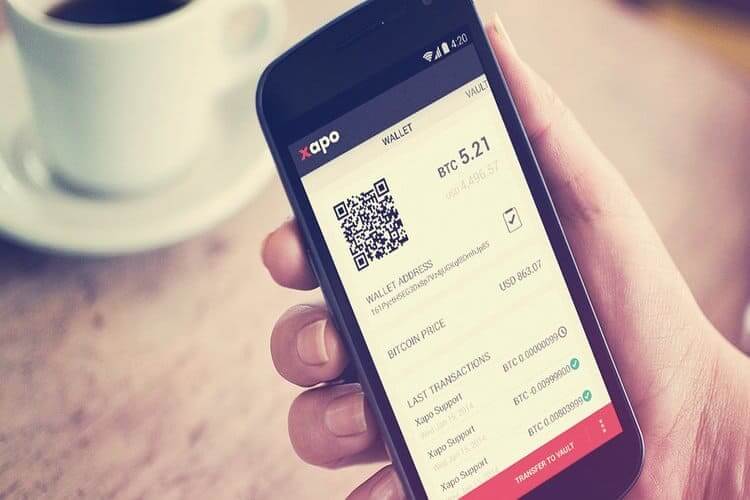
Xapo is an app-based crypto wallet that seeks to provide the most accessible and highly secure platform for Bitcoin users. It was founded by Wences Cesares – an international entrepreneur and financial technology expert – and it is registered and incorporated in Gibraltar. On their website, the Xapo crypto app is described as a ‘secure alternative platform’ that goes beyond the industry standards in helping you protect your livelihood and digital assets.

Some of the factors that set it apart from the competition include the fact that it is a Bitcoin-only wallet app. Further, it is a custodial wallet that stores your private keys in highly advanced and ultra-secure storage vaults that are never connected to the internet. In this Xapo wallet review, we vet the wallet’s security, ease of use, look at its pros and cons, and provide you with a step-by-step guide on how to use the Xapo app.

Xapo Crypto app key features:

Mobile wallet: Xapo is a mobile crypto app available to Android and iOS phone users.

Purchase Crypto with Fiat: Xapo has collaborated with numerous payment processing service providers that you can use to buy Bitcoins off the platform. These include direct wire transfers as well as credit and debit card purchases.

Inbuilt exchange: Xapo has also come up with a peer-to-peer exchange platform where users can exchange Bitcoins for fiat currencies. These in-app exchanges are free.

Portfolio tracker: On the Xapo user interface is the balance tab that lets you view your wallet balances in real-time, as well as the activity tab that keeps a record of all your transaction history. The two play a key role in helping you keep tabs on your expenses and help with budgeting by monitoring your crypto inflows and outflows.

Automated notifications: Xapo makes it possible to set automated notifications for different wallet functions. For instance, you can have the wallet send you a notification every time you receive crypto when cryptos are drawn from the wallet, and Bitcoin price alerts.

Multisignature wallet: The multisignature functionality of the Xapo crypto app makes it possible for you to share the app with family and segregate everyone’s funds.

Integrates debit card: Xapo recently launched the prepaid Xapo debit card that you can integrate with your Xapo crypto wallet and use it to pay for goods and services on the different crypto-friendly point of sale or withdraw funds from Bitcoin ATMs.

Libra member: Xapo is one of the founding members of the Libra blockchain network put together by Facebook. According to the Xapo website, the app’s development team provides technical expertise to help the association launch and run the Libra global currency sustainably.

Security features:

Password: Like most other crypto wallet apps, the Xapo crypto vault is secured with a password.

Two-factor authentication: All outbound transfers from the Xapo wallet app must be subjected to two-factor authentication. You have the option of receiving the verification code via email, SMS, or google authenticator.  

Cold storage: Unlike most other wallets that give you absolute control of your wallets by saving the private key in your phone, Xapo keeps the private keys safe on your behalf. According to the crypto security company, all your private keys are stored in ultra-secure vaults in the Swiss Alps and other parts of the world. They further add these vaults don’t connect to the internet, and they are largely made from demilitarized bunkers.

Highly encrypted: All your data, including the private keys, is shared with and stored in Xapo servers and is highly encrypted using proprietary encryption technology. And so are Xapo’s communication with third party systems like payment processors and third-party exchanges.

How to set and activate the Xapo wallet:

Step 1: Start by downloading the Xapo crypto mobile app from Google Play Store or Apple App Store.

Step 2: Install and launch the app, choose your country of residence, and enter your phone number.

Step 3: Verify the number by entering the 6-digit code received via SMS

Step 4: Enter your email address

Step 5: Complete the user profile by completing the registration form

Step 6: Choose your country of origin/citizenship from the drop-down menu

Step 7: Read and agree to Xapo wallet’s terms of use

Step 8: Create a 4-digit passcode for your Xapo wallet app

Step 9: Verify identity by uploading a photo of yourself and that of a government-issued identification document as well as a proof of address

Step 10: The app will now send a verification link to the email provided. Open the link to activate the account.

Step 11: Your Xapo wallet app account is now active and ready for use

How to add/ receive crypto into your Xapo wallet 

Step 1: Log in to your Xapo app, and on the dashboard, click on ‘My Money.’

Step 2: Tap on the ‘Add Money’ on the next window

Step 3: Follow the prompts to add Bitcoins using one of the provided account funding options.

How to send crypto from your Xapo wallet

Step 1: Log in to your Xapo wallet app and click on the ‘Payments’ tab.

Step 2: If you wish to send funds to an individual on your contact list, click on the “Transfer to a contact” tab, and select “Allow access.”

Step 3: Select the recipient and click on the “$” sign to initiate a transfer.

Step 4: Choose the account you wish to send the funds from, the amount you wish to send, the currency type, and click “Send.”

Step 5: Review the transactions and check the accuracy of the details before hitting “Confirm.”

Step 6: Enter the PIN code to authorize the pay

Xapo wallet ease of use

Xapo wallet has a highly intuitive and beginner-friendly user interface. It only has a few tabs that are carefully placed on the user dashboard to ease your in-app navigation and how you interact with the wallet.

The app’s onboarding process, though lengthy, is quite straightforward. And so are the processes of adding funds, receiving and sending Bitcoins and other Fiat currencies in and out of the wallet.

Xapo wallet supported currencies and countries.

Xapo is a Bitcoin-only crypto wallet app. Interestingly, and unlike most other Bitcoin-only wallets that extend their support to Bitcoin forks, Xapo does not support any other crypto, including such Bitcoin forks as Bitcoin Gold and Bitcoin Cash.

However, the integrated peer-to-peer exchange makes it possible for users to exchange Bitcoin with over 150 Fiat currencies.

Currently, the Xapo crypto wallet app is available in about 30 countries across the world.

Xapo wallet cost and fees 

Downloading and installing the Xapo crypto wallet app as well as storing your Bitcoins therein is free. You also won’t be charged for using their in-app peer to peer exchange or transferring funds from one Xapo wallet to another.

Outbound Bitcoin transfers to other wallets or exchange will, however, attract a network fee charged by Bitcoin miners and not Xapo. The fee is nevertheless dynamic, and you have the option of choosing either the standard fee for normal confirmation speeds or priority fee for trades you wish processed and confirmed urgently.

Xapo wallet customer support

Xapo’s customer support has a rather elaborate FAQ guide on the company website that addresses Xapo wallet users’ common challenges and provides troubleshooting guides. There also are tutorials that try to explain how you interact with the Xapo app.

You can also contact them via email, the live chat feature on both the website and the app, or direct message them on such social media platforms as Twitter, Facebook, and Instagram.

What are the pros and cons of using the Xapo wallet?

Pros:

  • Transfers from one Xapo wallet to another are free
  • It stores your private keys in cold storages and ultra-secure offline vaults
  • It allows you to buy Bitcoin with Fiat currency
  • It features an inbuilt peer-to-peer exchange
  • It integrates the Xapo Debit that you can use to pay for goods and services or withdraw at Bitcoin ATMs

Cons:

  • It will only support Bitcoins
  • It doesn’t support anonymous crypto transactions as all users must be subjected to KYC and AML procedures
  • It has an unnecessarily lengthy registration process

Comparing Xapo wallet with other Bitcoin-only wallets

Xapo wallet vs. BTC.com wallet

Xapo and BTC.com are both Bitcoin-only wallets. But unlike Xapo, which is a mobile crypto app, BTC.com is a web-based wallet. BTC.com is a lot easier to use and interact with as it not only features a friendly user interface but also has an easier onboarding process.

Xapo, however, carries the day when it comes to the security of client funds. Plus, while BTC.com’s online nature exposes its inherent threats associated with hot wallets, Xapo is a custodial wallet that stores client private keys in highly decentralized and ultra-secure cold storage.

Verdict: Is the Xapo wallet safe?

Xarpo is a custodial wallet that stores client funds in decentralized cold storages spread across the world. It has also put in additional client-side security features that deter unauthorized access to these keys, like securing the app with a passcode, two-factor authentication, and automated alerts on transfers and changes in digital asset balances. One might consider such security measures adequate, but we must observe that these don’t necessarily make you and your wallet immune from such social engineering threats as phishing.

Categories
Cryptocurrencies

Dharma Smart Wallet Review: How Smart Is The Defi-Focused Dharma Wallet?

Dharma smart wallet website refers to this crypto vault as ‘Your portal to DeFi’ and the ‘easiest and most secure way to invest and manage your money in DeFi.’ This mobile-based crypto wallet was created by Dharma Labs, a San Francisco based crypto technology company, and launched in April 2017. At the time of going public, Dharma was not a fully-fledged crypto wallet but an income-generating platform created on the compound protocol that individuals used to borrow and lend crypto.

In the months that followed, the protocol was subjected to numerous upgrades that saw it grow into a mobile crypto wallet that integrates such additional features as a Dapp browser. Similarly, this period saw the wallet onboard more DeFi programs, increase the number of supported tokens, and integrate advanced security measures.

This Dharma smart wallet review will help you understand how this mobile crypto vault works by detailing its key operational and security features, the step-by-step guide on how to activate the wallet, and highlighting its pros and cons. We also compare it with other mobile crypto wallets before telling you if Dharma is the safest DeFi wallet.

Key features

Mobile wallet: Dharma smart wallet is mobile-based and available in Android and iOS versions. Both have a highly intuitive and beginner-friendly user interface.

Auto upgrades: Unlike most other crypto wallets that require you to download and install their software or firmware upgrades manually, Dharma smart wallet upgrades are automatic and instantaneous. This ensures that a bug or vulnerability is patched at the same time for all wallet users.

Integrates DeFi apps: Note that Dharma smart wallet started as a Compound (a DeFi app) protocol before its eventual upgrade into a smart wallet app. During the upgrade, Dharma labs increased the number of supported DeFi apps, which effectively increased the revenue-generating screams.

Earn interest: The integration of numerous DeFi apps within the wallet makes Dharma an income-generating wallet. You start earning fixed interest as soon as you deposit your fiat or cryptocurrencies into the Dharma wallet. And the longer you let your cash sit in there, the higher the earnings.

Inbuilt exchange: Dharma mobile wallet features an in-built crypto exchange – Uniswap – where users can exchange and trade 2000+tokens seamlessly.

Deposit FIAT: Dharma processes both crypto deposits and is one of the few wallets that accept debit card deposits. You can, however, only deposit a maximum of $1000 via a debit card. You nevertheless are free to set up an automated recurrent deposit scheme.

Integrated Dapp browser: In addition to the income-generating apps, Dharma wallet also integrates Dapp browsers. This comes in handy to wallet users as they can use it to search and explore the Ethereum blockchain.

Automated updates: Dharma allows you to automate wallet notifications. These include notifications for token price changes as well as blockchain news.

Security features

Password: When installing Dharma smart wallet app and creating a user account, you will be required to set a unique password. It deters unauthorized access to your mobile wallet vault and serves as its encryption tool.

Open source: Dharma smart wallet is built on an open-sourced technology. This makes Dharma highly transparent and auditable by both the wallet users and crypto security experts.

Non-custodial wallet: Dharma is a non-custodial wallet in that it doesn’t store your private keys in their servers. Instead, the encrypted private keys are stored within your device, giving you absolute control over your private keys.

Multisig: Dharma wallet has enabled multi-signature functionality that, in turn, gives it multi-user capabilities whereby a transaction has to be verified by several parties before it is executed.

How to set and activate the Dharma Smart wallet

Step 1: Start by downloading the Dharma Smart wallet from either Google play store or Apple App Store.

Step 2: Install the app and click on the ‘Create a new wallet’ tab.

Step 3: Create a unique password for the wallet

Step 4: The wallet will now present you with a 24-word backup and recovery seed. Write it down on a piece of paper and keep it safe offline.

Step 5: You will want to verify your identity if you hope to deposit fiat or buy crypto with a debit card

Step 6: Your Dharma smart wallet app is now active and ready for use

How to add/receive crypto into your Dharma Smart wallet 

Step 1: Log in to your Dharma smart wallet and click ‘Receive” in the user dashboard.

Step 2: On the deposit window, copy the wallet’s address or QR code and send it to the party sending you coins

Step 3: Wait for the coins to reflect in your wallet.

How to send crypto from your Dharma Smart wallet

Step 1: Log in to your Dharma smart wallet app and click ‘Send’ on the user dashboard.

Step 2: If you have multiple digital assets stored therein, select the coin or token you wish to send

Step 3: On the transfer window, enter the receiver’s wallet address or QR code and the number of coins/tokens you wish to send

Step 4: Confirm that the transaction details are okay and hit send.

How does Dharma Smart wallet work?

Dharma smart wallet is a DeFi focused crypto platform that allows you to earn interest on your crypto or FIAT deposits. You start by creating a user account on the Dharma smart wallet app and depositing either fiat or cryptocurrencies.

You can then choose to stake it all or a part of it in one of the income-generating DeFi protocols, such as Compound. In here, you will find numerous other DeFi apps that present you with numerous other ways of earning from your deposits, like lending your crypto to other Dharma wallet or compound protocol users.

Dharma smart wallet ease of use

Dharma Smart Wallet’s dashboard stands out because of its simplicity and ease of use. Creating a user account for Dharma smart wallet is easy and quite straightforward. The highly intuitive and relatively clean user interface makes in-app navigation easy for both experienced and beginner crypto traders.

The processes of depositing and sending cryptos or cash in and out of the wallet and moving crypto and accumulated interests in and out of the income-generating platforms are also easy and straightforward.

Dharma Smart wallet supported currencies and countries

According to Dharma labs, the Dharma Smart Wallet app can support Ethereum, Ethereum classic, and 2000+ eth-based tokens.

The mobile wallet app is also available to residents of 100+ crypto-friendly countries.

Dharma Smart wallet cost and fees

One of Dharma Smart Wallet’s most interesting features is the Zero-fee policy for in-app transactions. You will not be charged any fees to swap tokens, send or withdraw crypto in and out of the DeFi apps. You will only have to pay GAS fees when you send crypto tokens to another wallet or exchange.

Dharma Smart wallet customer support

You can contact Dharma Smart wallet’s customer support team via the Live Chat button on the website and mobile app. Alternatively, send them an email or engage them on such social media platforms as Twitter or Discord.

What are the pros and cons of using the Dharma Smart Wallet?

Pros:

  • It provides you with multiple income-generating opportunities
  • It supports both fiat and crypto deposits
  • Dharma smart wallet is quite beginner-friendly
  • Dharma is highly secure as it embraces some highly effective security features
  • It is open-sourced and beginner-friendly

Cons:

  • Dharma will only support Eth-based cryptos and tokens
  • It is not immune to the inherent limitation facing online-based crypto wallets

Verdict: Is Dharma Smart wallet safe?

The smart wallet app has embraced several security measures to make the mobile crypto app the safest DeFi focused platform. Key among them is the password that locks and encrypts wallet contents, a recovery seed for backup, smart contracts that secure all crypto transactions, and the multi-signature functionality. However, we must mention that the fact that Dharma Smart wallet is online-based exposes you to inherent threats facing the mobile crypto apps like hacking and malicious virus.

Categories
Crypto Daily Topic Cryptocurrencies

Peach wallet Review: Is Peach The Safest Wallet For The Lightning Network?

Lightning Peach Wallet is an enterprise-focused crypto vault that’s specially designed to help you process micro-payments done on the lightning network. It is developed and maintained by the BitFury Lightning Network team and aims to help your business become crypto-ready. To this end, the wallet has incorporated several key features, including a fee-free payment processing service for all transactions carried on the lightning network and the integration of eCommerce plugins. The Lightning Peach wallet website also claims that the branded wallet is highly customizable, allowing you to scale up and feature more products and services for your business.

According to BitFury, Lightning Peach wallet was created to help any business increase user engagement and satisfaction, reach out to new audiences, and incentivize in-store spending. And achieve all this in a safe and cost-effective manner.

But does it live to these expectations? Is it safe for your business and your private keys? We answer these questions and more in this Lightning Peach Wallet review by looking at its key operational and security features, outlining the step-by-step guide on using the wallet, its pros, cons, and everything in between.

Key features

Cross-platform: Lightning Peach Wallet is a cross-platform wallet available in both desktop and mobile app versions. It is also available in both the standard and extended modes, whose only difference is the number of supported features.

Address book: Lightning peach wallet features an address book that integrates your phone’s contact list or allows you to save the wallet addresses for parties you interact with regularly. It simplifies back and forth crypto engagements by speeding up the time it takes to initiate a transaction while minimizing errors.

Pay with card: The wallet also integrates several payment processing options, including debit and credit card. Therefore, you can buy crypto from the lighting wallet or withdraw funds to a card or bank.

Integrates third party exchanges: Peach wallet also integrates such third party exchanges as Coinbase, Binance, and Bittrex, where users can buy, sell, and exchange cryptocurrencies and tokens.

Fee-free processing: Lightning peach wallet will not charge you a transaction-processing fee for all payments transacted on the Lightning network.

Full-node client: Peach Wallet is a full node client that requires you to download the Lightning Network. The node is inbuilt when you download the desktop client, but you will need to personalize one if you decide to use the mobile app. A recent upgrade to the Peach wallet has, however, made it possible for users to link their desktop wallet with the mobile app using a QR code.

Security features

Password: Lighting Peach wallet, like most other crypto vaults, is password secured to prevent and minimize cases of unauthorized access to your digital assets.

Recovery seed: Lightning Peach wallet will also provide you with a backup phrase that comes in handy when you need to recover lost private keys.

Open sourced: BitFury has also open-sourced the Lightning Peach Wallet design and availed it for viewing and auditing by both users and the entire crypto community. You can download this source code from the BitFury Peach website or GitHub.

Non-custodial: Peach Wallet is non-custodial and will, therefore, not store your private keys in the BitFury servers. Rather, it encrypts them and stores them within your mobile phone or computer.

Enterprise-grade encryption: BitFury has embraced end-to-end enterprise-grade encryption for all Peach Wallet communications. The wallet developer argues that not even their company servers can view the wallet’s communication with other wallets or third party software/systems.

Opt-in Improvements: One of Lightning Peach Wallet’s most controversial features is the opt-in service for data collection. The wallet developer claim that they will, by default, not collect any information from your wallet but adds that users can opt-in and allow BitFury to collect non-sensitive information anonymously to help improve wallet functions and user engagement. The crypto-security community has, however, expressed concerns with the fact that BitFury doesn’t explicitly state the type of data it collects for opt-in users or how the data is held and used.

How to set and activate the Peach wallet

Step 1: Start by downloading Lightning Peach Wallet on the BitFuryPeach.com website or GitHub

Step 2: Install the wallet and upon launching, click on the ‘Create a new wallet’ tab

Step 3: Read and agree to the wallet terms & conditions and privacy policy statements

Step 4: On the next window, click on the ‘Sign up’ tab

Step 5: Choose a unique username and create a password for the wallet

Step 6:  The wallet will now present you with a set of words that form the backup and recovery seed. Write them down, or choose to download them and save the copy offline.

Step 7: Verify that you have copied them right and click next

Step 8: Log in to your new wallet using the chosen username and password

Step 9: The wallet is now active and ready to use

How to add/ receive crypto into your Peach wallet

Step 1: Log in to the Peach wallet and click on the “receive” icon

Step 2: Copy the Wallet address or QR code displayed and forward to the person sending you Bitcoins

Step 3: Wait for the funds to reflect in your account

How to send Crypto from your Peach wallet

Step 1: Log in to the Peach wallet (extended) and click on the Lightning tab

Step 2: Choose the create payment option and specify if it is a one-time or recurrent payment

Step 3: Enter the transaction specifics like the name (optional), Recipient of the payment (enter their Lightning I.D, choose from the address book or their wallet address)

Step 4: Enter the amount of coins you want to send

Step 5: Confirm that the transaction details are correct and authorize the transfer

Peach wallet ease of use

Creating a Lightning Peach Wallet user account follows a fast and straightforward setup process. The wallet features a relatively clean user dashboard. The fact that it is also available in extended and standard modes for both mobile and desktop versions ensures that the lighting wallet caters for both experienced and beginner crypto traders/investors.  

Both the wallet and the BitFury website are also multi-lingual and available in several languages.

Peach wallet supported currencies

The lightning Peach wallet will only support Bitcoins. But you are free to send and receive such Bitcoin denominations as Bitcoin Satoshi.

Peach wallet cost and fees

Lightning network transactions are free. Regular Bitcoin network fees charged by miners will, however, apply when you send cryptos to other wallets or a crypto exchange.

Peach wallet customer support

There are three primary ways of contacting the Lightning Peach wallet support team. You can start by raising a support ticket on the BitFuryPeach.com website or engage them via the live chat features on both the website and wallet.

Alternatively, you can direct message this team directly on their official pages on such social media platforms as Instagram, Facebook, Twitter, or Telegram.

What are the pros and cons of using the Peach Wallet?

Pros:

  • Caters for both beginner and experienced Lightning Peach wallet users with their standard and Extended wallets
  • The wallet is feature-rich and hosts a wide range of operational features
  • The wallet is designed and maintained by BitFury, effectively minimizing your operational costs
  • The lightning Peach wallet features highly advanced security features
  • Sending Bitcoins within the Lightning network is free

Cons:

  • It will only support Bitcoin cryptocurrencies
  • Installing and running a full node business wallet eats up a lot of storage space

Verdict: Is Peach wallet safe?

Well, Lightning Peach Wallet has embraced several highly effective and advanced security measures. The developers are especially committed to transparency, as evidenced by the fact that they built the wallet on an open-sourced architecture. Other advanced security features integrated within the platform include enterprise-grade encryption, it is non-custodial, and the wallet’s anonymous data collection is optional. However, it would be great if BitFury were more forthcoming on how they collect and use this data. 

Categories
Cryptocurrencies

Gnosis Safe Smart Wallet Review: Is Gnosis The Most Secure Smart Contract Wallet?

Gnosis safe is a cryptocurrency wallet specially designed for the Ethereum network to host eth-based cryptos and tokens. The wallet was developed by GNOSIS – an internet technology company in Gibraltar – and is among the first smart contract-based mobile apps. It is available as both a desktop/mobile app as well as a browser extension. This, according to its developers, doesn’t just ensure that the wallet is safer but also gives it the capability to handle a wider range of functions not offered by the traditional blockchain wallets.

The Gnosis safe website refers to the wallet app as “The most trusted platform to manage digital assets on Ethereum for companies/investors/developers/hodlers and DAOs.” It also refers to it as a “Safe Multisig mobile” wallet that helps users monitor their crypto portfolio on the go. It is further described as a transparency and security-focused eth-wallet that seeks to provide wallet users with a balance between safety and ease of use. In this Gnosis Safe smart wallet review, we look at everything you need to know about the eth-based crypto vault while helping you determine if it indeed is the most secure smart contract wallet.

Gnosis safe key features:

Cross-platform: Gnosis Safe is a cross-platform wallet. It is available as a mobile app (for both Android and iOS), desktop app (for both Windows, macOS, and Linux), and an in-browser extension. 

Multi-user: Gnosis Safe smart wallet is also a multi-user wallet that provides multiple safes within the wallet. They have separate login credentials and work best for family members, acquaintances, or companies that want to maintain all their crypto assets in one vault.

DeFi focused: Gnosis also integrates some of the most popular decentralized finance apps and protocols maintained on the Ethereum Network.

Address book: Gnosis wallet also features an address book that allows you to either integrate the wallet with your phone’s contact list or save the contact information such as the wallet addresses of individuals you engage regularly.

Integrate Dapps: The fact that Gnosis Safe Smart wallet is built on the Ethereum ecosystem makes it possible to explore the blockchain and interact with different Dapps maintained here.

Gnosis safe security features:

Password: Like most other wallets, Gnosis Safe Smart wallet is password-secured, and you get to set this unique key when creating a user account.

Two-factor authentication: You can always use the Gnosis Safe Authenticator or the Status Keycard to activate the wallet’s 2-factor authentication feature for all outbound transfers.

Recovery seed: During the wallet activation and account creation process, you will be presented with a backup/recovery seed for the wallet. Write it down and keep it safe offline.

Open source: Gnosis Safe Smart wallet is fully open-sourced and users, as well as crypto security experts, are free to view and audit source code for vulnerabilities. Gnosis Labs has also continuously run a bug bounty program for the wallet, and no critical bug or vulnerability has ever been discovered.

Multi-signature: Gnosis Safe Smart wallet is a multi-signature crypto vault. You can activate this feature for the entire wallet if you only run one safe or any number of safes hosted by the wallet.

How to activate/setup the Gnosis Safe Smart Wallet?

Step 1: Start by downloading the Gnosis Safe Smart wallet from either the website or the app store

Step 2: Install and launch the app. Click on the “Create a new wallet” icon

Step 3: Read through and agree to the Gnosis privacy policy and terms of use

Step 4: Create a unique password for the Gnosis Safe wallet

Step 5: Proceed to create the first safe for the wallet. This requires you to deposit Eth or any of the supported tokens, and you will be charged a small fee (about 0.005 ETH) as the cost of deploying the wallet

Step 6: Confirm that you are ready to create a wallet on the pop-up window

Step 7: You will be required to download the web extension that serves as your wallet’s two-factor authenticator. It is also referred to as a Safe Authenticator.

Step 8: Install the browser extension app and upon launching, create a user password. This has to be different from the mobile app password.

Step 9: In the next window, click on the ‘Show QR Code’ icon and scan the QR code with your phone to connect the Safe Authenticator with Gnosis Safe Smart wallet

Step 10: Write down the recovery phrase provided and store it in a safe offline environment. Verify that you have copied it correctly.

Step 11: Pay the wallet deployment fees

Step 12: You will receive a notification via the in-browser app, informing you that the safe wallet has been successfully created and deployed.

Step 13: Your Gnosis Safe Smart wallet is now active and ready to use

How to add/ receive Crypto into Gnosis safe smart wallet:

Step 1: Log in to your Gnosis safe mobile app wallet and click on the ‘Receive” icon

Step 2:  If you have multiple safes created, select the safe into which you want to receive the crypto

Step 3:  Copy the wallet address or the QR code for the safe and forward it to parties ending you crypto

Step 4: Wait for the funds to reflect in your wallet

How to send crypto from Gnosis safe wallet:

Step 1: Log in to your Gnosis safe Mobile wallet app and click on the “Send” icon

Step 2: Select the safe from which you want to send crypto

Step 3: Select the digital asset you want to send

Step 4: Enter the recipient’s address and the number of coins you wish to send in the transfer window

Step 5: Check that the details of the transaction are correct and click the send button

Step 6: Log in to the Safe Authenticator (in-app browser) to review and authorize the transaction. Click the ‘Submit’ button if satisfied with the accuracy of the transaction details

Step 7: Return to the Gnosis safe smart mobile wallet to initiate the transfer.

Gnosis Safe smart wallet ease of use:

Though one may consider the setup and activation process for the Gnosis Safe Smart wallet app to be too lengthy, it is still quite straightforward. The setup guide is easy to follow, and you do not even need expert help to set up the mobile wallet or link it with the Safe authenticator. The Gnosis Safe wallet website features a wide range of guides that explain how to activate and interact with the Ethereum wallet.

Gnosis Safe smart wallet supported currencies:

Gnosis Safe is an Eth-focused wallet. It will, therefore, only feature Ethereum, Ethereum Classic, ERC-20 tokens, and such collectibles as the ERC-721 tokens.

Gnosis Safe smart wallet cost and fees:

Gnosis Safe wallet is free to download and install. However, you will be required to pay a small wallet deployment fee of ETH 0.005 when creating a wallet. Other fees include the transaction fees charged by the Ethereum network when you send cryptos/tokens to other wallets or exchanges.

What are the pros and cons of using Gnosis Safe smart wallet?

Pros:

  • It embraces highly advanced security features
  • It makes it possible for you to invest and earn digital assets
  • Gnosis wallet has a highly responsive customer support team
  • The wallet provides you with a demo version that you can use to test the vault

Cons:

  • It will only support Eth based cryptos and tokens
  • The wallet is exposed to inherent threats facing hot wallets
  • It imposes a ‘wallet deployment’ fee

Verdict: Is Gnosis Safe Wallet secure?

Well, Gnosis Safe Smart wallet embraces several highly effective security measures that its developers believe will play a key role in boosting the wallet’s safety and privacy. The wallet is password secured, outbound transfers from the Gnosis Safe smart wallet must be subjected to two-factor authentication, it is a multi-signature vault, and has also been formally verified by the Ethereum network. Our only concern with the Gnosis Safe Smart wallet is that both the Gnosis safe mobile app and Gnosis Safe Authenticator are online-based and, therefore, exposed to the inherent threats facing hot wallets. 

Categories
Cryptocurrencies

USDX Wallet review 2020: How Safe is The USDX Wallet?

USDX wallet is a multi-coin storage vault and the official wallet for the USDX stable coin and the Lighthouse (LHT) Coin. It was developed by the Lighthouse Blockchain Technology GmbH company and introduced to the crypto world in 2017. According to the wallet developers, USDX is specially designed and dedicated to providing users with a platform that they could use to secure and process crypto payments at “lightning-fast” speeds while maintaining zero fees. They add that the innovativeness level that went into designing and coming up with the USDX wallet is aimed at transpassing the current restrictions (banks, borders, and fees) set by both traditional and digital payments platforms.

But how does the USDX wallet hope to solve this? How does it work? We answer these questions and tell you everything else you need to know about the USDX wallet in this user review. We will especially look at its key features, the security features in place, and outline the step-by-step guide on how to interact with the wallet.

USDX Wallet key features:

Mobile wallet: USDX wallet is purely a mobile app available for the Android and iOS operating systems.

Fee-free transactions: One of the USDX wallet’s biggest selling points is the fee-free transaction processing approach. The wallet doesn’t impose the transaction fee when you send USDX Stablecoins or LHT tokens from your USDX wallet to other wallets or exchanges.

Lightning-fast transaction processing: The ultrafast transaction processing and confirmation for both transfers to other wallets and cash withdrawals are another selling point for the wallet. According to the USDX wallet website, their servers can process 100,000+ transactions per second. This is more than the combined transaction processing speeds for Visa and MasterCard.

In-built exchange: USDX wallet integrates Alterdice Exchange that provides you with a platform for selling, buying, and exchanging cryptos and tokens without leaving USDX. The transaction processing speeds are fast and maintain highly competitive fees.

Portfolio tracker: On the USDX wallet’s user interface are the transaction history and balance buttons that you can use to view your recent crypto inflows and outflows as well as the value of your digital assets in real-time.

Charting tools: The third party wallet integrated into the USDX wallet – Alterdice Exchange – features market analysis and charting tools. These come in handy in tracking the value of different crypto coins and determining the best buy and sell points.

Address book: USDX wallet’s versatility makes it possible for users to send altcoins to phone numbers, QR codes, and wallet addresses. And by integrating your phone’s contact list in the featured address book simplifies the process of sending funds to a phone number while avoiding such threats as pastejacking.

USDX Wallet security features:

Password + Biometrics: The USDX wallet is secured with a PIN code that you create during app installation and user account creation. You are also free to boost this app security feature further by adding such biometrics as the Face or Fingerprint I.D on compatible devices.

Two-factor authentication: All outbound transfers to other wallets or exchanges must be subjected to two-factor authentication. You will need a phone number, email address, the Google Authenticator app to receive the transaction authorization codes.

Hierarchically deterministic: USDX wallet uses the hierarchically deterministic functionality to auto-generates a new wallet address every time you initiate a crypto transaction, effectively masking your real wallet address.

Enterprise-grade encryption: Your USDX wallet embraces enterprise-grade technologies in encrypting your user data. All of the wallet communications with the Lighthouse Company servers and all other third systems, especially the third party exchange and wallets, are also highly encrypted.

How to activate/setup the USDX Wallet

Step 1: Download the USDX wallet compatible with your device on either Google Play Store or Apple App Store

Step 2: Install and launch the wallet. Since you are new to USDX, choose to create a new wallet.

Step 3: Choose a unique name for your USDX wallet

Step 4: Create a strong and unique multicharacter password (with a minimum of 10 characters) for the wallet.

Step 5: Create and confirm a 4-digit PIN code for securing the app

Step 6:  Enter and verify your phone number using the confirmation code received

Step 7: Your account is now active and ready to use

Step 8: Log in to your new wallet and use the settings tab to personalize it by activating two-factor authentication and backing up your private keys

How to add/ receive Crypto into USDX Wallet:

Step 1: Log in to your USDX wallet and hit “Receive” on the user dashboard

Step 2: The wallet will display the wallet address and its QR code. Copy either and forward it to the person sending you crypto

Step 3: Alternatively, hit the “Buy” button to buy from Alterdice exchange

Step 4: Follow the prompts to make your purchase.

How to send crypto from USDX Wallet:

Step 1: Log in to your USDX wallet and hit the “Send” icon on the user dashboard.

Step 2: If you have multiple coins hosted therein, select the cryptocurrency you want to send

Step 3: On the transfer window that pops up, enter the receiving wallet address or choose to scan their QR code

Step 4: Enter the amounts you wish to send

Step 5: Check the accuracy of these transaction details and confirm the transfer

USDX Wallet ease of use:

USDX wallet incorporates several highly effective functional features that make it highly intuitive and beginner-friendly. It, for instance, integrates an inbuilt exchange that eases the process of buying and exchanging cryptos. But more importantly, it maintains a clean and easily navigable user interface.

It will also take you less than two minutes to activate the wallet and create a user account. Similarly, the processes of sending and receiving cryptocurrencies in and out of the wallet are easy and straightforward.

USDX Wallet supported currencies:

USDX Wallet currently supports two cryptocurrencies; the USDX stable coin and the LHT coin. However, you can exchange either of these with virtually any other crypto or token, as well as a few fiat currencies on the integrated Alterdice exchange.

USDX Wallet cost and fees:

Downloading and depositing funds into the wallet is free. Crypto transfers involving the USDX stable coin are also free.

USDX Wallet customer support:

Lighthouse Blockchain Technology maintains a responsive customer support team for the USDX wallet. You can start by consulting the elaborate FAQ page for troubleshooting tips and guides on how to interact with the different wallet features.

However, personalized queries should be directed to the automated Telegram assistant bots or the wallet developers on the wallet’s official social media pages.

What are the pros and cons of using USDX Wallet?

Pros:

  • Sending USDX coins from the wallet is free.
  • Translation processing on USDX Wallet is lightning fast.
  • It embraces highly effective security measures like 2FA.
  • Creating an account and activating the user account is easy and straightforward.

Cons:

  • It supports a too limited number of coins.
  • USDX doesn’t support anonymous user registration.
  • Only USDX coins are exempt from transaction processing fees.

Comparing USDX Wallet with other crypto wallets

USDX Wallet vs. eToro wallet

USDX and eToro wallets are both highly advanced cryptocurrency wallets. Some of the common features between the two include the integration of a crypto exchange and some highly advanced security features like two-factor authentication and enterprise-grade encryption. More importantly, they both maintain highly responsive customer support teams.

But they also differ significantly on how they operate and their mission. For instance, while eToro’s crypto wallet is ideally meant to help the online broker’s investment vehicles, USDX seeks to be the world’s leading payment processor.

Verdict: Is USDX Wallet safe and easy to use?

Well, activating the USDX wallet and creating a user account takes no more than a few minutes. The wallet then embraces a clean, easily navigable, and beginner-friendly user interface. But irrespective of embracing some highly effective safety and privacy measures like making two-factor authentication default and enterprise-grade encryption, USDX wallets are yet to overcome some security challenges. It is a hot wallet, which exposes it to the inherent threats facing online mobile apps and web wallets.


Categories
Cryptocurrencies

NAGA Wallet Review 2020: Features, Security, Customer Support, Pros and Cons

Naga Wallet is described as the ultimate simple and secure storage for your fiat and cryptocurrency assets on the Naga.com website. It is a hybrid custodial vault for digital assets that integrates a wide range of highly advanced and innovative features. For instance, it is one of the few digital wallets that allows users to send crypto via email and provides users with a social investing platform for crypto, stock, forex, and commodity traders. Naga wallet also provides users with real-time access to the markets and equips you with the necessary investing and portfolio monitoring tools.

NAGA wallet started as an online forex and commodity trading platform, created and launched by NAGA Markets LTD in 2015. For the past few years, the online broker has reported explosive growth that saw it incorporate such new features as social investing tools and a crypto wallet to the platform.

But how safe is this multi-asset investing and storage platform? How do you activate and use NAGA wallet, what are its pros and cons, and how much does it cost? We answer all these and tell you everything else you need to know about NAGA Wallet in this review.

NAGA Wallet key features:

Cross-platform: Naga Wallet is a cross-platform storage vault currently available as a web wallet and a mobile app. It is also available on the MT4 and MT5 desktop and web terminals.

Multi-currency wallet: Naga is a hybrid and multi-asset wallet that stores both Fiat and cryptocurrencies. These are mainly major international fiat currency, popular cryptos, and tokens.

Send crypto via email: You don’t have to memorize an acquaintance’s wallet address when you can send cryptocurrencies and tokens via the email address used to create a Naga investor account.

Buy crypto with card: Naga wallet integrates a payment gateway that allows the residents of over 100 countries to purchase cryptos instantly with a credit/debit card. The payment gateway also facilitates the purchasing of crypto via bank transfers and e-Wallets as Neteller and Skrill.

Instant crypto transactions: The custodial nature of the Naga Wallet ensures that cryptocurrency transfers from one Naga account to another are free and instantaneous.

Social investing: Social investing is an interactive trading tool that allows you to engage other Naga Wallet users. It makes it possible for pro crypto traders to share insights with the rest of the community. You can even copy the trades or portfolios of these traders and replicate their success in your account.

Free curated investment portfolios: In addition to copying highly successful trades and portfolios of the pro traders, Naga wallet also presents you with expertly curated crypto portfolios that you can invest in while incurring zero administration fees.

Inbuilt exchange: Naga wallet also features a built-in exchange where you can buy, sell, and exchange cryptocurrencies and tokens with other platform users.

Integrates NAGA Card: Naga Markets LTD recently launched the contactless NAGA prepaid card. They have since integrated it with the Naga wallet, allowing you to load it with cryptocurrencies before using it to pay for goods and services at thousands of crypto-friendly stores across the world.

NAGA Wallet security features:

Password: Naga Wallet is secured with a strong multi-character password that not only seeks to deter unauthorized access to the wallet but also encrypts user data.

Identity verification: Naga Wallet requires that all users verify their identity and pass the KYC and AML verification protocols before they start using the platform.

Two-factor authentication: The wallet allows you to tweak its settings and create a two-step login guide that requires a user password and an authentication code received via SMS or Google Authenticator.

Decentralized data storage: Unlike most other custodial crypto wallets that store your cryptocurrencies in centralized company servers, Naga Wallet embraces the decentralized data storage system. This means that it stores its client funds and private keys in highly decentralized servers.

Backup 2-step key: Naga wallet makes it possible for you to create a backup for your wallet’s login verification code. It comes in handy if you ever change or lose your phone or can’t access the google authenticator.

Highly regulated: Naga wallet is the product of a highly regulated online trading/investment company, NAGA Markets LTD, which is registered in Cyprus and St. Vincente and Grenadines. The company is also authorized and regulated by the Cyprus Securities and Exchange Commission (CSEC).

How to activate/setup the NAGA Wallet

Step 1: Open the Naga wallet website and click on the “Sign up” icon on the top left corner of the web page

Step 2: Complete the user profile by keying in your personal details (name, email, country of residence, and phone number) on the account registration page.

Step 3: Answer the query about your trading experience and start the platform tour.

Step 4: Complete the detailed investor profile that asks for more detailed personal information and personal finance information like income and tax details in U.S residents.

Step 5: Verify your identity and country of residence by uploading a Driver’s license

Step 6: Allow them time to verify your identity and activate the account while you practice trading and familiarize yourself with the web wallet using the free Demo account

Step 7: You will receive a confirmation email notifying you that your account is now active and ready for use

Step 8: You will have 14 days to make your first deposit

How to add/ receive Crypto into NAGA Wallet:

Step 1: Log in to your Naga wallet and click on the “Add Funds” tab on the user dashboard’s top left corner.

Step 2: Choose your preferred deposit method from the list provided. You could choose to deposit funds using a credit/debit card, wire transfer, or transferring cryptocurrencies.

Step 3: If you choose crypto, select the coin that you would like to add to your New Naga wallet and hit the “Receive” button

Step 4: Copy the wallet address or QR code and forward it to the person sending you crypto and wait for the funds to reflect.

How to send crypto from NAGA Wallet:

Step 1: Log in to your NAGA wallet and click on the ”Send To” icon.

Step 2: Select the destination of the funds. It could be an exchange or another wallet via wallet address or email.

Step 3: If you choose the send by email option, enter the receiving email address and the amount you want to send

Step 4: Select the mode of payment for the network fee and the message accompanying the transfer (optional)

Step 5: Confirm that these transfer details are correct and hit send.

NAGA Wallet ease of use:

Naga wallet embraces a simplistic design that is characterized by a clean and decongested user interface. When you create a user account, you will be given a free demo trading account that you can use to practice crypto investing and to familiarize yourself with the wallet’s most popular features.

NAGA Wallet supported currencies:

Currently, Naga wallet supports 15 popular cryptocurrencies and all ERC-20 tokens and is available in over 200 countries.

NAGA Wallet cost and fees:

Naga wallet is free to download. You also won’t be charged for opening an account here, depositing, and storing your cryptocurrencies therein. You will only be charged network fees when you send crypto from your wallet to another wallet or exchange. Plus, you stand to benefit from a 10% reduction in transaction fees when you choose to pay for the transfer using NAGA coins.

NAGA Wallet customer support:

Naga wallet maintains a highly responsive customer support team that is available online 24/7. You can contact them via email or the live chat tool on the company website, web app, and the wallet app.

What are the pros and cons of using the NAGA Wallet?

Pros:

  • It is highly innovative and allows traders to send crypto to email addresses.
  • It a multi-asset wallet that hosts numerous forex pairs, popular cryptocurrencies, and ERC 20 tokens.
  • The wallet embraces highly effective safety features, including decentralizing data storage.
  • Naga Markets LTD is authorized and regulated.
  • You get to interact with such revolutionary trading tools as social investing.

Cons:

  • It doesn’t support anonymous crypto trading.
  • It supports a limited number of cryptocurrencies.

Comparing NAGA Wallet with other Multi-Asset wallets

NAGA Wallet vs. eToro wallet

Naga and eToro multi-asset wallets were both started by online brokerage service providers. Other similarities include the fact they both support a limited number of cryptocurrencies, encourage social investing, store the private keys on behalf of their clients, and allow wallet users to purchase crypto with a card, bank wire, or eWallets. Both are also maintained by highly regulated online trading platforms.

Naga, however, goes a step further when they introduce and integrate the NAGA contactless card into the wallet. It also facilitates free crypto transfers within the network while discounting outbound transfers paid by Naga Coin. Plus, unlike eToro, it provides users with a backup for the 2FA key/code.

Verdict: Is NAGA Wallet safe?

Well, Naga Markets LTD has put in place several highly effective security and privacy measures around the Naga Wallet. And it all starts with the online brokerage-cum-crypto wallet demanding that all prospective wallet users verify their identity and complete the KYC and AML protocols. It then extends to storing private keys in decentralized data centers on behalf of their clients and activating two-factor verification for wallet logins. The only downside to using Naga Wallet is that it deprives you of control over your private keys.

Categories
Cryptocurrencies

Muun Wallet Review:  How Safe Is Muun Bitcoin And Lightning Wallet?

Muun is a bitcoin and Lightning wallet that strives to presents its users with a balance between usability and security. It integrates highly intuitive usability features with advanced security features to achieve this. The wallet was developed and maintained by a team of 15 highly experienced blockchain technology and crypto security experts based in Buenos Aires, Argentina. Some of their strengths include maintaining the most responsive customer support team and their commitment to transparency.

According to the wallet’s development team, the Muun project started in 2013 as a ”commitment to building the most secure and easy-to-use mobile wallet” in the world. Seven years on, and though Muun is still a work in progress, the team has made significant strides towards accomplishing this goal.

In this review, we will be vetting this progress by looking at the quality of the integrated features and determining if Muun is indeed the safest and easiest to use Bitcoin and lightning wallet.

Munn Wallet key features:

Mobile wallet: Muun wallet launched as a crypto app for both android and iOS devices. And even though the same team developed both iOS and Android Muun wallets, we couldn’t help but notice a difference in the number of integrated features.

Transaction tracking: Muun wallet’s user dashboard features the transactions history tab that outlines all your recent crypto inflows and outflows. This, plus the balance tab, play a crucial role in helping you track your expenditure and portfolio.

Address book: Muun wallet also features an address book that integrates your phone’s contact list, effectively making it possible for you to send Bitcoins to another mobile number while avoiding pastejacking. The feature is, however, native to the android app.

Off-chain payments: The wallet is compatible with the lightning network and makes it possible for users to make instant payments and pay off-chain invoices with zero-channel configuration by leveraging submarine swaps. The wallet is, however, yet to allow users to create lightning invoices.

Segwit enabled: Muun integrates the Segwit bitcoin wallet technology that makes it possible for users to send Bitcoins to Bench32 addresses and saves them on the transaction costs.

Munn Wallet security features:

Password + Biometrics: Munn wallet requires that you set a highly unique password for your wallet when creating a user account. Plus, you can always boost the wallet’s safety by integrating Face and Fingerprint I.Ds on compatible devices.

Two-factor authentication: One of the personal details Muun wallets asks for when creating a user account is the email address. You can use it to activate two-factor authentication or simply integrate the Google authenticator app.

Backup and recovery: Unlike most other Bitcoin or lightning apps that provide you with a recovery seed for the wallet, Muun backs up the wallet to your email with a special recovery password. You will need these two to restore lost private keys or login to your Muun wallet on a different phone.

Multi-signature: Muun wallet is a multi-signature Bitcoin and lightning wallet that requires two signatories for transaction confirmation. One is created by your phone while the other is provided by Muun. Both are highly encrypted and stored within your device to ensure that you never get locked out of your wallet, even if the Muun servers were compromised.

Open sourced: Muun Bitcoin wallet is designed using a fully open-sourced technology. Anyone can view and audit their source code by clicking on the “Audit Us” icon on the top right corner of the Muun wallet website that directs you to Muun’s repository on GitHub.

Non-custodial: Muun Bitcoin and Lightning wallet won’t store private keys on your behalf. Rather, all the wallet data, especially the private keys and passwords, are highly encrypted and stored on your phone.

Hierarchically deterministic: Every time you initiate a crypto transaction, Muun Wallet will open a new hierarchically deterministic wallet address. This masks your real wallet address and makes it possible for crypto trackers to monitor your crypto activity.

Secure enclave: When using a Muun wallet, your private keys will always be stored in a secure enclave. You will need to enter the wallet password or use the Fingerprint to view this key.

How to activate/setup the Munn Wallet

Step 1: Start by downloading the Muun Wallet app on Google Play Store or Apple App Store.

Step 2: Install and launch the app. Muun wallet will now ask to create and confirm the PIN code for the wallet.

Step 3: A new window will pop up, displaying a congratulatory message informing you that your Muun wallet has been successfully created.

Step 4: You will now want to backup your wallet. Provide the Muun Wallet app with a valid email address and follow the link sent to the mail to verify it.

Step 5: Proceed to create a strong and unique backup password.

Step 6: On the next page, read and agree to Muun wallet’s terms of use and the privacy policy

Step 7: Your wallet is now active and ready to use

How to add/receive Crypto into Muun Wallet:

Step 1: Log in to your Muun wallet and click the “Receive” tab on the user dashboard.

Step 2: Decide if you want to load funds to the Bench32 Native Segwit or legacy wallet.

Step 3: Copy the wallets address or its QR code and send either to the party sending you Bitcoins

Step 4: Wait for the funds to reflect in your Muun wallet.

How to send crypto from Munn Wallet:

Step 1: Log in to the Muun wallet and on the user dashboard, click the “Send” icon

Step 2: Decide if you want to pay a lightning wallet through the Segwit wallet or transfer funds from the legacy wallet.

Step 3: On the transfer window, enter the recipient’s wallet address, the amount you want to transfer, and select the transaction fee

Step 4: Alternatively, use the drop-down menu on the “send to” section to choose the recipient’s phone number from your phone’s contact list

Step 5: Check the transaction details and confirm that they are correct before hitting send

Munn Wallet ease of use:

Muun wallet has one of the straightforward app activation and account creation process. You also don’t need an expert to teach you how to interact with some of the wallet’s key features. We especially appreciate the integration of an address book and ability to send Bitcoins to a phone number. Similarly, we like the fact that one can pay Lightning wallet invoices using onchainBTC through the Submarine swap transaction technology.

Munn Wallet supported currencies:

Muun is a Bitcoin-only wallet. You are, however, able to send and receive different Bitcoin denominations, including Millbitcoins, Microbitcoins, and Satoshis.

Munn Wallet cost and fees:

Muun wallet is free to download and install. You will nevertheless pay the highly variable transaction fee every time you send cryptos out. The fee is also dynamic and allows you to decide how much you want to pay for a transaction depending on urgency. In such a case, priority transactions attract higher pay and have faster confirmation speeds than regular transactions.

Muun Wallet customer support:

Muun wallet has one of the most responsive customer support team. Write them an email or direct message them on Twitter or better still, address your concerns on the comment section of their wallet’s page on google play store.

What are the pros and cons of using the Muun Wallet?

Pros:

  • Customer queries are addressed fast and satisfactorily.
  • It hosts both Segwit and legacy wallet addresses with automated payment conversion.
  • Transaction processing fees on Muun wallets are incredibly low and dynamic.
  • It embraces highly effective security features like biometric support and multi-signature functionality.

Cons:

  • It is a hot wallet and, therefore, exposed to the inherent threats facing hot wallets.
  • It will only support Bitcoin cryptocurrencies.

Comparing Munn Wallet with other Bitcoin-only wallets

Munn Wallet vs. Mycelium wallet

Muun and Mycelium are both Bitcoin-only wallets. Other similarities between the cryptocurrency wallet apps include the fact that they both have host Legacy and Sewit addresses. They are highly transparent as they have open-sourced their code. And they are non-custodial.

However, they differ significantly when it comes to wallet backup and recovery strategy whereby, Muun Wallet uses an email address and password while Mycelium provides users with a recovery seed. Muun Wallet, nevertheless, carries the day when it comes to responsiveness to customer queries and transparency on the features supported by the different phone operating systems.

Verdict: Is Munn Wallet safe and easy to use?

Yes, Muun wallet has a very intuitive and beginner-friendly user interface. Most app users have reported having an easy time interacting with the wallet’s key features, especially when sending funds to the native bench32 Segwit address. However, while the wallet developers have integrated some highly advanced security features around, two flaws about the wallet stand out; its insistence on backing up the Muun wallet with an email and password and the fact that it is online based and, therefore, exposed to such online threats as phishing and malware.

Categories
Cryptocurrencies

03 Wallet Review: Is It The Safest Neo Blockchain Wallet Yet?

203 crypto wallet launched in 2015 as a mobile crypto app before its developers – 03 Labs – introduced the desktop version in 2018. It is built for the Ontology Network – a Neo Blockchain fork – that was previously grouped alongside NEP-5 crypto projects. It is specially designed to provide Neo platform users with a safe and easy to use platform where they can store, exchange, and monitor their crypto portfolio.

The 03 network website describes the 03 crypto wallet app as a “gateway to the smart economy” where you can “manage, exchange, stake, and buy” different cryptocurrencies. But how convenient is the 03 Wallet? How safe is the 03 mobile wallet app? This wallet review seeks to explore and detail all the 03 Wallet features to help determine the wallet’s safety and security level.

Key features:

Cross-platform wallet: 03 is a cross-platform wallet implying that it is available as both a mobile wallet for Android and iOS smartphones and a desktop app compatible with Windows, macOS, and Linux. You can download the updated versions of either on the 03 network website or GitHub.

Voting and staking: By maintaining a significant number of Gas and NEO coins in your 03 Wallet, you can vote for the network delegates. Similarly, you can stake your coins held in the 03 Wallet and get to earn interest in the form of GAS tokens.

Multiple payments methods: 03 Wallet is also one of the few NEO and ONT network-linked wallets that allow for crypto purchases using credit cards. It is also one of the few wallets that allow you to buy Neo-affiliated tokens using such other cryptocurrencies as Bitcoin, Ethereum, and Litecoin.

Integrates a crypto marketplace: Though 03 Wallet does not have an inbuilt exchange, it integrates the Switcheo marketplace that allows for the exchange of cryptocoins and tokens at reasonable fees. The marketplace is highly intuitive and easy to use but requires you to transfer funds between the exchange and your wallet.

NEO newsfeed: The crypto wallet also integrates an updated NEO-blockchain news site. Here, you get the latest news and developments taking place within the Neo blockchain and ONT networks.

Portfolio monitoring: 03 further lets you partition your wallet and create hot and cold storage. This, plus the fact that you are able to monitor both wallet performances, plays a key role in helping you make sound financial decisions. It is also a security measure ensuring that even if a hacker were to gain access to your device, they cant breach your cold storage.

Security features:

Uses device password: Like most other app-based crypto vaults, 03 Wallet is secured with a password. But, unlike most other wallets, you don’t have to create a separate password for the wallet as it uses your device’s password.

Open source: 03 Wallet is created using open-source technology, which gives anybody a chance to view and audit its code. You can download this code on either the 03 network website or GitHub.

Hierarchically deterministic: The 03 Wallet app is also hierarchically deterministic and will auto-generate a new wallet address for every new transaction. This goes a long way in masking your real public address and throwing off would-be third-party crypto trackers.

Non-custodial: The 03 crypto wallet doesn’t store your private keys in the ONT or Neo network servers. Rather, it saves them within your device.

Guaranteed user anonymity: 03 Wallet guarantees the anonymity of their wallet users in the sense that it doesn’t ask for any of your personal information when creating a user account and neither does it collect and store any information that’s personally identifiable to you. Your crypto transactions are, therefore, wholly anonymous.

Military-grade encryption: All the data collected by the wallet, including your wallet address, private keys, and passwords, is also subjected to military-grade encryption. So are all wallet communications with third party systems like payment processors and exchanges.

How to set and activate the 03 Wallet

Step 1: Search for 03 Wallet on Google play store of Apple app store and download

Step 2: Install the wallet and, once complete, launch the app and select “Create a New Wallet.”

Step 3: Create a password for your wallet. This not only helps secure your app vault but also plays a key role in randomizing your private key.

Step 4: Click on the settings tab and proceed to backup your crypto wallet.

Step 5: Your 03 Wallet is now active and ready for use.

How to add/receive crypto into your 03 Wallet

Step 1: Log in to your 03 crypto wallet, and on the user dashboard, click on the “Receive” tab.

Step 2: The wallet will display both the public address and the QR code that you can copy and send to the individual sending you coins.

Step 3: Alternatively, use the “Buy” option and buy crypto from the integrated exchanges.

Step 4: Wait for your crypto to reflect on your wallet.

How to send crypto from your 03 Wallet

Step 1: Log in to your 03 crypto wallet app and on the user dashboard, click “send.”

Step 2: If you have multiple crypto coins held in here in different wallets, select the crypto you want to send

Step 3: On the transfer window, key in the recipient’s wallet address and the number of coins you wish to send 

Step 4: Confirm the accuracy of these details and hit send

03 Wallet ease of use

03 Wallet is very user friendly and easily navigable with all the important tabs carefully placed on the user dashboard. The wallet is designed to appeal to novice and experienced traders alike. The onboarding process is quick and straightforward, and so are the processes of sending and receiving crypto. 03 is also a light wallet that doesn’t eat into your phone’s storage or battery power while guaranteeing the fastest transaction processing speeds.

03 Wallet supported currencies

03 is a multi-currency asset, implying that it supports a wide variety of cryptocurrencies. Supported cryptos include Neo, Neo Gas, ONT, all NEP-5 tokens, and all ONT-G tokens.

03 Wallet cost and fees

Installing the 03 Wallet and storing your cryptocurrencies therein is free. You will, however, be charged a network fee for outbound transactions by the NEO and ONT networks.

Other charges that you might incur when using 03 Wallet include the exchange fees accrued when you buy or sell crypto. This fee is fixed at 15% of the total value, but you enjoy a 50% discount if you use the exchange’s native token – SWTH.

What are the pros and cons of using the 03 Wallet

Pros:                                                                                                           

  • The wallet app is highly intuitive and beginner-friendly
  • 03 Wallet is quite versatile as its available on mobile and desktop
  • 03 integrates a crypto exchange and supports crypto purchases using a credit card
  • Wallet users also have access to a readily available customer support team via Telegram and twitter
  • The transaction processing fees are minimal and discounted – in the case of the Switcheo exchange

Cons:

  • When the wallet uses your device’s password, you risk losing private keys should you deactivate the password before backing up the vault
  • It is a hot wallet
  • It ignores key security features like the two-factor authentication

Comparing 03 Wallet with other Neo-blockchain crypto wallets

03 Wallet vs. Neo Web Wallet

03 Wallet and Neo web wallet are some of the most innovative and easy to use Neo-blockchain wallets. They are also Neo-specific, relatively safe, and promote anonymous crypto trading. They also encrypt your user data and store it in your device. However, while Neo is web-based, 03 Wallet is a desktop and mobile app.

While Neo Web wallet may be considered faster in transaction processing, 03 Wallet carries the day when it comes to the number of supported currencies, integration with crypto exchanges, and support of multiple payment processing service providers.

Verdict: Is 03 Wallet safe?

Well, the desktop and mobile wallet app has embraced key security and anonymity measures that guarantee the security and anonymity of your trades. It, for instance, is hierarchically deterministic in generating wallet addresses, it is open-sourced, and allows for anonymous trading. Moreover, it introduces the concept of partitioning your wallet to create hot and cold storage. However, we must mention that 03 is still a hot wallet and, therefore, exposed to the inherent threats dogging online wallets.

Categories
Cryptocurrencies

MyMonero wallet Review: How Safe Is This Desktop And Mobile Wallet App?

MyMonero is a lightweight desktop and iOS app wallet developed by Monero Project steward, Riccardo Spagni, and the Monero Core Team. It was launched in 2014 as an alternative to Monero GUI – the full node client for Monero blockchain. And it seeks to address some of the challenges faced by Monero GUI users, including slow transaction processing speeds, extended wallet startup times, and drag on your computer memory, storage, and battery life.

On the MyMonero website, this desktop and mobile app wallet is described as the “Sweet spot between convenience, security, and features.” The website further adds that its development team has “Ironed out the technical details … so you can get back to business” by prioritizing the crypto wallet’s design.

But has MyMonero lived up to its expectations when it comes to balancing the ease of use with security and privacy? We answer this question and more in this MyMonero review.

MyMonero key features

Cross-platform support: MyMonero is a highly versatile crypto wallet that is compatible with multiple operating systems. Unlike the traditional Monero GUI that was only available as a desktop client, MyMonero is available as a web wallet, desktop app (Linux, Windows, and macOS compatible), and iOS mobile app.

Lightweight: MyMonero crypto wallet is also extremely light as it offloads all the heavy work to the MyMonero servers. This implies that you no longer have to download the Monero blockchain that drains its storage and RAM while eating into the battery life of your phone or computer.

Synchronized cross-platform experience: One of MyMonero wallet’s unique features is its cross-platform synchronization experience. This implies that you can easily get access to your wallet account, view transaction history and balances on any device. You only need the seed words to login to your wallet via any device.

Smart contacts management tool: MyMonero has an inbuilt Rolodex that helps you keep track of your private addresses, payment IDs, and OpenAlis addresses. You can also use smart Rolodex to manage your wallet contacts.

Speedy transfers: One of the benefits of MyMonero wallet’s lightweight nature is its speedy startup and fast transaction processing capabilities. You no longer have to wait, hours on end, for the full node client to sync with your wallet to initiate a Monero transaction.

MyMonero Security and privacy features

Password: Like any crypto wallet, MYMonero is secured with a password. The user sets this multi-character password during app installation and when registering a wallet account. It serves to protect your wallet from authorized attacks and also doubles up as an encryption tool.

Non-custodial: While MyMonero wallet servers run virtually all the wallet transactions, it won’t store your private keys. These are stored within the computer or mobile devices, giving you total control over your digital assets.

Strong encryption: All the data held in a MyMonero wallet is highly encrypted, especially the private keys and wallet communications with project servers and other third-party systems.

Native privacy: Monero takes pride in being one of the safest and most private blockchain networks around. MyMonero has taken this a step further and promotes anonymous crypto transactions by ensuring that the wallet doesn’t ask for any of your personally-identifiable details like name, address, or email. It also doesn’t keep logs for your crypto transactions, location, or device IP address. This approach to privacy beats the rudimental privacy systems put in place by some popular crypto wallets.

Open sourced: MyMonero wallet is also built on an open-sourced technology. Its users and blockchain security experts can view, audit, and recommend adjustments to the wallet app from its GitHub wallet repository.

How to set up and activate the MyMonero wallet

Step 1: Open the MyMonero official website and download the web wallet that is compatible with your device’s operating system

Step 2: Install and launch the wallet app to start the registration process

Step 3: Note that the app doesn’t ask for registration details. Rather, it will provide you with a private login key made up of 12 random phrases that double up as the wallet’s recovery seed and request that you set a password.

(Note: Write this private login key down on a physical piece of paper and keep it safe. You will not only need it to access the wallet on different devices, but it will also be needed when recovering lost private keys)

Step 4: Confirm that you have correctly written down the private login key by reentering it on the prompt tab

Step 5: Chose your preferred language and login to your MyMonero wallet

Step 6: Your account is now active and ready for use

How to add/receive coins to MyMonero wallet

Step 1: Log in to your MyMonero wallet, and on the user dashboard, click ‘Receive.’

Step 2: Copy the wallet’s public address or the QR code and forward either to the party sending you the Monero cryptos

Step 3: Wait for the coins to reflect on your wallet

How to send crypto from MyMonero wallet

Step 1: Log in to your MyMonero wallet and click the ‘Send’ tab on the user dashboard

Step 2: On the popup window, enter the recipient’s wallet address and amount of XMR you wish to send

Step 3: Enter the payment ID (This helps differentiate your transaction from others and is especially important when sending cryptos to an exchange)

Step 4: Set the privacy level for your transactions, from minimum to high or Paranoid (Monero pushes private transactions by bundling several transactions together and making it impossible to track either one to your crypto wallet. The ring size, presented as “With # others,” refers to the number of transactions bundled alongside yours).

Step 5: Confirm the correctness of the transaction details and hit send

MyMonero wallet ease of use

Downloading and installing the MyMonero wallet app or registering a user account on the MyMonero web wallet is easy. It also features a highly intuitive and beginner-friendly user interface. The user dashboard is also multi-lingual, easily navigable, and only features the most important aspects of the wallet. The process of sending and receiving cryptos into MyMonero wallet is equally easy and straightforward.

MyMonero wallet supported currencies.

MyMonero wallet will only support Monero (XMR)  altcoins.

MyMonero wallet cost and fees

Downloading and installing the MyMonero wallet is free, and so is storing your XMR altcoins in the wallet. However, you will be charged a transaction fee every time you send XMR coins to another wallet or exchange. Ideally, there are two types of fees acting on an XMR transaction.

First, is the tax charged based on the amount of data it takes to complete the transaction. It is measured in Kilobytes and is charged at 0.002XMRs per KB. Second is the miner’s fee, which is approximately 50% of the transaction cost.

What are the pros and cons of using MyMonero wallet

Pros:

  • MyMonero is a light wallet that doesn’t require you to download the full node blockchain
  • MyMonero is private and highly encrypted to guarantee the privacy of your digital assets
  • The wallet has one of the most interactive and beginner-friendly user interfaces
  • The wallet is also relatively inexpensive
  • It allows for anonymous registration and facilitates private crypto transactions

Cons:

  • MyMonero will only support XRM cryptocurrencies
  • It is an online wallet and still susceptible to the inherent risks facing hot wallets
  • The wallet doesn’t support multi-signature functionality
  • Comparing MyMonero wallet to other Eth-based crypto wallets

MyMonero wallet vs. Monero GUI

MyMonero desktop wallet can be best described as the stripped-down version of the Monero GUI. The two are almost identical in that they have similar roles in storing XRM coins and facilitating Monero transactions. The only difference between the two is that Monero GUI is a full node desktop client, while MyMonero is a light desktop app. These make MyWallet relatively easier to use and faster compared to Monero GUI.

Verdict: Is MyMonero wallet safe?

Well, MyMonero embraces the privacy-oriented nature of the Monero blockchain in the execution of its functions. It will not ask for the client’s personal data, nor collect or keep logs of your crypto activity. Additionally, any information stored within the open-sourced wallet is highly encrypted. These features have made MyMonero one of the most secure and one of the most private crypto wallets. However, we must observe that, though it is non-custodial, MyMonero is still online-based and, therefore, exposed to the inherent risks facing hot wallets. 

Categories
Cryptocurrencies

Bread Wallet Review: How Safe Is This Crypto Wallet App?

Bread Wallet started as a Bitcoin-only crypto wallet built on the iOS platform. Also known as BRD, Bread wallet was established and launched to the market by BREAD, a Switzerland-based technology company, in 2015. According to their website, the app is focused on privacy, the security of the private keys, and simplicity. In the past few years, the Bread wallet has been subjected to several upgrades that, among other things, ensured it increased the number of supported currencies and introduced the BRD android app.

This review will determine if the Bread wallet app is indeed the safest or the most intuitive crypto wallet app. And we hope to achieve this by highlighting its critical operational and security features, ease of use, and customer support level before comparing it with equally popular crypto wallets.

Key features:

Light mobile wallet: BRD is a lightweight mobile wallet that does not require you to download a full node blockchain into your phone.

SPV functionality: Bread Wallet also leverages the Simplified Payment Verification (SPV) technology to guarantee your Bitcoin transactions’ speedy yet safe execution. And it achieves this by establishing direct communication channels with the Blockchain.

Supports credit card purchases: While Bread Wallet doesn’t have an inbuilt exchange, it has made it possible for you to purchase the supported cryptocurrencies using a credit card. Recent updates to the wallet have also introduced several ways that you can use to buy crypto. These include purchases via bank transfers, in-person purchases at a Bitcoin ATM, and even crypto-dispensing convenience stores.

Multi-blockchain platform: At the time of launching the Bread wallet, it could only support the Bitcoin blockchain. However, several upgrades to the wallet have seen the wallet integrate more cryptocurrencies and their respective blockchain networks.

Security and privacy features:

Password and biometric support: Bread Wallet app embraces a multi-layered security structure. When installing the app, you are requested to set a 6-digit passcode to secure your wallet. You can also add such biometric security features as the Touch and Face ID that you can use to further secure your wallet.

Open source: The bread crypto wallet app is built on an open-sourced technology. This implies that anyone can view and audit its source code for the presence of malicious codes or security loopholes – making BRD one of the most transparent wallet apps available today.

Hierarchical deterministic: The wallet is also hierarchically deterministic, which goes a long way in guaranteeing the privacy of your transactions. For every transaction you initiate, the wallet will automatically generate a new public address, effectively masking your real wallet address and making it hard to track your crypto spending.

Non-custodial: BRD wallet app stores your private keys within your mobile device and not on the company servers – giving you absolute control over your digital assets.

Supports anonymous trading: One of the BRD Wallet’s key features is its commitment to privacy and support for anonymous trading. When installing the wallet and creating a user account, BRD does not ask for any name, email address, phone number, or personal information. It also doesn’t keep logs of your crypto transactions on their company servers.

Highly encrypted: The data stored within the BRD wallet, especially your passwords, private keys, and transaction history, is also highly encrypted.

How to set up and activate the Bread Wallet

Step 1: On your phone’s Google play store or Apple AppStore, search for and download Bread Wallet

Step 2: Install the app, and upon launching, click on ‘Create New Wallet.’

Step 3: Create a unique 6-digit passcode for the wallet

Step 4: The app will now provide you with 12 random words that form your recovery seed. Write them down and store them safely offline.

Step 5: Your wallet is active and ready to use

How to add/receive coins to Bread Wallet

Step 1: Log in to your wallet and on the user dashboard, click on the ‘Buy’ tab

Step 2: Choose the coin you wish to buy and your preferred payment method

Step 3: Fund your account, and the app will automatically convert the Fiat deposit into a digital asset.

Alternatively:

Step 1: Log in to your wallet and click the ‘Receive’ tab on the wallet dashboard

Step 2: The wallet will present you with a wallet address and QR Code. Copy either and forward it to the party sending you cryptos

Step 3: Wait for the funds to reflect on your wallet.

Note: In some countries, the Wallet app integrates a map that highlights the different Bitcoin ATMs available

How to send crypto from Bread Wallet

Step 1: Log in to your BRD wallet app and on the user dashboard, click on the ‘Send’ tab

Step 2: If you have multiple cryptos stored here, select the crypto you would like to send

Step 3: Enter the recipient’s wallet address or scan their QR code and then enter the number of coins you would like to send

Step 4: Confirm the accuracy of these transaction details, hit send, and enter your wallet password to authorize the transfer.

Bread Wallet ease of use

Bread Wallet has one of the easiest and straightforward onboarding processes. You only need to download the wallet and create a passcode to activate it. Unlike most other crypto wallet apps, BRD does not request for your personal information.

The processes of adding and sending cryptos in/out of the wallet are also easy. For instance, you have the option of funding your wallet app by depositing coins from other wallets/exchanges or making a purchase via your credit card.

These, plus the wallet’s highly intuitive user interface, make BRD a beginner-friendly crypto wallet app.

Bread Wallet supported currencies and countries

Bread started as a Bitcoin-only crypto wallet. However, in the past few years, it has expanded its range of supported cryptos to include Bitcoin Cash, Ethereum, Bread Coin, Stable coins like USDT and DAI, and all ERC-20 tokens.

Accepted Fiat currencies that you can use to but crypto in the app are USD, EUR, GBP, GBO, DKK, and CAD.

Bread Wallet cost and fees

You won’t be charged for downloading and installing or storing your digital assets in the BRD wallet app. You will, however, be charged a small blockchain network fee every time you wish to send cryptos to another wallet or exchange.

Bread Wallet Customer support

Bread Wallet has a readily available and one of the most responsive customer support teams. It starts with an elaborate FAQ section that addresses all the challenges faced by most BRD Wallet users.

Within the app is the live chat features that you can use to engage the BRD support and development team. You can also engage this team on the BRD social media channels on Telegram, Twitter, Reddit, and even Facebook.

Note that BRD Wallet’s rewards scheme also works closely with the support team where you get to unlock support perks depending on the number of BRD Tokens you hold. For instance, you can contact the support team via email or phone if you hold more than 2500 BRD tokens.

What are the pros and cons of using Bread Wallet

Pros:

  • The wallet supports anonymous crypto trading
  • It has embraced several security features aimed at limiting unauthorized access to your wallet
  • It is highly intuitive and beginner-friendly
  • Speeds up transaction processing by connecting directly to the respective blockchains

Cons:

  • It is an online wallet and, therefore, exposed to the inherent risks associated with hot wallets
  • One may consider the mobile crypto app to be too basic
  • It is an unregulated wallet

Comparing Bread Wallet to other multicurrency crypto wallets

Bread Wallet vs. eToro

Bread Wallet and eToro are both multicurrency crypto wallets. They also feature on the list of few wallets that support the purchase of cryptocurrencies using credit cards and bank transfers. More importantly, they have both embraced a multi-layered security approach towards securing the wallets.

But while eToro supports 10+ cryptocurrencies, BRD will only support Bitcoin and Ethereum blockchain-based cryptos. And while BRD may be considered more intuitive and easier to use, eToro carries the day when it comes to the number of integrated operational features – such as the eToro crypto exchange.

Verdict: Is Bread Wallet safe?

Well, the crypto wallet app has put in place several security measures that are aimed at keeping your private keys safe and your crypto transactions anonymous. Key among these is the inclusion of Biometric security features like Fingerprint and Face ID, user data encryption, and the wallet’s open-sourced nature. More importantly, the wallet does not, at any point, ask for information personally identifiable to you or keep logs of your crypto transactions.

Categories
Cryptocurrencies

Freewallet Review: Is It A Safe Cryptocurrency Wallet Or A Scam?

According to their website, Freewallet is specially designed to help you access, manage, and store crypto with ease. It comprises of both individual wallets for specific cryptocurrencies and Freewallet Lite – the multi-currency wallet. Single wallets are available as mobile apps, while the multi-currency wallet is available as a mobile app and a web interface. Some of Freewallet’s key features are its dynamic fee system, support for individual crypto wallets, and the fact that it is custodial.

But what makes Freewallet unique? Does its custodial nature make it safer than the next wallet, or is it a scam? We answer these questions in this Freewallet review by detailing some of its key operational and security features. We will also look at its pros and cons and compare its effectiveness with similar crypto wallets.

Key features:

In-built exchange: Freewallet features an inbuilt exchange that supports the trade of 100+ cryptocurrencies. Note, however, that this exchange is only available to the multi-currency wallet users. Plus, it is only accessible via the web wallet.

Single and multi-currency wallets: Freewallet hosts two types of crypto wallets: the Individual crypto wallets that host a specific digital coin like Bitcoin, Litecoin, Ethereum, or Dogecoin and the multi-currency Freewallet Lite that supports 100+ cryptocurrencies.

Free in-app transfers: Freewallet embraces the sidechain crypto technology within the Freewallet network. You, therefore, will not be charged when you transfer crypto to other Freewallet users.

Buy with card: In addition to exchanging crypto for crypto within the Freewallet network, you can also buy crypto with a credit card. And you don’t even have to go through such third party currency conversion sites as Changelly or Simplex.

Highly versatile: Freewallet is also compatible with multiple operating systems. You can access this browser extension via all the popular browsers. Plus, it’s also available in both the Android and iOS app versions.

Intuitive user interface: Both the single currency apps and the multi-currency web interface are highly intuitive. The display is highly intuitive, which makes navigating through the app and initiating transactions relatively easy. It also integrates some of the leading crypto exchanges that allow you to monitor the price performance of different coins and monitor your portfolio on one screen.

Freewallet security features:

Password + Biometric support: Like most other cryptocurrency wallets, Freewallet is secured with a passcode. You get to set this four-digit pin-code when installing and activating the wallet. Its support for biometrics also gives you a choice of securing the wallet with a fingerprint.

Two-factor authentication: 2FA is an additional boost to the security of your wallet. And you can choose to attach either your phone number or email address to the wallet. It is critical in restricting remote access and hacks by ensuring that only email/phone owners can log in and initiate transactions.

Hierarchically deterministic: The Freewallet is hierarchically deterministic and will automatically create a new address for every new transaction. This limits the exposure of your real wallet address, and you, therefore, don’t have to worry about trackers monitoring and tracing your crypto transactions.

Custodial cold storages: Freewallet is a custodial crypto vault that stores private keys on your behalf. And according to their website, these keys are stored in cold storages away from hackers. You, therefore, don’t have to worry about keeping your investments safe.

Active sessions control: Freewallet gives you near-absolute control over your wallet. It lets you monitor all the users’ active sessions by viewing their devices. You can then whitelist or block any unauthorized wallet users.

Multi-signature: You can activate the multi-signature feature of the Freewallet by linking it to up to five email addresses. In such a case, the transaction will not be initiated before confirmation from all linked email addresses.

Transaction limits: Freewallet will also let you set the daily, weekly, and monthly transaction limits. This limit ensures that even if a hacker was to gain access to your wallet, there is only so much they can offload.

Freewallet Setup and activation

Step 1: Open the Freewallet.org website and click on the ‘Wallets’ section. Decide on the type of wallet you wish to download. This can be an individual wallet for a specific crypto coin or the multi-currency Freewallet Lite.

Step 2: Register a user account by linking your wallet with your Facebook profile, Google profile, or phone number.

Step 3: Set a PIN code for the account.

Step 4: Activate the two-factor Authentication feature using either email or the phone number.

Step 5: The account is now active, and you can start adding and sending crypto.

How to add/receive crypto into Freewallet

Step 1: Log in to your Multicurrency Freewallet Lite and click on “Smart Pay In.”

Step 2: Select the currency you wish to use in topping up your wallet. This reveals both the wallet address and the QR code.

Step 3: Send the address or the code to the individual/party, sending you the coins.

Step 4: Wait for the coins to reflect in your wallet.

How to send crypto out of Freewallet

Step 1: Log in to your Freewallet account. Tap on the + icon and click “Send.”

Step 2: Enter the recipient’s wallet address and the number of coins you wish to send.

Step 3: Confirm that the details are correct and hit ‘Send.’

Step 4: Decide on the network fees – from the list of four price ranges.

Freewallet ease of use:

Freewallet app and web interface are highly intuitive and very easy to use. And it starts with a straightforward and easy registration process. Unlike other wallets with complicated account creation processes, Freewallet only requires you to link the wallet with your Facebook or Google profiles or mobile phone number.

From its dashboard, you have easy access to all of Freewallet’s key features, including the send/receive icons. Moreover, you get to monitor your balances and portfolio as well as the real-time price movements for various coins.

The wallet is also multi-lingual and is currently available in over 13 international languages.

Supported cryptocurrencies and countries

According to the Freewallet website, Freewallet Lite multi-currency wallet can support 130+ cryptocurrencies and tokens. However, crypto-specific wallet apps will only host one digital currency.

Currently, Freewallet is available to individuals in over 100 countries across the world, including the U.S, UK, Germany, France, and Russia.

Freewallet cost and fees

You will not be charged to download and activate the Freewallet app or create a user account on their web interface. Sending crypto from one wallet to another within the Freewallet network is also free.

When sending crypto to other users, however, you will be charged blockchain network fees. Freewallet nonetheless embraces the highly dynamic Reduce by Fee protocol that gives you the freedom to determine these transaction charges. There are four pricing levels, and the higher the fees, the faster the transaction processing speed.

Comparing Freewallet with other crypto wallets

Freewallet vs. eToro

Freewallet and eToro have several things in common. Chief among them is the fact that they are both custodial and store private keys on behalf of their clients. These can also be said to have some of the most intuitive user interfaces.

But unlike eToro that only has one type of crypto wallet, Freewallet has both the crypto-specific and multi-currency wallets. And while both their wallets are free, Freewallet uses sidechain technology to make transactions within the network for free. It also embraces a dynamic transaction pricing structure that lets the user set an individualized transaction cost.

What are the pros and cons of Freewallet

Pros:

  •         Transactions within the Freewallet network are free. And you also get to set the transaction fee for external transfers.
  •         You can choose to install multiple crypto-specific wallets for the coins you wish to trade or the multi-currency wallet.
  •         The web interface of a Freewallet has an in-built exchange.
  •         The wallet supports a relatively wide range of cryptocurrencies.
  •         Freewallet has integrated several security measures, including support for biometrics, two-factor authentication, and cold storage.

Cons:

  •         Freewallet stores the private keys on behalf of their clients – providing hackers with a central target.
  •         The wallet is hosted online, and this exposes it to such risks and threats as hacks and malware attacks.
  •         It requires a phone or Facebook profile when registering a user account.
  •         The wallet is not regulated.

Verdict? Is it safe or a scam?

Freewallet adopts a unique approach to the storage and management of cryptocurrencies. These include cold storages, two-factor authentication, active session control, and transaction limits. Some serve to discourage unauthorized access to your wallet while the rest limit the extent of the damage. We, therefore, consider their app and web interface relatively safe. We nevertheless would have been able to give a more qualified verdict if Freewallet adopted even more stringent safety protocols like providing users with recovery seeds and decentralizing the storage of private keys.