Categories
Cryptocurrencies

MIRkey Hardware Wallet Review: How Safe Is MIRKey Hardware

MIRkey is a Bitcoin hardware wallet designed and introduced to the crypto world by Ellipticsecure, a crypto-security company that specializes in the manufacture of Hardware Security Modules (HSM). According to its developers, MIRkey is a security-focused hardware wallet that embraces a host of security features, including a FIDO2 certification. But unlike most other hardware wallets that have their focus set on ease of use, especially with a large OLED display, MIRkey doesn’t have a display screen. 

In this MIRkey hardware wallet review, we will be vetting the wallet by looking at such factors as its key features, ease of use, pros and cons, and a step-by-step guide on how to interact with MIRkey, and compare it with other Bitcoin only wallets. 

MIRkey wallet key features:

Sleek design: MIRkey hardware wallet embraces a sleek USB-like design. This implies that the wallet is both ultra-light and highly portable. The wallet also features a single button that is used to authorize outbound crypto transfers. 

Integrates software wallets: You get to control the MIRkey hardware wallet via the MIRkey software wallet. This software is versatile and compatible with virtually all computer operating systems, including Windows, macOS, and Linux.

Integrates Electrum wallet: MIRkey hardware wallet will also integrate software crypto wallets like the Electrum Bitcoin wallet that plays a key role in making the hardware wallet easy to use and interact with. 

Security features:

Password: Like any other software or hardware crypto wallet, MIRkey is secured with a password that you set when activating the wallet and creating a user account. This prevents unauthorized access to the wallet and the private keys and serves as the hardware wallet’s encryption tool. 

Two-factor authentication: All outbound crypto transfers from your MIRkey hardware wallet must be subjected to two-factor authentication. On the hardware wallet device is a button that you have to press to authorize the transfer implying that even if a hacker were to gain access to your passwords, they must have physical access to the device to initiate the transfer. 

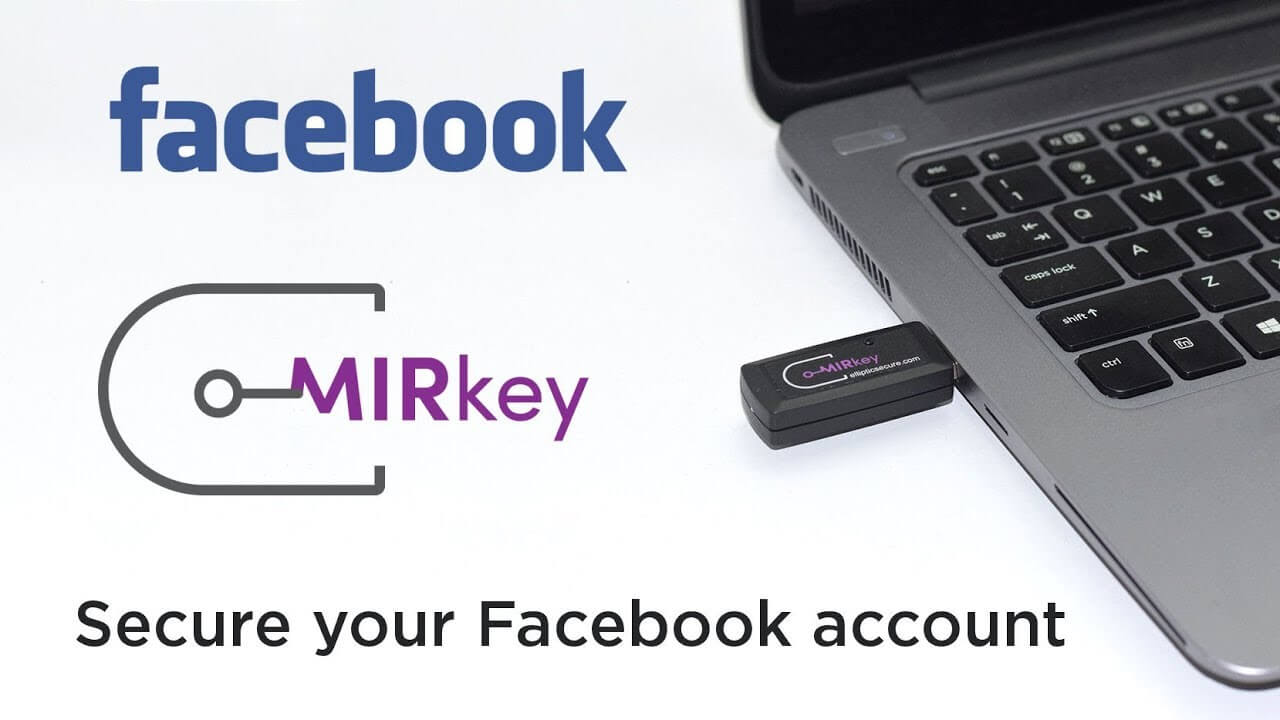
FIDO2-certified: MIRkey hardware wallet received FIDO2 certification in September 2019. This implies that the wallet meets the international standards in security and safety and can, therefore, be used to store the security phrases and passcodes for registries, systems, and such web services like Google, Facebook, Netflix, GitHub, Amazon, etc. 

VPN access: Another unique security measure that sets the MIRkey hardware wallet apart from most other hardware wallets is that it is accessible via a VPN.

Cold storage: MIRkey is a noncustodial wallet implying that your private keys and all other personal data stored in the wallet are stored therein is highly encrypted and stored in hardware devices offline. None of your information is stored on the Ellipticsecure company servers, plus all communications between the wallet, the company, and other third party systems are subjected to end-to-end encryption. 

Hierarchical deterministic: Sensitive information like wallet addresses and the recovery seed are generated by the hardware device offline. The wallet address generation process is also hierarchically deterministic in a process meant to throw off crypto trackers. 

Recovery seed: When activating the hardware wallet and creating a user password, you will also be presented with a 24-word backup and recovery seed. It comes in handy should you want to recover lost private keys. 

How to set and activate the MIRkey wallet

Step 1: Start by ordering your copy of a MIRkey hardware wallet on the Ellipticsecure.com website.

Step 2: Download the MIRkey desktop app that is compatible with your computer. 

Step 3: Install and upon launching the app, click the ‘Create a new wallet’ tab

Step 4: Create a password for the wallet

Step 5: Insert the MIRkey hardware wallet device. 

Step 6: Choose a username and create a passcode for the wallet.

Step 7: The wallet will now present you with a 24-word recovery seed. Write it down on a piece of paper and keep it safe offline. 

Step 8: The wallet is now active and ready for use 

How to add/receive crypto into your MIRkey wallet 

Step 1: Log in to the MIRkey desktop wallet app and click on the “Receive” tab on the user dashboard.

Step 2: On the wallet address and forward it to the person sending you Bitcoins

Step 3: Alternatively, have them scan the wallet’s QR code

Step 4: Wait for your funds to reflect in your account.

How to send crypto from your MIRkey wallet

Step 1: Log in to the MIRkey desktop wallet app, and on the user dashboard, click “Send.” 

Step 2: Select the account from which you want to send Bitcoins 

Step 3: On the transfer window that pops up, enter the recipient’s wallet address and the number of Bitcoins you want to send

Step 4: Insert the MIRkey hardware wallet device into the computer

Step 5: Confirm that the transaction details are correct and press the on-device button on the MIRkey wallet to authorize the transfer.

MIRkey wallet ease of use

The MIRkey hardware wallet is relatively easy to use. The onboarding process is quite easy and straightforward. And while one might find fault that they don’t include the wallet activation guide in the wallet’s package, you don’t need expert help to activate the wallet.

The processes of sending and receiving Bitcoins in and out of the MIRkey wallet is also quite straightforward. We must, however, observe that the lack of an on-device screen complicates the transaction verification process. 

MIRkey wallet supported currencies

MIRkey is a bitcoin-only wallet, but you can always integrate it with such software wallets as the Electrum that help increase the number of supported crypto coins. 

MIRkey wallet cost and fees

The MIRkey hardware wallet costs $49 on the Ellipticsecure.com website. But you can buy a double pack hardware wallet for $79 with a 30-day money-back guarantee. 

The desktop wallet app is nevertheless free. And so is storing your digital assets here. However, you will have to part with the Bitcoin blockchain network fee every time you want to send coins to another wallet or exchange. How much you pay is largely dependent on the number of coins you want to send. 

MIRkey wallet customer support

EllipticSecure, the MIRkey hardware wallet developers, has one of the most responsive aftersales service and customer support team. You can contact them via the phone number on their website, send them an email, or raise a support ticket on their ‘Contact Us’ page. 

You can also consult their blog, documentation, and how-to guides on the website’s ‘Resources’ page. 

What are the pros and cons of using the MIRkey Wallet?

Pros:

  • It embraces some of the most innovative security features
  • MIRkey is relatively inexpensive when compared to most other hardware wallets
  • The wallet is highly intuitive and beginner-friendly
  • It has a highly responsive customer support team that is also available on the phone
  • It is compatible with the electrum software wallet 

Cons:

  • It will only support Bitcoins
  • It doesn’t have an on-device screen, and this complicates transaction verification

Comparing MIRkey wallet with other hardware wallets

MIRkey wallet vs. Ledger Nano S wallet

MIRkey and Ledger Nano S are both security-focused hardware wallets. They also rank highly among the most affordable hardware wallets. Other similarities between the two include storing your coins in cold storage, their sleek and ultra-lightweight design, and ease of use. 

However, while MIRkey will only support Bitcoins. Ledger Nano S, however, is a multicurrency hardware wallet that supports 1000+ cryptocurrencies and tokens. Similarly, Ledger features both the on-device button and OLED screen. Further, unlike MIRkey that is only compatible with the Electrum software wallet, Ledger Nano S integrates numerous software and mobile app crypto wallets. 

Verdict: Is MIRkey wallet safe?

Yes, the hardware cryptocurrency wallet has put in place several highly advanced security and privacy measures. These have seen the wallet earn the coveted FIDO2 certification, and they include the fact that your wallets are stored in cold storage. The process of generating wallet addresses is also hierarchically deterministic, you can boost wallet security with two-factor authentication, and it also provides you with a backup and recovery seed. You only have to part with $49 and deal with the fact that it is a Bitcoin-only wallet.  

Categories
Cryptocurrencies

BC Vault Hardware Wallet In-Depth Review: Is It The Most Secure Hardware Wallet Yet?

Designed by Real Security, a Slovenia-based firm, BC Vault (short for Bitcoin Vault) is a relatively new hardware wallet that provides you with a safe way to store your cryptocurrencies. It is one of the most unique and most innovative hardware wallets we have come across. It seeks to replace some of the most common aspects of a hardware wallet with more secure and highly innovative features.

For instance, instead of recovery seeds, the wallet presents its users with 4-layer security passwords. Similarly, instead of relying on the hierarchical deterministic protocol used in generating new secure wallet addresses, BC Vault adopts the non-deterministic security protocol.

In this BC Vault review, we will be exploring the different operational and security features that help BC Vault stand out of the crowd. We will look at its key features, security features, ease of use, customer support, compare it to other hardware/software wallets and everything else you need to know about the Bitcoin wallet.

We start with key operational features:

BC Vault key features

Large D-pad and display:

The hardware is specially designed with a 2.42-inch OLED that features a 128×64-pixel white-on-black display. The screen is large enough to fit all details of a crypto transaction, including the recipient’s addresses, fees, crypto amount, and the wallet name.

Supports 2000+ wallets:

BC Vault is the truest form of a multi-signature hardware wallet as it allows you to create 2000+ individual wallets. Additionally, the wallet makes it possible for you to create highly unique multi-character passwords for each of these wallets, making it possible to share the device between two or more persons.

Compatible with multiple operating systems:

Like most other hardware wallets, BC Vault has to be paired with a desktop app or browser extension. But unlike most other wallets that will only support a limited number of browsers or operating systems. BC Vault is highly versatile.

Multi-currency support:

According to the BC Vault website, the company currently supports up to 30 cryptocurrencies and tokens. These include all the popular cryptos like Bitcoin, Ethreum, Litecoin, Dogecoin, Ripple, Bitcoin Cash, Litecoin, Bitcoin Gold, Ethreum Classic, all ERC-20 tokens. And with every successive upgrade, the wallet developers promise to add even more coins and tokens.

Native ERC20 token and multi-crypto support

The hardware wallet enables the use of cryptocurrencies in multiple wallets all in a single app. It supports native storage of ERC-20 tokens and does not rely on websites or third-party applications. Users can comfortably manage BCH, LTC, BNB, DASH, and many more supported currencies.

BC Vault security features

Multiple passwords:

Unlike most other crypto hardware wallets that only have one password unlocking the application, device, and individual wallets, BC Vault is fortified with four passwords for both the wallet device and application. The Global Password is used to unlock the BC Vault application and is entered on the application. The Global PIN is, on the other hand, used to unlock the wallet device. The two give you access to both the app and the wallet device.

There’s also the Wallet password that’s used to unlock the wallet on the application. The wallet PIN, on the other hand, is used to unlock a wallet and initiate a transaction and is entered on the wallet device.

Note that the wallet password and pin can be different for each wallet, especially if it is a shared wallet. Plus, it isn’t mandatory that you set the wallet password and PIN if it isn’t shared (not recommended).

Two-factor authentication:

The BC Vault user has the option of activating the two-factor authentication that comes in handy when unlocking the wallet and accessing the wallet content. You can use any of the common two-factor authentication apps /tools like Google Authenticator.

Independently generated keys:

BC Vault uses a Random Number Generator (RNG) to create more than 2000 independent and non-deterministic crypto wallets. What’s more, each key is generated independently, which also means that keys are not mathematically linked.

Secure storage:

All its private keys are stored in specialized storage known as FRAM. They are 1000x faster and consume 250x less power. Apart from that, the hardware is designed with a security chip to prevent the exposure of users’ wallets to hackers or malicious malware.

High anonymity:

The fact that wallets on the hardware device are generated independently enhances its anonymity. Additionally, BC Vault does not have a serial number to ensure complete anonymity of its users’ wallets.

Secure encryption:

Also known as the bounty wallet, this hardware integrates quite a strong encryption. Private keys correspond to a specific public address in each BC Vault.

Industry-standard encryption:

In addition to the passwords, every aspect of the BC Vault hardware wallet is highly encrypted, especially the private keys, your personal data, and the wallet addresses.

SD Card and paper QR backup:

While most crypto hardware wallets available today have recovery seed that one can use to recover private keys if their device is compromised, BC Vault presents you with a 1GB SD Card. It is highly encrypted and provides you with more than enough room for backing up your private keys.

Guaranteed security:

BC Vault touts its wallet as being the most secure cryptocurrency hardware wallet. As a guarantee, the wallet developers have placed a 1BTC price for anyone who will be able to crack the wallet’s encryption.

Tamper proof:

The compact design of the wallet’s hardware ensures that the user will always know when their device has been opened up. Additionally, the software/firmware technology applied in proprietary and not open-sourced, which means a hacker would have to undertake the painstakingly long and tedious process of reverse-engineering the system if they were to carry out a successful hack.

How to set up and activate the BC Vault wallet

Step 1: Plug in the device to your laptop or desktop

For the device to be operational, you have to plug it to a desktop or computer. It has a long connectional cable, which means that you can use it while still connected to the laptop.

Step 2: Shake the device to generate a random number

To generate a wallet address, you are required to shake the device for about two minutes. This is a security safeguard and the non-deterministic form of generating wallet addresses.

Step 3: Download and install the app

After generating the wallet, open the BC Vault official website and download the BC Vault app and link it to your device and the newly-created address. The app is compatible with Windows, macOS, and Linux Operating systems.

Step 4: Set a Global password or PIN

After going through all the above steps, you will be required to set a unique 8-character global password or PIN before you can be allowed to use your BC Vault. It is a fundamental security feature that will be used every time you need to access your BC Vault or application.

Step 5: Create a wallet and transfer funds

Now that you have set your PIN, you need to create a wallet and transfer some crypto funds. You can deposit into your new wallet from another wallet, from an exchange, or by converting your fiat currency via such third party fiat-to-crypto conversion sites like Simplex or Changelly.

Step 6: Use your BC Vault

Now your BC Vault crypto hardware wallet is all set and ready for use.

How to add/receive into your BC vault hardware wallet

Step 1: Start by logging into your wallet device and application, and clicking on the ‘Add New Currency’ tab.

 Step 2: Click on the wallet address for the crypto you wish to receive. If it is a new wallet, you will first need to create a new wallet address for the cryptos by simply clicking on ‘New Wallet’ and selecting the crypto you wish to add from the drop-down menu.

Step 3: Copy the wallet address and send it to the party from whom you wish to receive the cryptos or have them scan your address QR Code.

Step 4: Wait for the coins/tokens to reflect in your wallet.

Step 5: Back up your wallet using the SD Card as soon as you add these cryptos into the wallet. Keep in mind that the wallet does not have a cloud backup, and you, therefore, need to backup your wallet on to the SD card every time you load new crypto.

How to Send Funds with Your BC Hardware Wallet

Step 1: Start by launching the BC Vault app and connecting the hardware device

Step 2: Tap on the ‘Send’ icon and click on the cryptocurrency you wish to send.

Step 3: In the pop-up window that appears, key in the recipient’s wallet address and the amount of crypto you wish to send

Step 4: Confirm that the crypto amounts and the wallet address are safe and hit send.

BC Vault wallet costs and fees:

There are currently three models of the BC Vault hardware wallet. The Legendary BC Vault One costs $155, the limited edition of both BC Vault Quicksilver, and BC Vault Gunmetal vaults cost $260. They all have similar specifications safe for Quicksilver and Gunmetal wallets whose casings are made from brushed aluminum and aircraft-grade aluminum, respectively.

Storing your digital assets in the sturdy hardware wallet is free. But you will have to part with variable transaction fees every time you send cryptocurrencies to another wallet or exchange. The amounts charged will depend on the transaction volume and the type of crypto and will go to blockchain miners.

BC Vault wallet customer support:

BC Vault has one of the most elaborate FAQ pages. This section of their website addresses all of the most common challenges by the hardware wallet users. It features both quick-start guides and video tutorials on how to interact with the hardware device. For more personalized queries, however, you may contact the BC Vault hardware wallet developers via email: [email protected]  or on their different social media pages.

What are the Pros and Cons of BC Vault Hardware Wallet

Pros:

  • It’s a true multi-signature wallet that supports 2000+ individual wallets with unique passwords.
  • The wallet integrates some of the most innovative security features that include four sets of passwords and an SD card backup.
  • BC Vault wallet has a straightforward activation process and elaborate FAQ Section that make it beginner-friendly
  • All aspects of the wallet are highly encrypted to guarantee maximum security.

Cons:

  • One may consider BC Vault’s acquisition cost of $155-$260 exorbitant.
  • One may question the transparency and security of the wallet, given that their technology isn’t open sourced.
  • Doesn’t have a mobile app and doesn’t support Bluetooth/wifi connectivity

How Does Bitcoin Hardware Wallet Compare with Other Wallets?

Unlike Ledger Nano S or Trezor, BC Vault utilizes an encrypted backup and a global password or PIN instead of an unencrypted BIP39/44 seed phrase in its security. Users can also back up their funds externally on a wallet data on an SD.

Further, they can also use an encrypted wallet data to print out a series of QR codes. The majority of their competitors use hierarchical deterministic wallets, which also means that addresses used can be traced back to the seed.

Verdict: Is Bitcoin Vault Worth Your Money? 

Based on the security incorporated in these devices, there is no doubt Bitcoin Vault is worth every penny. The device is specially designed to provide users with a sophisticated method to store funds and other digital assets over a long period. Some of the factors that make BC Vault stand out are its adoption of highly unconventional operational and security features.

It, for instance, is the first hardware wallet to forego the recovery seed in favor of an SD card backup. There also aren’t many hardware or software wallets that have as much as four passwords. And while most multisig wallets support multiple wallets, only a few support individualized passwords for each wallet.