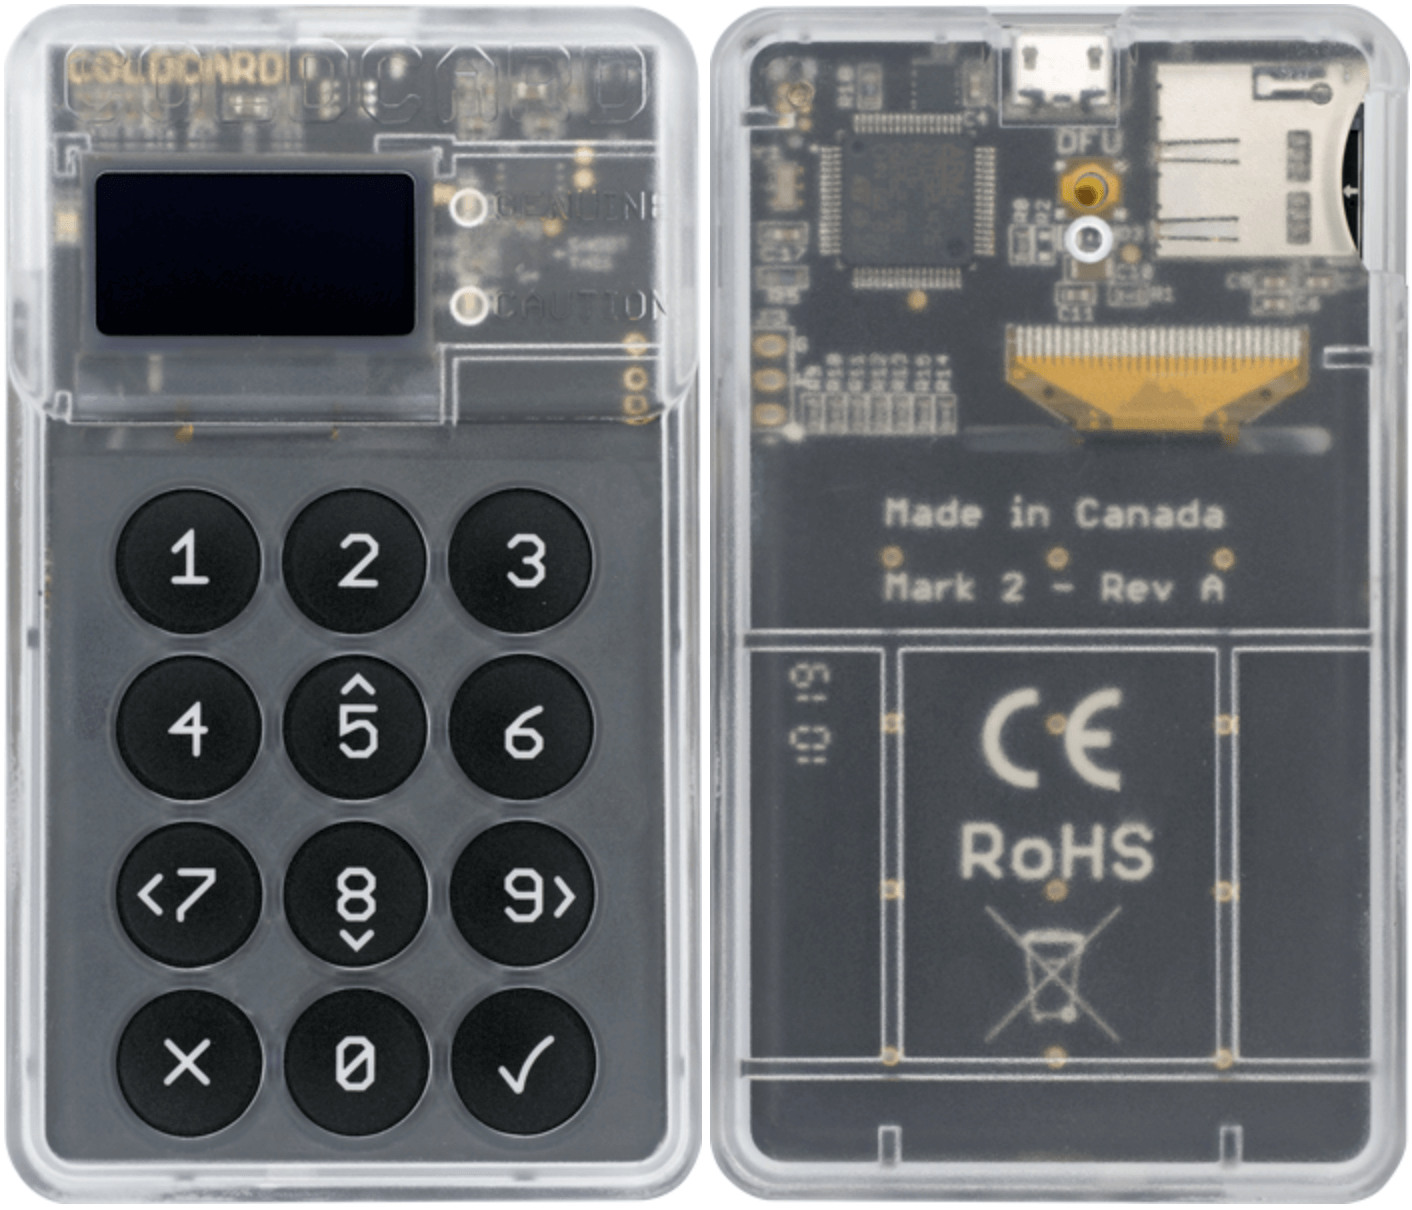
Coinkite is an innovative company that has been producing several cryptocurrency-related products. Its dedication to wow crypto enthusiasts has seen them manufacture a range of gadgets, including a hardware wallet, a Bitcoin data visualizer, metal backup plates, and even a Bitcoin server!
There is a lot to talk about when it comes to Coinkite, but today let’s focus on its hardware wallet – Coldcard.
Coldcard is “an open, cheap, and ultra-secure hardware wallet,” according to the company’s official website. “Don’t trust, verify,” also goes their slogan. So, we shall not take their word for it but embark on a critical review of the product to verify these claims and give a balanced verdict on whether it’s worth the money and trouble it costs. This review looks at Coldcard’s key features, it’s security, setting up the wallet, customer support, and other useful aspects.
Key Features
- Hardware wallet – Obviously, but worth mentioning nonetheless, Coinkite’s Coldwallet is a hardware device
- Open source – The code that runs Coinkite is open-source. You can compile it yourself if you so wish
- True air-gap operation – Air-gapped devices are meant to never connect to the internet. While some air-gapped devices occasionally connect to a computer connected to the internet, you can operate Coinkite without ever connecting it to a computer, thus, “true air-gap operation.”
Setting up Coldcard
Before the setup is done, you need to get yourself a Coldcard. This mini-calculator-sized device can be purchased from store.coinkite.com for $119.97. This is about the same price you will pay for other leading brands such as Trezor One.
You can also buy Coldcard in one of the bundled packages that Coinkite offers. For instance, for $169.99, you get a Coldcard and two industrial-grade MicroSD cards. There’s, however, one exciting bundle – the “Backup Bundle” that comes with two Coldcards, two industrial-grade MicroSD cards, a power-only USB cable, and one seed plate backup, all for $329.99.
Coinkite also sells a variety of accessories that you can use with the wallet. They have a Bitcoin price-tracker, caps, and even stickers. But the Center Punch used for etching backups on their 2mm-thick steel seed plate stands out.
Initial set up process.
- Upon receiving your package, inspect the tamper-evident bag for any signs of prior opening. The bottom of the bag should be seamless, and the perforations on the tear-off tab should match those on the bag.
- Connect the Micro USB cable to the USB port at the top of the device and the other end to a power source. Coldcard will turn on and display its Terms of Service. Use the 5 and 8 keys to scroll through the message and press the OK key when done.
- Next, you will set an initial PIN. Coldcard’s PIN is divided into two parts – a prefix and a suffix. Each part must be at least two digits long. The prefix is used to generate a set of words that you will see each time you log in. Once you provide the prefix, Coldcard will generate your set of words, which you will need to memorize. You can experiment with several prefixes until you’re comfortable with the set of words you get. Next, you will set your pin and confirm it.
- Now that your security options are configured, you can create a new wallet or import an existing one. Both options are readily available from the main menu.
- If you choose to create a new wallet, Coldcard will show you a sequence of 24 words that you must record in the order presented. Coldcard will then ask to verify your seed words, which is basically backing up your wallet.
You should not use your wallet until your seed backup is configured correctly. Also, remember that you cannot recover your PIN should you lose it, even if you contact customer support.
At this point, the wallet is ready for your day-to-day usage. So let’s see how you can send and receive funds.

Sending and Receiving Funds
You can operate Coldcard with or without connecting it to a computer. Connecting your wallet to your computer allows faster and easier operation. On the other hand, operating the device without ever connecting it to a computer allows for more secure operation. Let’s start with the easier way of doing it.
Using Coldcard with Computer Connected
- Install the latest version of Electrum with Coldcard support on your computer
- Connect Coldcard via USB and enter the PIN
- Open Electrum and go to “New/Restore” on the file menu
- Choose a file name and specify that it is a standard wallet in the next menu
- Select “Use a hardware device” and pick Coldcard from the list of devices that appears
- Set up a transaction, as usual, preview it, then choose to save PSBT (partially-signed Bitcoin transaction)
- Save the file directly to your MicroSD card
Using Coldcard Offline
- On the device’s menu, navigate to Advanced>Micro SD Card>Export Wallet>Electrum Wallet
- A warning message should appear. Approve it and proceed. This step creates a file with the name new-wallet.json
- Remove the MicroSD card from Coldcard and connect it to your computer, which should be running Electrum with the Coldcard plug-in enabled
- Open new-wallet.json and give it a few moments to synchronize
Sending Funds
- Set up your transaction in Electrum and save it as PSBT. Then copy the PSBT file to Coldcard’s MicroSD card
- Transfer the MicroSD card to Coldcard and scroll down to “Ready to sign” on Coldcard’s main menu
- Select the PSBT file that needs signing
- You will see a preview of the transaction details. Approve and proceed
- Coldcard will sign the transaction and save it under the same file name and append a -final.txn suffix
- Transfer the MicroSD card to the computer, load the transaction and push it to the blockchain
If you have used other wallets, you might find Coldcard’s offline transactions quite cumbersome. However, if you are paranoid about security, you will likely find the process pleasurable.
To receive funds, you need to generate a receive address. This can be achieved from the Address Explorer on the Advanced Menu. Addresses generated can be saved on the MicroSD card for ease of transfer to a computer.
Pros
- Ultra-secure hardware wallet – Coldcard includes all the security features of a standard hardware wallet plus a dedicated security chip and tamper-evident packaging
- The product is relatively affordable and can be complemented with a variety of accessories from the same manufacturer
- Initial set up is easy
Cons
- It is larger than most hardware wallets, which makes it less portable
- It has a particularly uninteresting design
- Customer support is not as responsive as one would expect from a commercial product
- Using the wallet in offline mode is quite cumbersome
Final Thoughts
Coldcard is arguably one of the most secure hardware wallets. The product offers superior security, set up simplicity, and solid performance. However, its support for only one currency, below-par customer service, and cumbersome offline transactions create room for improvement.

