
Introduction
Everyone wants to be the hero in the market and claim that they have picked the top or bottom of a currency pair. However, apart from boasting, there is no gain from repetitive selling at every new ‘high’ in hopes that this one would be the final ‘high.’ One of the biggest dangers encountered by novice traders is picking a top or bottom with no logic. The pure die-out is an intraday strategy that picks a top or bottom based upon a strong recovery after an extended move.
Time Frame
As it is an intraday strategy, the highly suitable time frames are 1 hour and 15 minutes.
Indicators
In this strategy, we will be using two indicators. The two indicators are RSI and Bollinger Bands.
Currency Pairs
This strategy works best on major currency pairs only. Among these, the preferred ones are EUR/USD, USD/JPY, GBP/USD, GBP/JPY, and USD/CAD.
Strategy Concept
The strategy looks for intraday fake-outs using three sets of Bollinger bands and the relative strength index (RSI) on the hourly and 15-minute charts. The trade setup is formed when RSI hits either an overbought or oversold level. The market is considered to be overbought when RSI moves above 70, while the market is considered oversold when RSI goes below 30.
This signals a possible reversal in the market and that we can start looking for a trade in the opposite direction. However, rather than just immediately buying or selling in hopes for a trend reversal based solely upon RSI, we add in three sets of Bollinger Bands, to help us identify the point of over-extension. We use three sets of Bollinger Bands because it helps us assess the extremity of the move along with the extent of possible U-turn.
The conventional theory of Bollinger bands suggests buying or selling when prices hit the two bands. In our strategy, we will totally be using three Bollinger bands, and when prices hit the third band on any side, we say that the move is within the 5% small group, which characterizes the move as extreme.
When prices move away from the third standard deviation Bollinger band and move into the zone of first and second Bollinger band, we are confident that the currency pair has hit its extreme point and is moving into a reversal phase.
Finally, we look for one last thing before making an entry: a candle to close fully between the second and first Bollinger Bands. This last step helps us screen out false moves and assures that the previous move was really exhaustion. This is a low-risk and low-return strategy that is suitable for traders who like to scalp the market.
Trade Setup
To illustrate the strategy, we have considered the USD/JPY currency pair, where we will be applying the 1-hour chart strategy. Here are the steps to execute the strategy.
Step 1
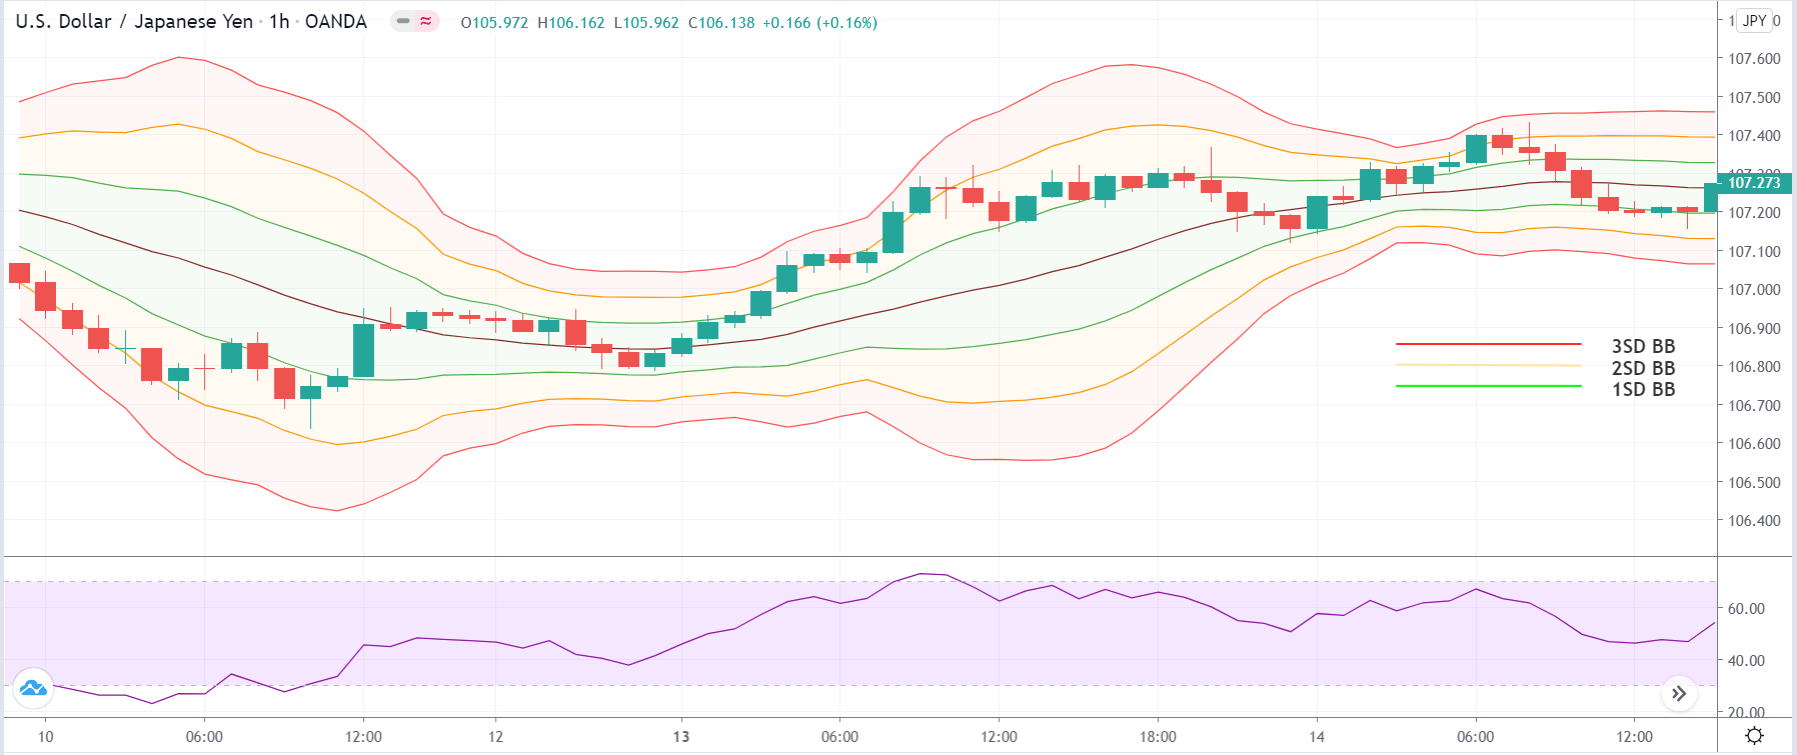
Firstly, open the 1 hour or 15 minutes chart of the desired currency pair. Then plot the Bollinger band and RSI indicator on the chart. We need to plot 3 Bollinger bands with the same ‘period’ but different standard deviations. The first Bollinger band (BB) should have a standard deviation (SD) of 1, the second BB will have SD of 2, and finally, the third BB will have SD of 3. RSI will carry the default settings.
The below image shows the Bollinger band indicator plotted on the USD/JPY currency pair and the RSI on it.
Step 2
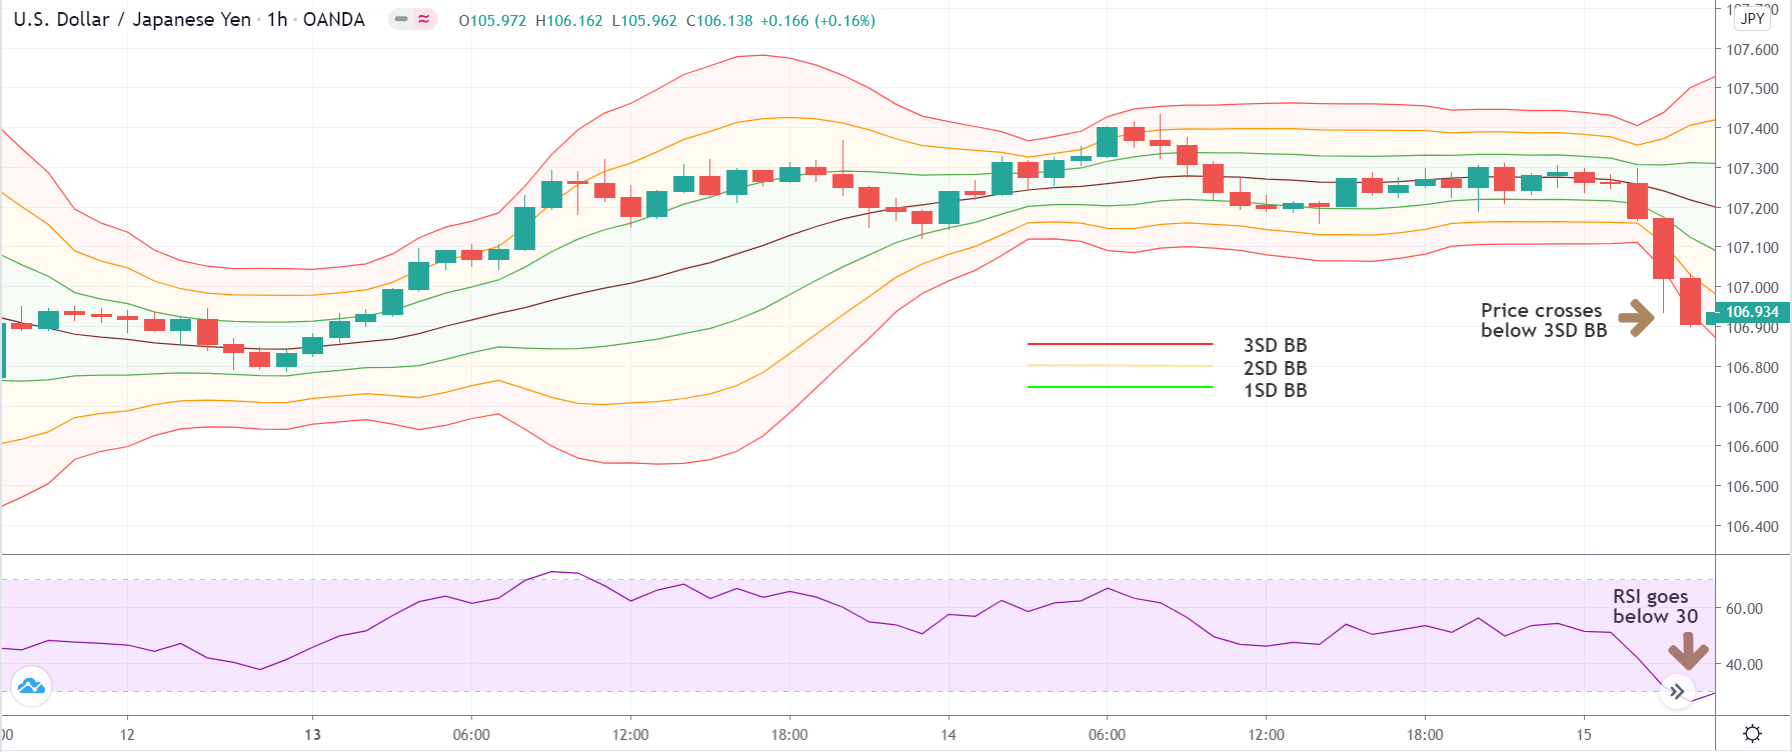
If we are looking for an overextended move on the downside, wait for the price to cross below the lower band of the 3SD BB or if we are looking for an overextended move on the upside, wait for the price cross above the upper band of the 3SD BB. Along with this, we need to see that the RSI goes below the 30 ‘mark’ in a down move and moves above the 70 mark in an up move. Both conditions need to be satisfied simultaneously.
In the example since we are looking for a ‘buy’ trade, we have to wait for the price to cross below the lower band of the 3SD BB along with the RSI reading of below 30. The below image shows that the conditions mentioned above are fulfilled.
Step 3
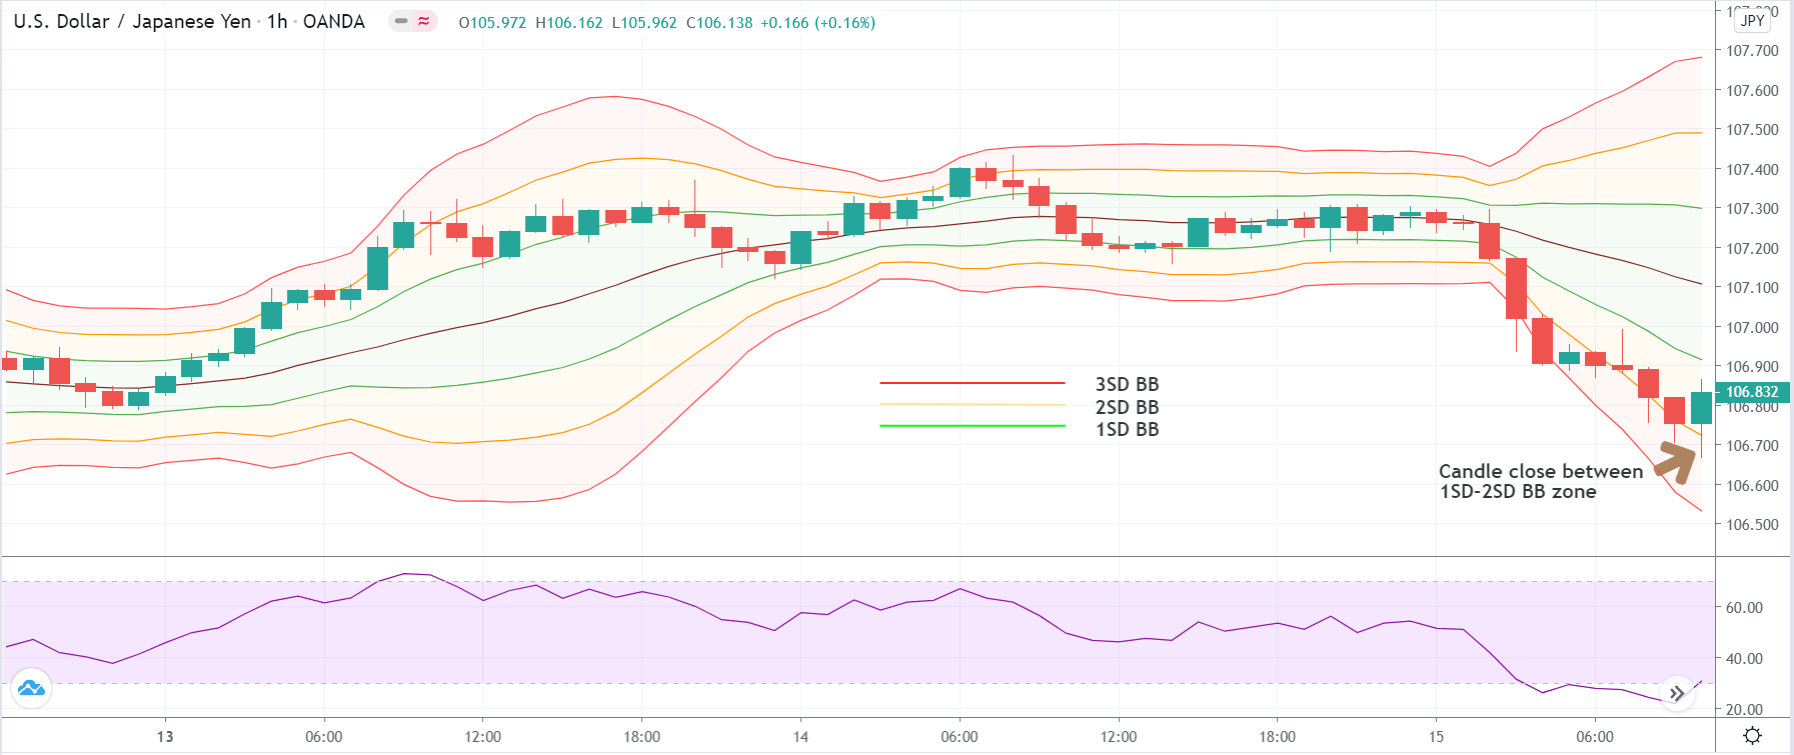
In this step, we wait for a candle to open and close between the 2SD BB and 1SD BB zone. It is important to check that the entire body of the candle is within this zone, and it closes near the lower band of the 1SD BB. This was for a ‘long’ setup. In the case of a ‘short’ trade, the only difference is that the candle should close between the upper band of the 2SD BB and 1SD BB.
In the below image, we can notice a bullish candle that closes well within the required zone, which is a sign of reversal.
Step 4
In this step, we determine the ‘stop-loss’ and ‘take-profit‘ for the strategy. Stop-loss is placed below or above the ‘low’ or ‘high,’ respectively, from where the reversal began. As we are trading against the trend, the ‘take-profit’ is set at 1:1 risk to reward. We will also lock-in some profits when the market starts moving in our favour, to ensure that we don’t lose money if it turns midway.

Strategy Roundup
In this strategy, we combine two technical indicators to identify the market’s top and bottom, without making wild guesses. This means we are determining overextended moves logically and technically. After practising well on the 1-hour chart, we can spot trade setups on the 15 minutes time frame. Since these are counter-trend trades, the probability of success will be less. This strategy is very simple to understand if we have basic knowledge of indicators.